Lemon Blueberry Bundt Cake

Lemon Blueberry Bundt Cake

This post may contain affiliate links, but all opinions are my own. Please read my disclosure policy for more information. 

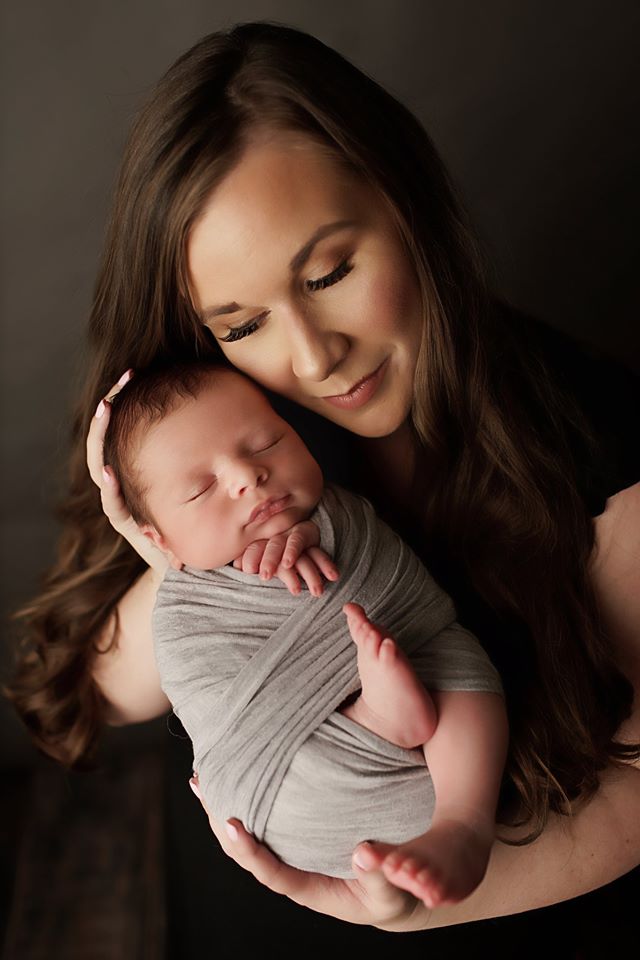
It’s almost Mother’s Day! This year is especially exciting for me as this is my first official Mother’s Day with my sweet guy! He was in my tummy last year, but I really had no idea how much my world was going to change once he graced us with his presence. There is really no other feeling like being a mom. It isn’t always perfect and it isn’t always easy, but it is a joy like no other and I wouldn’t trade it for anything. 

Mommy Newborn Photo

I know I’m biased, but I have the world’s greatest mom. So this day has always been so special to me. I now also have the world’s greatest mother-in-law and step mother-in-law, so Mother’s Day is one of the best days of the year to celebrate the many mommas in my life who love and sacrifice so much for their kiddos. 

Mother’s Day always centers around three main things in our family: Quality time, delicious food, and a creative and meaningful gift these mommas wouldn’t buy for themselves! 

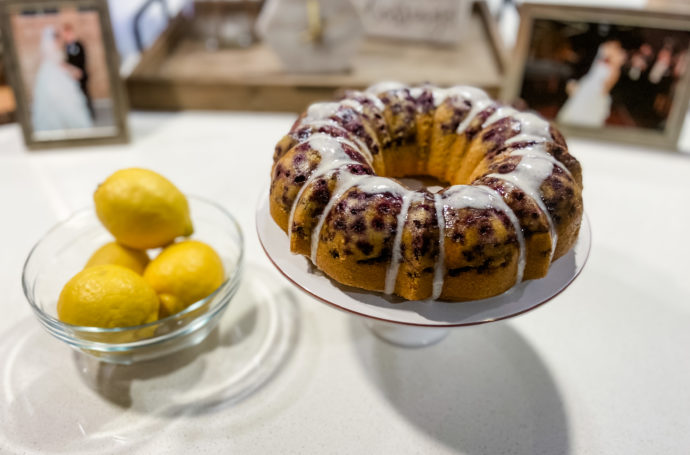
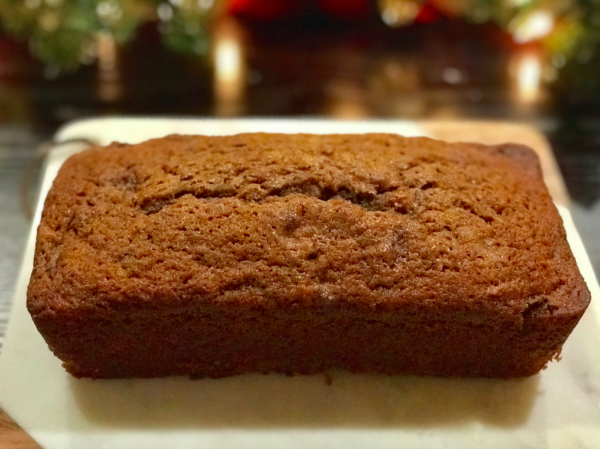
There is something about a bundt cake that says Mother’s Day to me. Bundt cakes are classic and lovely, just like a mom. And you don’t have to be a professional baker to make a bundt cake beautiful and delicious! My first bundt cake pan came from my momma and my Nina (my grandmother) makes the most delicious bundt cakes!

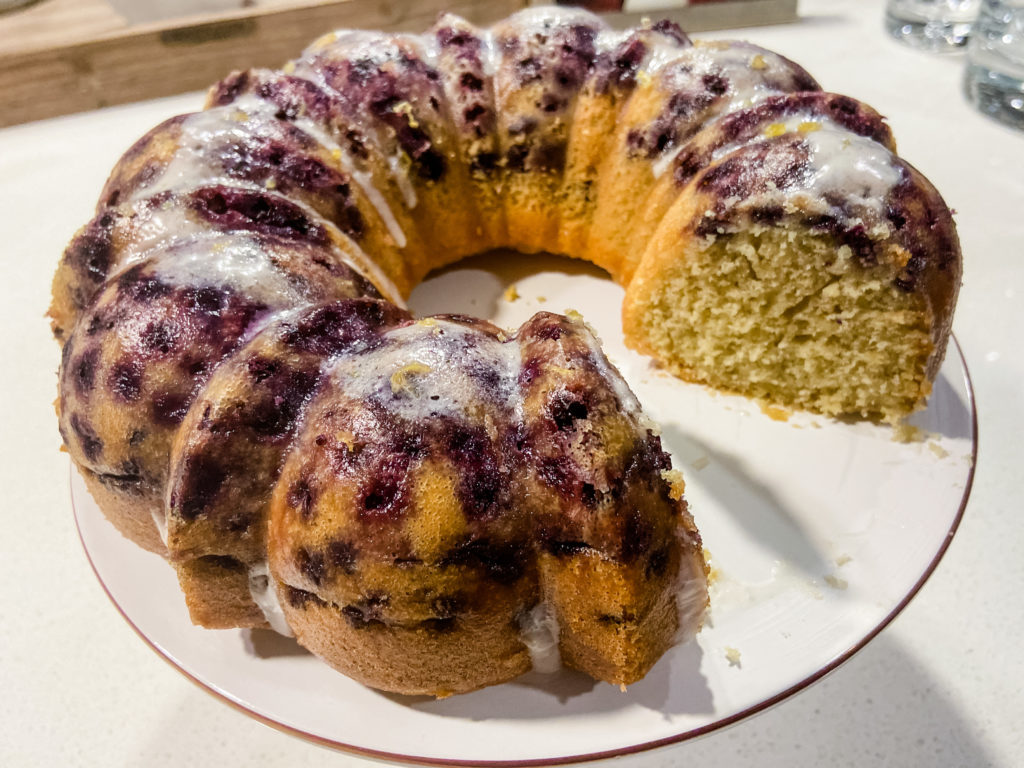
One of my new favorite bundt cake recipes is this Lemon Blueberry Bundt Cake. It is super easy and you don’t have to have the entire baking aisle in your pantry. It only requires a few ingredients to make you look like Martha Stewart at your Mother’s Day family gathering! 

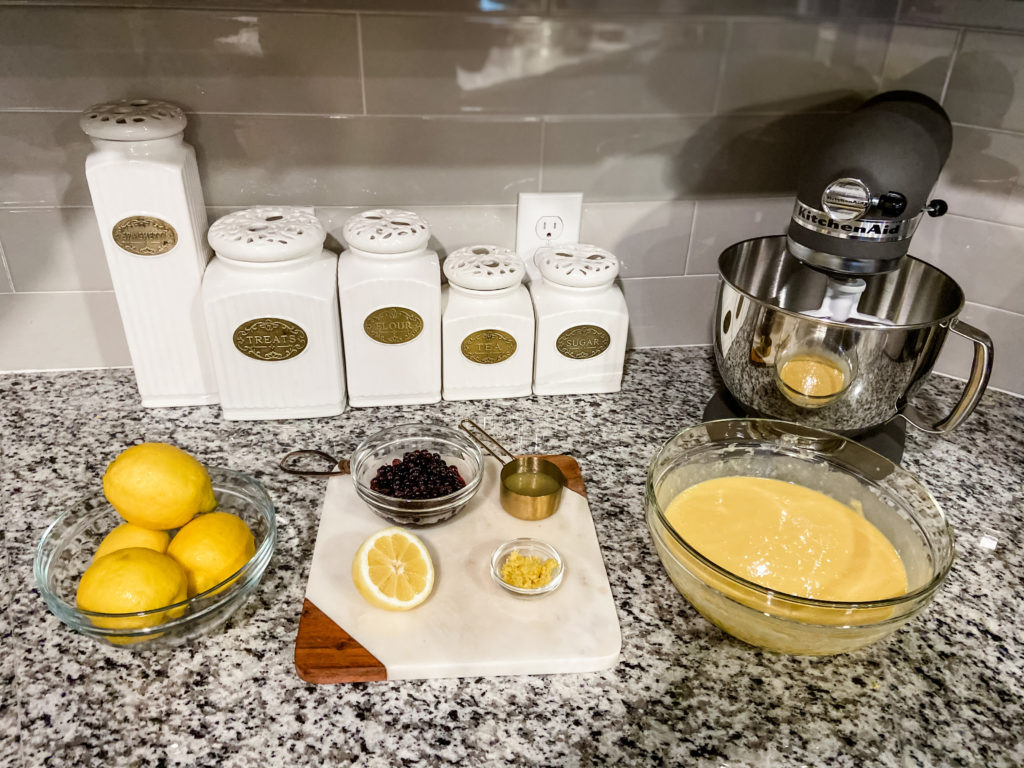
Gather those ingredients and let’s bake! 

Lemon Blueberry Bundt Cake

Lemon Blueberry Bundt Cake Ingredients

Cake Ingredients:

  • 1 yellow box cake
  • 3 eggs
  • 1/2 cup of vegetable oil
  • 1 cup of water
  • 2 cups of blueberries – I used frozen wild blueberries, but fresh will work too! 
  • 1/3 cup fresh lemon juice
  • 2 tbsp. fresh lemon zest 

Lemon Glaze Ingredients:

  • 1/4 cup powdered sugar 
  • 1-3 tbsp. lemon juice 

Vanilla Glaze Frosting Ingredients:

  • 2 cups of powdered sugar
  • 1/4 cups of milk 
  • 1 tsp. vanilla extract 
  • 2 tsp. lemon juice 

Ready, Set, Bake! 

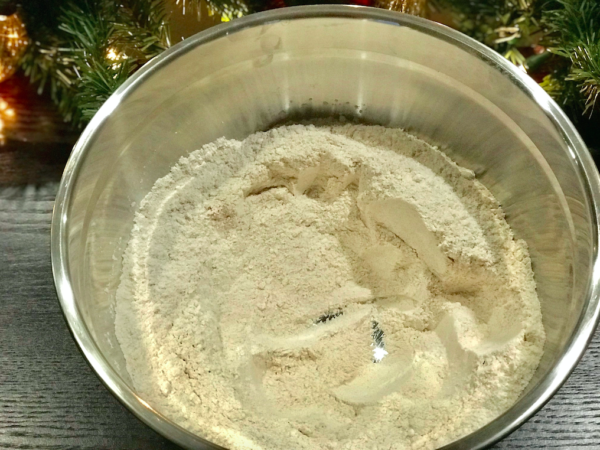
Heat oven to 350• F.  Prepare the box cake as directed on the box. 

Mother's Day Lemon Blueberry Bundt Cake

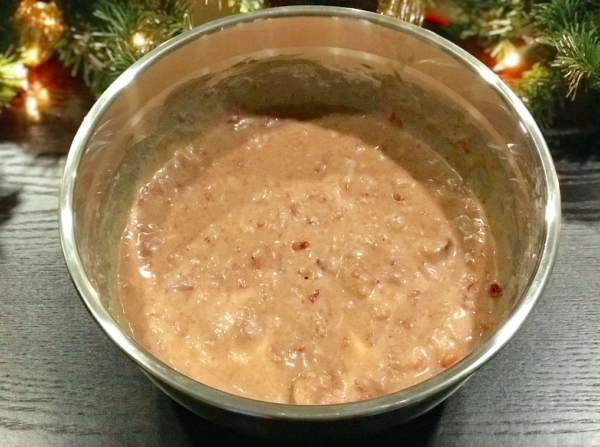
Mix the lemon juice and lemon zest into the cake.

Gently fold the blueberries in to the cake and distribute them evenly throughout the bowl.

Quick Tip: If you are using frozen blueberries, make sure they are thawed before adding them to the cake. You can add the frozen blueberries to a sauté pan on low heat to help defrost. This will bring out some of their juices, so make sure to strain some of the juice before adding the blueberries to the cake. Otherwise the cake will have too much liquid from the berries. 

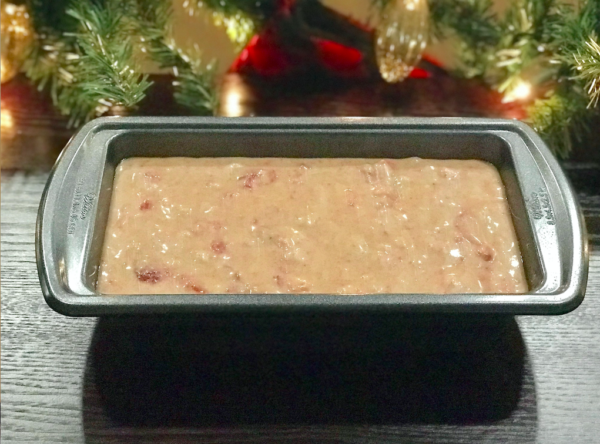
Add the cake batter to a lightly greased bundt pan and bake for 38-42 minutes as directed on the box.

Dessert Recipe Lemon Blueberry Bundt Cake

For the lemon glaze, add the powdered sugar to a small bowl and add the lemon juice one tbsp. at a time until you have the desired taste and consistency. If the glaze is too thick, you can add a little bit of water to thin out the glaze. 

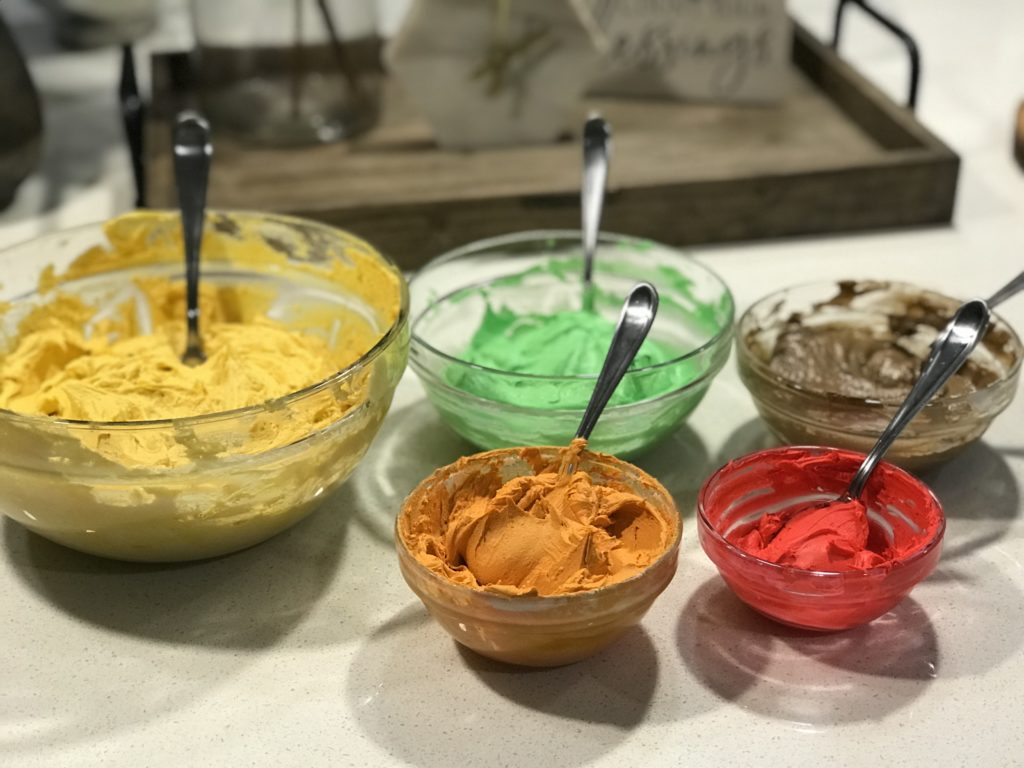
For the vanilla frosting, combine all ingredients together and mix with a stand mixer or hand mixer until combined.

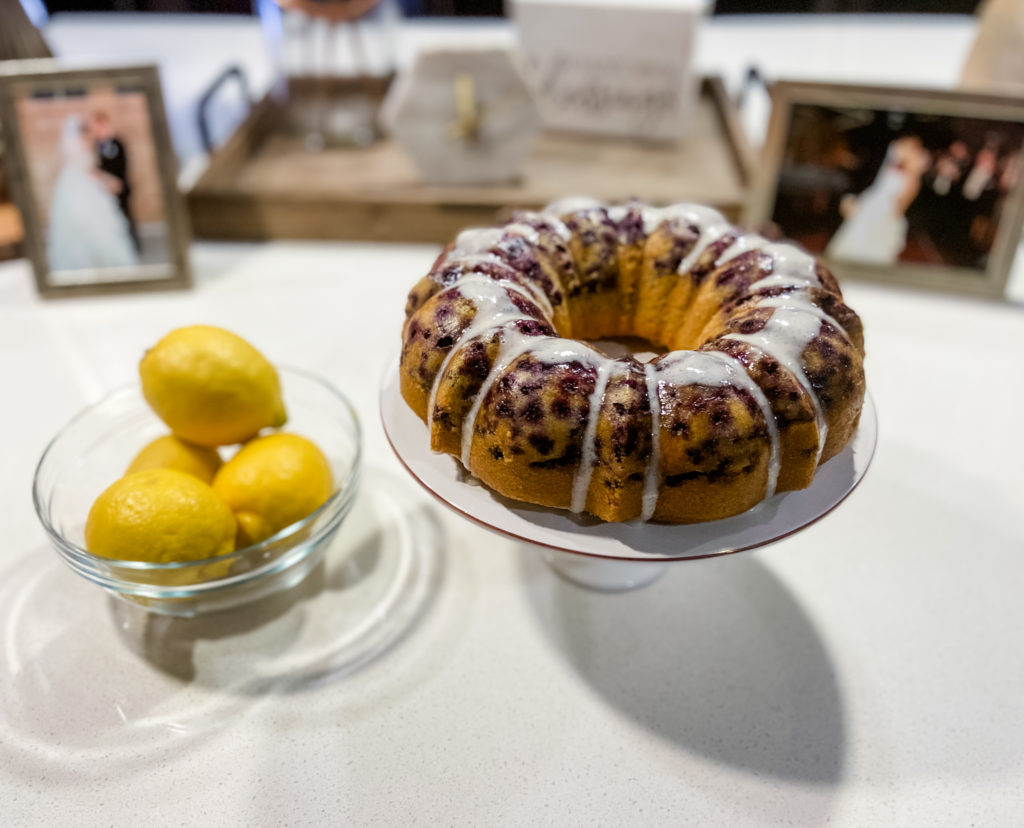
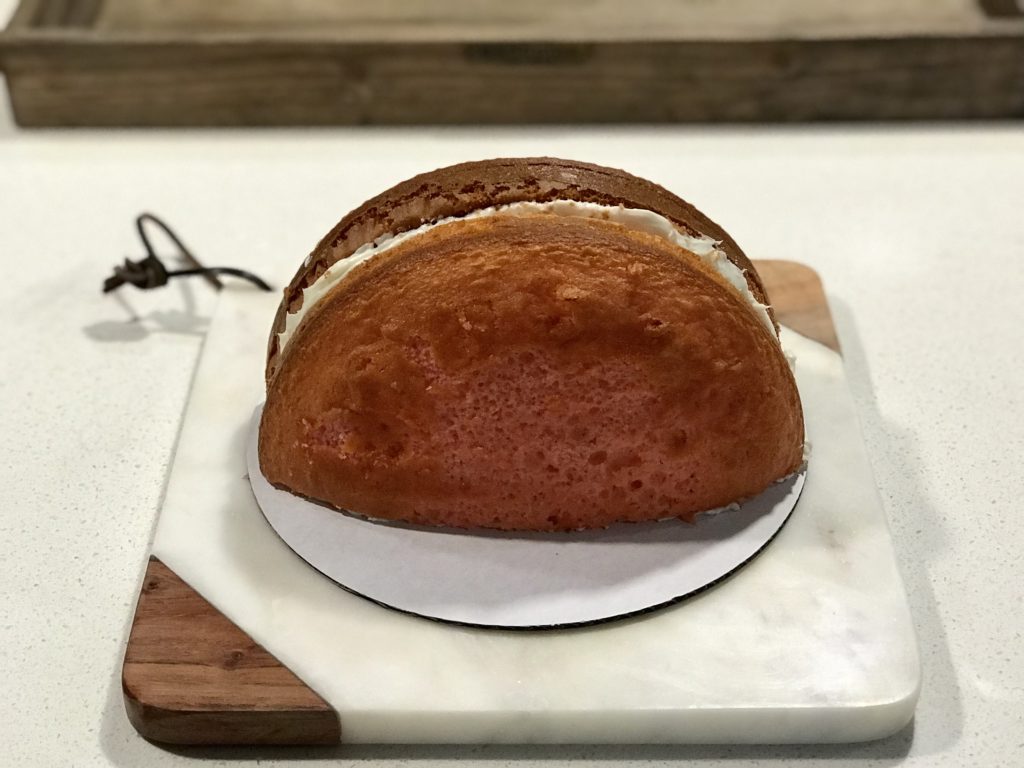
Once the cake is finished baking, allow the cake to cool completely before removing it from the pan.

Place a plate or cake stand on top of the bundt pan and carefully flip the pan over to release the cake onto the plate or cake stand. 

Lemon Blueberry Bundt Cake Recipe Mother's Day Brunch

Use a toothpick to poke small holes on top of the cake and pour or brush the lemon glaze on top of the cake. The glaze will soak into the cake giving it extra lemony deliciousness and an extra moist cake! Depending on how much lemon flavor you like will depend on how much of the glaze you use. I like to use about half on the cake and save the other half to serve with the cake for those who want extra glaze! 

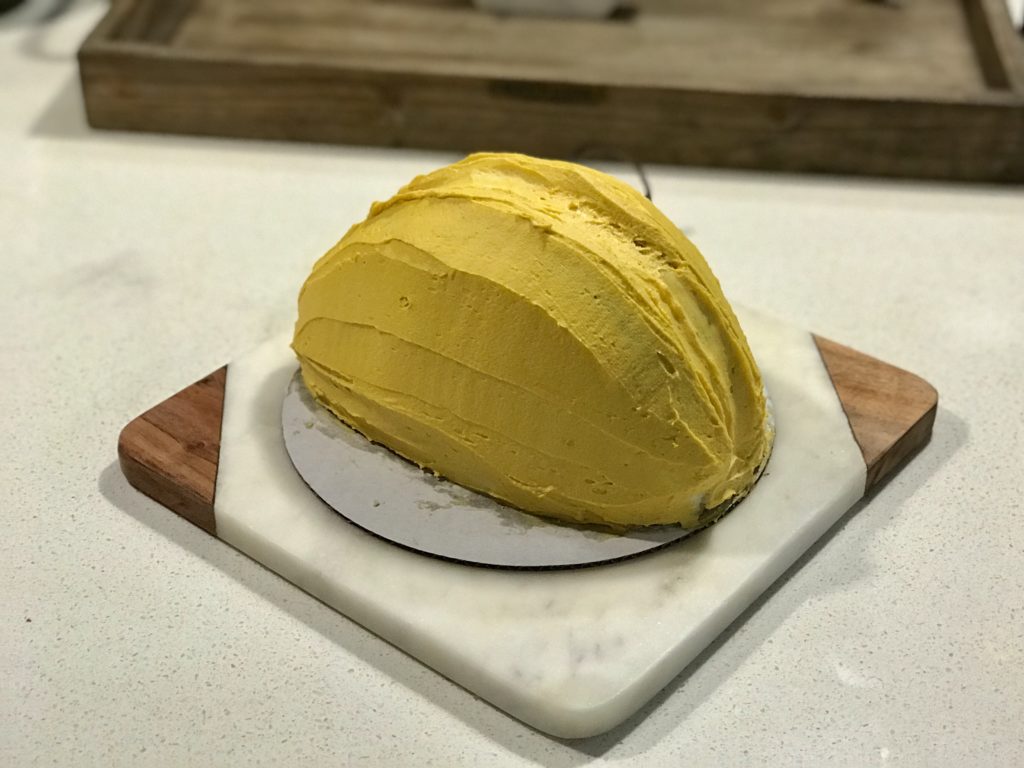
Slowly pour the vanilla frosting on top of the cake allowing it to naturally fall down the grooves of the bundt cake. Like the glaze, the amount is completely up to you! I liked to use just enough to coat the top and make it pretty! I serve the rest of the frosting on the side of the cake for those who like a little cake with their frosting. I’m definitely talking about my momma here. 

Mother's Day Lemon Blueberry Bundt Cake Recipe

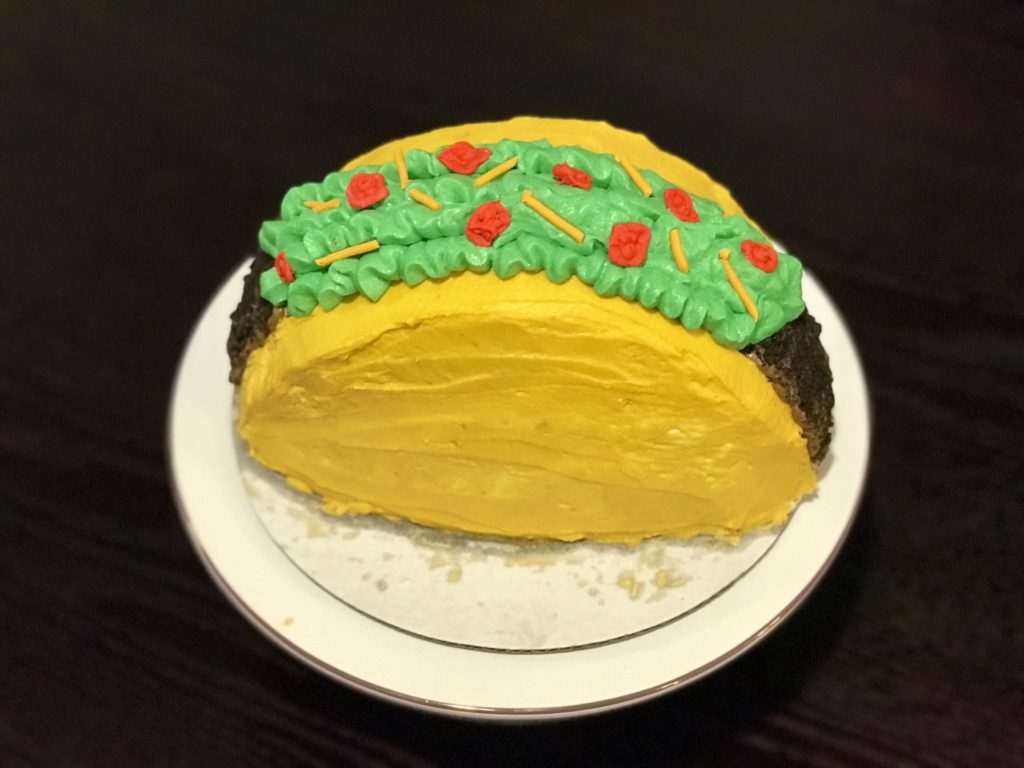
For extra garnish, zest part of a lemon on top of the cake. Enjoy!  

Lemon Blueberry Bundt Cake Recipe

I hope this cake brings joy to everyone at your table! How did it turn out? I would love to see your beautiful cakes! Leave me a comment below or send me a picture on Pinterest here! I hope you have a beautiful Mother’s Day! 

Continue Reading

How To Make A Taco Cake

Taco Cake

Who doesn’t love tacos? Taco night is definitely a weekly staple in our household. Last year, one of our best friends was having a taco themed birthday party. His wife was planning all the details and mentioned wanting to have a taco cake. I immediately volunteered to make the taco cake because it sounded like a really fun challenge. I had never made a taco cake before, but I figured it couldn’t be that hard, right? Thanks to this amazing tutorial from Studio DIY, it was honestly a piece of cake! Ha! But I definitely learned a couple of things during this process. 

How To Make A Taco Cake

The cake batter I made was enough for two 8-inch round cakes so my husband decided to make one too so that we could have a little bake-off! It was so fun y’all. We took the taco cakes to our friend’s party and had everyone vote on the best looking taco cake. So I HAVE to ask y’all, which one is your favorite? 

Taco Cake

Side Note: See the terrible grease showing on the cardboard from the buttercream? I definitely learned my lesson. See my quick tip below Step 1 to see how to prevent this rookie mistake. Face palm for sure. SO embarrassing. Lesson learned. 

Okay now that you have already made your mental vote, I will tell you that my hunky husband won the votes at our friend’s party.  We both took one different creative liberty while decorating that made our cakes stand out. As I was mixing the yellow buttercream for my taco shell, I left some specs of white in the mix to make it look more like a corn taco shell. Jeremy decided to add some of the crushed Oreos to the frosting on his shell to make it look more realistic.

While I was so annoyed I didn’t win, it was honestly so fun and we had two cakes to enjoy! We even had a request to make another taco cake for another friend’s birthday the following week! And not that I’m bitter or anything, but my husband is a dentist so he is required to have steady hands while working with hand tools on a daily basis. Again, not bitter or anything! =P I’m honestly so proud. 

Date Night!

For a fun date night, enjoy these super easy chicken tacos for dinner and have a taco cake decorating competition for a fun activity and dessert! 

Are you ready to make your own taco cake? Gather all of your supplies and let’s get to decorating! 

Taco Cake Supplies and Ingredients: 

  • 1 8-inch round baked cake 
  • 1 Batch of Buttercream (Check out one of my go to recipes from Paula Dean) 
    • I started with 1 batch of buttercream, but depending on your recipe, you may need to make half of a second batch to make sure you have enough. 
  • Red Food Coloring
  • Green Food Coloring
  • Yellow Food Coloring
  • Brown Food Coloring
  • Orange Food Coloring
  • Crushed Oreos
  • 3 Tbsp. Meringue Powder
  • 4 Cups Powdered Sugar
  • 5 – 7 Tablespoons Warm Water 

Step 1: 

Cut your 8-Inch round cake in half. Spread buttercream on the bottom of each cake half and sandwich them together. This will act as your filling so be generous! Spread a little bit of buttercream on the flat edge of your sandwiched cake and place the flat edge on your cake stand. You should now have the shape of a taco on your cake stand. 


How to Make a Taco Cake

Decorate A Taco Cake

Quick Tip: As you can see, I made the rookie mistake of using a round cardboard cake board as my base to decorate. Since my cake is not round, you see SO much cardboard and it just looks terrible! And once you start decorating, there is no moving the cake without absolute disaster! This is why I recommend first placing it on the cake stand you plan to serve the cake on. 

Another Quick Tip: The birthday boy requested a strawberry cake, so of course that is what he received. However, the strawberry cake did make it look like raw taco meat when we cut into the cake. Ha! SO if you don’t have a cake flavor preference, a chocolate cake would be the most appetizing visual in my opinion. 

Step 2: 

Cover the cake in a thin layer of the buttercream frosting and place it is the fridge for 30 minutes to chill. This is known as your crumb coat to prevent crumbs from getting into your final layer of buttercream. 

Step 3:

Taco Cake Decorations

While the crumb coat chills, make your buttercream and icing paste colors. 

Buttercream:

¼ cup brown buttercream.

¼ cup green buttercream

Color the remaining buttercream yellow

Icing Paste:

Mix the meringue powder with 5 tablespoons of water to form the icing paste for the cheese and tomato toppings. You want it to be thick, but thin enough for you to pipe. Just add a tablespoon at a time until you have the right consistency. I personally needed 6 tablespoons of warm water. 

Step 4: 

Remove the cake from the fridge and cover the cake in the yellow buttercream until the cake looks like a yellow taco shell! 

Taco Cake

Quick Tip: Use a knife or frosting spatula to smooth the top of the taco and help create a groove for your toppings. See how the picture above doesn’t quite look like a taco? Keep working with your knife or spatula until you have more defined edges on top. I worked on this step until I was pleased with the top. 

Step 5:

Place your brown buttercream in a piping bag and cut a small whole at the bottom of the bag. Fill each side of the taco with the brown frosting about ¼ of the way up each side of the taco. Carefully coat the brown frosting with the crushed oreo pieces to make the “ground beef” for the taco. 

Place your green buttercream into a piping bag and use the Wilton 366 Leaf Tip to pipe the lettuce on the top of the cake. You will cover the remaining yellow top of the taco cake with the lettuce buttercream. 

Quick Tip: Practice using the leaf tip on a paper towel before you pipe the buttercream lettuce on top of the cake.

Step 6:

Divide the icing paste into two bowls and color one red and one orange. Add each icing color to a piping bag with a round tip. Pipe small lines onto parchment paper to make the shredded cheese. For the tomatoes, pipe tiny squares to resemble diced tomatoes. Let the toppings sit until set enough to remove with a knife or small spatula. I waited about 10 minutes.

Place the shredded cheese and tomatoes on top of the cake to finalize your beautiful and delicious taco cake! 

Taco Cake

I would LOVE to see your finished taco cakes! Please leave me a link to your post below. If you want a little more inspiration, check out this Nailed It! themed emoji cake decoration competition I had one my friends last year!

Cake Decorating Emoji Cake

Have you made an awesome cake? I would love to see your finished cakes! Happy decorating, friends!

Continue Reading

Skinny Chicken Parm Recipe

Skinny Chicken Parm Recipe

This post may contain affiliate links, but all opinions are my own. Please read my disclosure policy for more information. 

http://thesassysouthern.com/skinny-chicken-parm-recipe-2/

I absolutely love Italian food! I also love hosting dinner parties and an Italian dish is always one of my go-to recipes when planning for a larger crowd. However, Italian meals don’t always fit into my healthy eating plan, so I’m always looking for a healthier, but still delicious recipe! I love swapping recipes with my friends! We decided to do a recipe swap for one of our Saturday brunch sessions. One friend shared this delicious skinny chicken parm recipe that she found on Pinterest from Two Purple Figs and I have been hooked ever since! It is so easy to make and it definitely cuts down on the calories!

This recipe teaches you how to make homemade marinara sauce and the chicken cooks perfectly! This is another recipe I LOVE to cook in my Copper Chef! I promise this will become a family favorite and will be an instant go-to for dinner! Here is what you need to get started!

Skinny Chicken Parm Ingredients

  • 4 boneless, skinless chicken breasts
  • 1 tsp. dried oregano
  • 2 Tbsp. olive oil
  • 4 tsp. pesto sauce
  • ½ cup grated parmesan cheese
  • ½ cup shredded mozzarella cheese
  • ½ tsp. salt
  • ¼ tsp. pepper
  • 1 batch of homemade marinara sauce
  • 1 box of whole wheat spaghetti

Homemade Marinara Sauce Ingredients

  • 2 Tbsp. extra virgin olive oil
  • 3 cloves garlic, minced
  • 1 ½ tsp. dried oregano
  • ½ cup fresh basil leaves, finely minced (dried basil will also work)
  • 1 32 oz. can of crushed tomatoes
  • ¾ tsp. salt (or to taste)
  • ½ tsp. pepper (or to taste)
  • 2 Tbsp. grated parmesan cheese

Let’s Get Cooking!

Homemade Marinara Sauce

  1. Heat olive oil in a skillet over medium heat. 
  2. Sauté the garlic and the scallions for 30 seconds. Season with salt and add half of the oregano. Sauté until fragrant.
  3. Add half of the basil to the garlic mixture and sauté for another 30 seconds.
  4. Stir in the crushed tomatoes and season with salt, pepper, and remaining oregano.
  5. Bring the sauce to a boil.
  6. Cover the sauce and simmer for 15 minutes.
  7. Turn off the heat and add the parmesan cheese and remaining fresh basil. I’ll be honest, I have made this recipe plenty of times with dried basil and it was delicious! 

Skinny Chicken Parm

Skinny Chicken Parm Recipe

  1. Preheat oven to 375°.
  2. Pour half of the marinara sauce in 9×13 baking dish. If you are using a Copper Chef, skip this step!
  3. Season both sides of the chicken with salt, pepper, and oregano.
  4. Heat your pan to medium heat and add the olive oil.
  5. Sear the chicken for 3 minutes on each side.
  6. Lower the heat to medium-low and cook the chicken for another 2-3 minutes.
  7. Remove the chicken from the pan and pour in half of the homemade marinara sauce. Place the chicken on top of the marinara sauce. If you are not using a Copper Chef pan, add the chicken to the baking dish you set aside earlier with the marinara sauce.
  8. Spread the pesto on top of each piece of chicken.
  9. Spread the marinara sauce on top of each piece of chicken, making sure the sauce covers the entire piece of chicken.
  10. Sprinkle the cheese on top of each piece of chicken.
  11. Place the Copper Chef or baking dish in the oven and bake for 12-15 minutes.
  12. Cook the spaghetti while the chicken is baking.
  13. Plate as photographed and enjoy with a delicious salad and bread!

Do you have a favorite go-to dinner recipe? I’m always looking for new recipes to add to our menu!

Skinny Chicken Parm
Serves 4
This skinny take on Chicken Parmesean is easy to make and will definitely be a family fave!
Write a review
Print
Ingredients
  1. Skinny Chicken Parm Ingredients
  2. • 4 boneless, skinless chicken breasts
  3. • 1 tsp. dried oregano
  4. • 2 Tbsp. olive oil
  5. • 4 tsp. basil pesto
  6. • ½ cup grated paremesan cheese
  7. • ½ cup shredded mozzarella cheese
  8. • ½ tsp. salt
  9. • ¼ tsp. pepper
  10. • 1 batch of homemade marinara sauce
  11. • 1 box of whole wheat spaghetti
  12. Homemade Marinara Sauce Ingredients
  13. • 2 Tbsp. extra virgin olive oil
  14. • 3 cloves garlic, minced
  15. • 1 ½ tsp. dried oregano
  16. • ½ cup fresh basil leaves, finely minced (dried basil will also work)
  17. • 1 32 oz. can of crushed tomatoes
  18. • ¾ tsp. salt (or to taste)
  19. • ½ tsp. pepper (or to taste)
  20. • 2 Tbsp. grated parmesan cheese
Instructions
  1. Homemade Marinara Sauce
  2. 1. Heat olive oil in a skillet over medium heat.
  3. 2. Sauté the garlic and the scallions for 30 seconds. Season with a pinch of salt and add half of the oregano. Sauté until fragrant.
  4. 3. Add half of the basil to the garlic mixture and sauté for another 30 seconds.
  5. 4. Stir in the crushed tomatoes and season with salt, pepper, and remaining oregano.
  6. 5. Bring the sauce to a boil.
  7. 6. Cover the sauce and simmer for 15 minutes.
  8. 7. Turn off the heat and add the parmesan cheese and remaining fresh basil.
  9. Skinny Chicken Parm
  10. 1. Preheat oven to 375°.
  11. 2. Pour half of the marinara sauce in 9x13 baking dish. If you are using a Copper Chef, skip this step!
  12. 3. Season both sides of the chicken with salt, pepper, and oregano.
  13. 4. Heat your pan to medium heat and add the olive oil.
  14. 5. Sear the chicken for 3 minutes on each side.
  15. 6. Lower the heat to medium low and cook the chicken for another 2-3 minutes.
  16. 7. Remove the chicken from the pan and pour in half of the homemade marinara sauce. Place the chicken on top of the marinara sauce. If you are not using a Copper Chef pan, add the chicken to the baking dish you set aside earlier with the marinara sauce.
  17. 8. Spread 1 tsp. of the basil pesto on top of each piece of chicken.
  18. 9. Place 2 Tbsp. of marinara sauce on top of each piece of chicken, making sure the sauce covers the entire piece of chicken.
  19. 10. Sprinkle the cheese on top of each piece of chicken.
  20. 11. Place the Copper Chef or baking dish in the oven and bake for 12-15 minutes.
  21. 12. Cook the spaghetti while the chicken is baking.
  22. 13. Plate as photographed and enjoy with a delicious salad and bread!
Adapted from Two Purple Figs
The Sassy Southern http://thesassysouthern.com/
SaveSave

Continue Reading

Bite-Size Beef Wellington Appetizer Recipe

Beef Wellington Appetizer

This post may contain affiliate links, but all opinions are my own. Please read my disclosure policy for more information. 

I have a very special love for Beef Wellington. The first time I ever tasted Beef Wellington was as an appetizer at my cousin’s beautiful wedding! They passed around bite-sized Beef Wellington appetizers and I was instantly hooked! Then, the chef for our wedding made us a special Beef Wellington with wedding rings and heart designs baked into the pastry dough! How cute is that?

Beef Wellington Wedding Menu

I have recently been planning out our Super Bowl party menu and I want to serve something a little different than normal. I had several steaks in the freezer and leftover pastry puff dough from the holidays. I decided to make a bite-size Beef Wellington appetizer recipe and I am so happy I did! It was absolutely delicious and so easy to make. Here is what you will need!

Bite-Size Beef Wellington Ingredients:

  • 2 12 oz. Steaks (I used 2 Ribeyes)
  • Pastry Puff Sheet (I used Pillsbury)
  • 8 oz. of cremini or baby bella mushrooms, finely chopped (Optional)
  • 1 Large Shallot, Finely Chopped (Optional)
  • Dijon Mustard
  • 1 egg
  • 1 tbsp. Garlic Powder
  • 1 tbsp. Onion Power
  • 1 tsp. Paprika 
  • 1 tsp. Salt
  • 1 tsp. Pepper
  • 1 tsp. Parlsey 
  • 1 tsp. Olive Oil

Let’s Get Cooking!

Heat oven to 400° F.

Cut each steak into cubes and season with the garlic powder, parsley, onion powder, salt, pepper, and paprika.

Beef Wellington Bite-Size Recipe

Sear the steak cubes for 1-2 minutes, turning each piece to make sure all sides are seared. Set aside. I used my Copper Chef to sear the steak. The Copper Chef is non-stick and has a sear button that sears each piece of steak beautifully! If you don’t own a Copper Chef, I would highly recommend you look into purchasing one.

Beef Wellington Bite-Sized Recipe

For the mushroom mixture, add the olive oil to a skillet and heat over medium-high heat. Add the mushrooms and cook until they start to brown. Add the shallots and cook until the shallots are soft and the mixture is golden brown. Remove mixture from the heat and set aside.

*Note: I chose not to include the mushroom mixture for the photos I am sharing. The crowd I was cooking for that evening did not care for mushrooms, so I removed them for that particular party.

Add flour to a clean surface and lay out your pastry puff sheets. Cover the pastry puff with the Dijon mustard. I would recommend a generous coating of mustard because it really adds so much flavor. Sprinkle with salt and pepper to taste.

Recipe for Beef Wellington

If including the mushroom mixture, place a small dollop on the pastry dough and add the cubes of meat on top. I found that having three pieces of meat across the pastry dough and four pieces down created the perfect pastry to meat ratio.

Using a sharp knife, cut the dough into squares around each piece of meat.

Bite-Sized Beef Wellington

Pull opposite sides of the dough over the top of the meat diagonally and pinch together. Repeat with the other sides to make sure the pastry is completely sealed.

Beef Wellington Appetizer Bites

Beef Wellington Pastry Puff

Brush the beaten egg over each bite-size Beef Wellington.

Beef Wellington Appetizer Recipe

Place each piece on the baking sheet and bake for 20-25 minutes or until the pastry dough is golden brown.

Place the bite-size Beef Wellington pieces on a serving tray and garnish with parsley. Serve with a bowl of Dijon mustard.

Bite-Sized Beef Wellington

Enjoy!

Bite-Size Beef Wellington Appetizer Recipe
A delicious bite-size beef wellington appetizer recipe that is perfect for any gathering!
Write a review
Print
Ingredients
  1. 2 12 oz. Steaks (I used 2 Ribeyes)
  2. Pastry Puff Sheet (I used Pillsbury)
  3. 8 oz. of cremini or baby bella mushrooms, finely chopped (Optional)
  4. 1 Large Shallot, Finely Chopped (Optional)
  5. Dijon Mustard
  6. 1 egg
  7. 1 tbsp. Garlic Powder
  8. 1 tbsp. Onion Power
  9. 1 tsp. Paprika
  10. 1 tsp. Salt
  11. 1 tsp. Pepper
  12. 1 tsp. Parlsey
  13. 1 tsp. Olive Oil
Instructions
  1. Heat oven to 400° F.
  2. Cut each steak into cubes and season with the garlic powder, parsley, onion powder, salt, pepper, and paprika.
  3. Sear the steak cubes for 1-2 minutes, turning each piece to make sure all sides are seared. Set aside.
  4. For the mushroom mixture, add the olive oil to a skillet and heat over medium-high heat. Add the mushrooms and cook until they start to brown. Add the shallots and cook until the shallots are soft and the mixture is golden brown. Remove mixture from the heat and set aside.
  5. Add flour to a clean surface and lay out your pastry puff sheets.
  6. Cover the pastry puff with the Dijon mustard.
  7. Sprinkle with salt and pepper to taste.
  8. If including the mushroom mixture, place a small dollop on the pastry dough and add the cubes of meat on top.
  9. Using a sharp knife, cut the dough into squares around each piece of meat.
  10. Pull opposite sides of the dough over the top of the meat diagonally and pinch together. Repeat with the other sides to make sure the pastry is completely sealed.
  11. Brush the beaten egg over each bite-size Beef Wellington.
  12. Place each piece on the baking sheet and bake for 20-25 minutes or until the pastry dough is golden brown.
  13. Place the bite-size Beef Wellington pieces on a serving tray and garnish with parsley. Serve with a bowl of Dijon mustard.
  14. Enjoy!
The Sassy Southern http://thesassysouthern.com/
Continue Reading

Taco Croissant Party Ring Recipe

Delicious Taco Ring Recipe

Happy Taco Tuesday! I am always looking for a reason to make tacos! They are so delicious and they really are so easy to make! However, they aren’t always the easiest to eat. I really end up eating a taco salad before it is all said and done!

Super Bowl Sunday will be here before we know it and I am in the process of finalizing my menu for our Super Bowl party! I of course want to incorporate tacos into my menu, but they aren’t the easiest things to eat while yelling at the TV or standing around chatting with friends. I’ve been trying a lot of different Super Bowl recipes that are oh so tasty and crowd friendly for the big game and I think I have finally found my taco recipe! 

Super Bowl Taco Ring Recipe

Pillsbury gave me this idea from one of their brilliant croissant commercials and I instantly fell in love! The recipe is simple, easy to eat, and absolutely delicious! Here is what you will need:

Taco Croissant Party Ring Ingredients:

  • 2 Packages of Croissant Dough (I used Pillsbury)
  • 1 lb. of Ground Beef
  • 2 Tbsp. Taco seasoning
  • 8 oz. Shredded cheddar cheese
  • Lettuce
  • Tomatoes
  • Salsa
  • Sour Cream

Let’s Get Cooking!

Heat oven to 375 °F.

In a skillet, cook the ground beef over medium-high heat until the meat has browned and there isn’t any pink. Add the taco seasoning and half a cup of water. Stir and let simmer until slightly thickened.

Add the shredded cheese and the ground beef to a bowl and mix together.

Taco Recipe

Cover a baking sheet or pizza pan with aluminum foil. The aluminum foil will help you transfer the taco ring to a serving tray when you are ready to serve!

Unroll each croissant and place the short part of the triangle toward the center of the dish. Do this with each croissant to form a ring on the pan. The pieces will overlap a bit. This is totally okay!

Taco Croissant Recipe

Spoon the ground beef and cheese mixture towards the top of the ring on each piece of croissant dough.

Taco Ring Recipe

Fold each croissant over the ground beef mixture and toward the center of the ring. Some of my pieces of dough were longer than others, so I ended up trimming the ends on a few pieces. Tuck the ends of the dough under the ring. The filling will show some.

Bake for 20 to 25 minutes or until the full ring is golden brown. My oven tends to cook more quickly, so mine was ready after 20 minutes!

Delicious Taco Ring Recipe

Move the taco ring to your serving dish and add lettuce, tomatoes, and a bowl of salsa to the center of the ring! We also added a bowl of sour cream next to our serving dish for those who like sour cream with their tacos!

Tip: I found it was easiest to transfer the taco ring to my serving tray by picking up the aluminum foil and placing it on the serving tray. I then slid the aluminum foil out from under the taco ring.


Slice the taco ring into individual pieces! If you are hosting a party, this will make it easy for your guests to grab a slice! Enjoy!

Taco Croissant Party Ring
A delicious taco croissant ring that is perfect for Taco Tuesday or a tasty appetizer at your next party!
Write a review
Print
Ingredients
  1. • 2 Packages of Croissant Dough (I used Pillsbury)
  2. • 1 lb. of Ground Beef
  3. • 2 Tbsp. of Taco seasoning
  4. • 8 oz. shredded cheddar cheese
  5. • Lettuce
  6. • Tomatoes
  7. • Salsa
  8. • Sour Cream
Instructions
  1. In a skillet, cook the ground beef on medium-high heat until the meat has browned and there isn’t any pink. Add the taco seasoning and half a cup of water. Stir and let simmer until slightly thickened.
  2. Add the shredded cheese and the ground beef to a bowl and mix together.
  3. Cover a baking sheet or pizza pan with aluminum foil.
  4. Unroll each croissant and place the short part of the triangle toward the center of the dish. Do this with each croissant to form a ring on the pan. The pieces will overlap a bit.
  5. Spoon the ground beef and cheese mixture towards the top of the ring on each piece of croissant dough.
  6. Fold each croissant over the ground beef mixture and toward the center of the ring. Some of my pieces of dough were longer than others, so I ended up trimming the ends on a few pieces. Tuck the ends of the dough under the ring. The filling will show some.
  7. Bake for 20 to 25 minutes or until the full ring is golden brown. My oven tends to cook more quickly, so mine was ready after 20 minutes!
  8. Move the taco ring to your serving dish and add lettuce, tomatoes, and a bowl of salsa to the center of the ring! We also added a bowl of sour cream next to our serving dish for those who like sour cream with their tacos!
  9. Slice the taco ring into individual pieces! If you are hosting a party, this will make it easy for your guests to grab a slice! Enjoy!
Notes
  1. Tip: I found it was easiest to transfer the taco ring to my serving tray by picking up the aluminum foil and placing it on the serving tray. I then slid the aluminum foil out from under the taco ring.
The Sassy Southern http://thesassysouthern.com/

Do you have a favorite taco or party recipe?

SaveSave

SaveSave

SaveSave

SaveSave

SaveSave

SaveSave

Continue Reading

The BEST Chex Mix You Will Ever Eat

The Best Chex Mix

Who doesn’t love Chex Mix? Can we all admit that at one point in our lives, we have easily eaten close to an entire batch of Chex Mix in one sitting? I’m raising my hand. My mom has always made Chex Mix around the holidays and her recipe is hands down the BEST Chex Mix in the world! I promise I’m not biased. People tell her all the time. I understand if you are questioning this since I am her daughter, so I would recommend you just try it for yourself!

The Best Chex Mix

While my mom doesn’t have one specific special ingredient that puts this over the top, she keeps the recipe super simple and in this case, less is more! Instead of adding some of the traditional Chex Mix ingredients like pretzels and bagel chips, she sticks to the Chex cereal, peanuts, and seasoning. There is something about the simplicity of ingredients that just really makes everything blend beautifully! Here is what you will need! 

Chex Mix Ingredients:

  • 2 Cups of Whole Wheat Chex Cereal
  • 3 Cups of Corn Chex Cereal
  • 3 Cups of Rice Chex Cereal
  • 2 Cups of Peanuts
  • 1 Stick of Butter
  • 5 Tbsp. Worcestershire Sauce — and a little more 
  • 1 Tsp. Garlic Powder
  • 1 Tsp. Onion Powder
  • 2 Tsp. Lawry’s Seasoning

Let’s Get Cooking!

Heat the oven to 225°F.

Add the cereal and peanuts to a large bowl.

Chex Mix Ingredients

Melt the butter in a microwave-safe bowl and add the Worcestershire sauce, Lawry’s, seasoning garlic powder, and onion powder. Stir.

Add the seasoning mixture to the cereal and stir well.

The Best Chex Mix Recipe

Cover a baking sheet with aluminum foil. Pour the Chex Mix onto the baking pan. I really love Worcestershire sauce, so I like to drizzle a little bit more on top of the mixture before I pop it into the over. My mom always does this and I think it really puts it over the top! 

Chex Mix Recipe

Bake the Chex Mix for an hour, stirring every 15 minutes. Some recipes call for the microwave, but baking it really helps seal the flavors into each piece of cereal and it is so crispy and delicious!  

Chex Mix

Let cool and add to a decorative baking tin!

Chex Mix Homemad Gift

This is perfect for holiday parties or to give as a homemade gift. We also love to have it for our holiday snack corner! If you are looking for something sweet to make with this savory snack mix, check out my Christmas Crunch candy recipe! I hope you enjoy!

The Best Chex Mix Recipe
My mom makes the most delicious and simple Chex Mix recipe! I look forward to this tasty snack every holiday. Enjoy!
Write a review
Print
Cook Time
1 hr
Cook Time
1 hr
Ingredients
  1. 2 Cups of Whole Wheat Chex Cereal
  2. 3 Cups of Corn Chex Cereal
  3. 3 Cups of Rice Chex Cereal
  4. 2 Cups of Peanuts
  5. 1 Stick of Butter
  6. 5 Tbsp. Worcestershire Sauce
  7. 1 Tsp. Garlic Powder
  8. 1 Tsp. Onion Powder
  9. 2 Tsp. Lawry’s Seasoning
Instructions
  1. Heat the oven to 225°F.
  2. Add the cereal and peanuts to a large bowl.
  3. Melt the butter in a microwave safe bowl and add the Worcestershire sauce, Lawry’s, seasoning garlic powder, and onion powder. Stir.
  4. Add the seasoning mixture to the cereal and stir well.
  5. Cover a baking sheet with aluminum foil. Pour the Chex Mix onto the baking pan.
  6. For extra flavor, dash a little extra Worcestershire Sauce on top of the mixture.
  7. Bake the Chex Mix for an hour, stirring every 15 minutes.
  8. Enjoy!
The Sassy Southern http://thesassysouthern.com/
 
Continue Reading

Delicious Strawberry Bread Recipe

Strawberry Bread Loaf Recipe

This post may contain affiliate links, but all opinions are my own. Please read my disclosure policy for more information. 

One of my dear friends would always make homemade strawberry bread around Christmas time. She would have a day of baking and then wrap them in beautiful paper and deliver them to all of her friends and family. She was kind enough to share the recipe with me so that I could start making this delicious holiday treat for my friends and family!

Strawberry Bread Slices

I have been making this recipe for several years and it is something I always look forward to! It makes for a delicious and beautiful homemade gift, but it is also perfect to have for breakfast on Christmas morning! It is so easy to make and it makes your home smell absolutely delicious! Happy baking!

Strawberry Loaf Bread Recipe

 Strawberry Bread Ingredients:

  • 3  Cups Flour
  • 2  Cups Sugar
  • 1  tsp. Baking Soda
  • 1  tsp. Salt
  • 3  tsp. Cinnamon
  • 2  10 oz. Packages of thawed Strawberries
  • 4  eggs
  • 1 ½  Cups Oil

Let’s Get Baking!

Heat the oven to 325° F.

Mix the dry ingredients together and make a hole in the center.

Strawberry Bread Ingredients

Add eggs and oil to a separate bowl. Beat well. Add the strawberries. You can use fresh strawberries, but frozen strawberries work well too and they are usually less expensive! I like to purchase the frozen bags of whole strawberries. This is really helpful especially if you are making multiple batches. I just thaw the strawberries in a glass bowl in the microwave and throw them in my Ninja Chop! It is so much cheaper than purchasing the sliced strawberries! 

Strawberry Bread Loaf Ingredients

Pour the liquid ingredients into the mixture and mix with a spoon.

Ingredients for Strawberry Bread

Fill a greased loaf pan a little over halfway with the batter. This mixture will fill two loaf pans.

Strawberry Bread Recipe Instructions

Bake @ 325 for 1 hour to 1 hour and 15 minutes.

Strawberry Bread Breakfast Loaf Recipe

Allow the loaf to cool before slicing or wrapping!

Strawberry Bread Loaf Recipe

If I’m taking this to a party or serving it for breakfast, I like to slice it and store it in a fun Christmas tin! If I’m giving the bread as a gift, I like to wrap it in plastic wrap and decorative cellophane. I hope you enjoy!

 
Continue Reading

Christmas Crunch Candy Recipe

Christmas Party Recipe Christmas Crunch

This post may contain affiliate links, but all opinions are my own. Please read my disclosure policy for more information. 

One of my favorite things about the holiday season is baking delicious treats! I love putting on a Christmas movie and just baking away! I make more treats than the hubs and I should ever eat, so I package them together to give out as gifts and take to Christmas parties. It is something I look forward to every year. One of my go-to staples is making Christmas Crunch candy!

My aunt has made this delicious treat since I was little and it is absolutely amazing! She has this amazing treat corner in her kitchen and every year at Christmas, it is filled with the most delicious Christmas treats! I still feel like a little kid every time a make a beeline for that corner. She taught me how to make this several years ago and I am still amazed at how easy it is! This is the perfect treat to take to Christmas parties or to just make for a tasty Christmas treat!

Christmas Crunch Candy Ingredients:

  • Golden Grahams
  • Peanut Butter Captain Crunch
  • Peanuts
  • Vanilla Almond Bark or White Chocolate
  • Christmas Sprinkles

Christmas Treats Recipe

Let’s Get Baking!

Add the almond bark to a pan and stir continuously until completely melted. I personally love using my Copper Chef because it is evenly heated, so it melts the almond bark more quickly and it doesn’t stick to the pan! You will be so thankful for this when it comes time to clean up! If you don’t have a copper chef, you can use a big pot or double boiler. Just make sure you keep the heat on low.

Christmas Candy Recipe

Christmas Candy Recipe

Once the almond bark is completely melted, gradually stir in the cereal and peanuts. I didn’t put an exact amount because this is completely up to you! I like to gradually add the mix-ins until all of the almond bark is covering the cereal and peanuts. You don’t want the coating to be too thick because it will cause the candy to be too sweet.

Christmas Crunch Recipe

Christmas Crunch Candy Recipe

Cover a baking pan with wax paper. Spread the mixture out onto the wax paper and add the sprinkles. I just do a few sprinkles for decoration. Allow the candy to dry completely and then break apart and add to your serving dish or storage tin.

Christmas Candy Crunch Recipe and Ingredients

Christmas Candy Crunch

Enjoy!

How is easy is that? I promise you will want to make plenty of this because it will be gone in a second! Merry Christmas, friends!

Christmas Crunch Candy Mix
A delicious holiday candy recipe that is super easy to make and will be the hot of every Christmas party!
Write a review
Print
Ingredients
  1. Golden Grahams
  2. Peanut Butter Captain Crunch
  3. Peanuts
  4. Vanilla Almond Bark or White Chocolate
  5. Christmas Sprinkles
Instructions
  1. Add the almond bark to a melting pot and stir continuously with the heat on low until completely melted.
  2. Once the almond bark is completely melted, gradually stir in the cereal and peanuts.
  3. Keep adding cereal until all of the almond bark is covering the cereal mixture.
  4. Cover a baking pan with wax paper.
  5. Spread the mixture out onto the wax paper and add the sprinkles.
  6. Allow the candy to dry completely and then break apart and add to your serving dish or storage tin.
  7. Enjoy!
The Sassy Southern http://thesassysouthern.com/
 
Continue Reading

5 Holiday Cocktail and Mocktail Recipes

Holiday Cocktail and Mocktail Recipes

This post may contain affiliate links, but all opinions are my own. Please read my disclosure policy for more information. 

Holiday parties are in full swing and I always love serving beautiful dishes and drinks! I recently shared one of my favorite holiday cocktail recipes to the blog, Christmas Sangria! It is so tasty and my friends always ask me to please make it or bring it to our Christmas parties. This made me want to experiment with more delicious drink recipes for the holiday season and, as more of my lovely friends are having babies, I have been experimenting with delicious mocktail recipes as well! Here are 5 holiday cocktail and mocktail recipes to enjoy this holiday season!

Merry Cranberry Cocktail Recipe

Holiday Cranberry Cocktail

This might be my new favorite holiday cocktail! Rim the edge of your glass with sugar. Mix equal parts Cranberry Sprite and Cranberry Juice, and add the Coconut Rum to your liking. I usually do a shot per serving for parties and then guests can add more if they wish! Also, can we please talk about how GORGEOUS these Mikasa Cheers Wine Glasses are? I even have the matching Christmas ornaments! They are perfect for entertaining because each glass has its own pattern and they look stunning! Okay, back to the recipe. 

Ingredients:

Cranberry Sprite

Cranberry Juice

Coconut Rum

Garnish:

Cranberries

Rosemary 

Sugar Rim 

Merry Cranberry Mocktail Recipe

Cranberry Cocktail Recipe

This is one of my new favorite holiday mocktails! The Coconut Lacroix gives you a hint of coconut just like the rum does in the cocktail version. It is absolutely delicious and looks fabulous! 

Ingredients:

Cranberry Sprite

Cranberry Juice

Coconut Lacroix

Garnish:

Cranberries

Rosemary

Sugar Rim

Rudolph’s Punch Cocktail Recipe

Cinnamon Apple and Cranberry Cocktail

This punch is absolutely delicious! The cinnamon stick gives the perfect amount of cinnamon without overpowering the drink and the sparkling cider and Moscato blend beautifully with the cranberry. I like to pour half a glass of Moscato and add equal parts Cranberry Juice and Sparkling Cranberry Apple Cider. This is definitely a tasty holiday treat! 

Ingredients:

Moscato

Cranberry Juice

Sparkling Cranberry Apple Cider 

Garnish:

Cranberries

Cinnamon Stick


Rudolph’s Punch Mocktail Recipe

Cinnamon and Cranberry Cocktail

This drink is just as yummy without the Moscato! Make it a delicious mocktail by adding Giner Ale instead of wine. It is so refreshing and will definitely put you in the holiday spirit! 

Ingredients:

Cranberry Juice

Ginger Ale

Sparkling Cranberry Apple Cider 

Garnish:

Cranberries

Cinnamon Stick


Sparkling Raspberry Lemonade Cocktail

Delicious Raspberry Cocktail

This Sparkling Raspberry Lemonade is SO delicious! Rim the glass with a Cosmopolitan Sugar Rim. I bought mine from our local liquor store. Add equal parts Raspberry Lemonade and Sprite with two shots of Coconut Rum, or to your liking. Add a fresh raspberry to your straw and enjoy! 

Ingredients:

Raspberry Lemonade 

Coconut Rum

Sprite

Garnish:

Raspberries

Cosmopolitan Sugar Rim


Sparkling Raspberry Lemonade Mocktail

Coconut Rum and Raspberry Lemonade Cocktail Recipe

This is one of my favorite non-alcoholic drinks ever! I love to have restaurants make this as a treat! Just mix the Raspberry Lemonade with the Sprite and rim the glass with cosmopolitan sugar. It will definitely be a hit for all of your mocktail loving guests. 

Ingredients:

Raspberry Lemonade

Sprite

Garnish:

Raspberries

Cosmopolitan Sugar Rim


Sparkling Apple Pie Cocktail Recipe

Holiday Mocktail Sparkling Cider Recipe

If you love apple pie and vanilla ice cream, you will love this holiday cocktail! Rim the glass with cinnamon sugar. Add two shots of Vanilla Vodka (or your preference) and fill the rest of the glass with Sparkling Apple Cider. Top it off with green apples, cranberries, and a cinnamon stick. 

Ingredients:

Vanilla Vodka

Sparkling Apple Cider

Garnish:

Green Apples

Cranberries

Cinnamon Sugar Rim

Cinnamon Stick


Sparkling Apple Pie Mocktail Recipe

Sparkling Cider Cocktail and Mocktail Recipe

You can still have the taste of apple pie with vanilla ice cream without the Vodka. Instead of Vanilla Vodka, just add a vanilla syrup or flavoring to make it a mocktail! It looks absolutely stunning and tastes even better! 

Ingredients:

Vanilla Syrup 

Sparkling Apple Cider

Garnish:

Green Apples

Cranberries 

Cinnamon Sugar Rim

Cinnamon Stick


Raspberry Cheer Cocktail Recipe 

Mocktail and Cocktail Recipe

This holiday cocktail is perfect for Christmas and New Year’s Eve! It is also extremely simple! Add raspberry sorbet to a champagne glass and pour in the Prosecco! This drink looks amazing and tastes soooo yummy! If you are wanting an extra special treat for Christmas morning, add orange sorbet instead of rasperry sorbet for a yummy Mimosa! 

Ingredients:

Raspberry Sorbet

Prosecco

Garnish:

Raspberries


Raspberry Cheer Mocktail Recipe 

Raspberry Cocktail Recipe

If you want the fizz and glam of this drink without the alcohol, just add Ginger Ale instead of Prosecco! It is still so tasty and is perfect for all of your guests! This is also a really fun mocktail for the kiddos! 

Ingredients:

Raspberry Sorbet 

Ginger Ale

Garnish:

Raspberries

Watch this tutorial to make each cocktail at home! 


Which holiday cocktail or mocktail are you going to try this season? Please remember to always drink responsibly. Cheers!

SaveSave

SaveSave

SaveSave

SaveSave

SaveSaveSaveSave

 
Continue Reading

Southern Cornbread Dressing Recipe

Dressing Recipe

This post may contain affiliate links, but all opinions are my own. Please read my disclosure policy for more information. 

Dressing or stuffing? That seems to be a constant debate around the holidays. In my family, we have always had a southern cornbread dressing recipe, not stuffing! This is easily my favorite dish at Thanksgiving and Christmas! I know there are multiple ways to make dressing, but my favorite way is a savory and dry dressing compared to a sweeter moist recipe. The combination of the dressing with homemade gravy absolute perfection! I’m getting excited just thinking about it! I promise you will impress all of your holiday guests with this delicious recipe!

Cornbread Dressing

Buttermilk Cornbread Ingredients

  • 1 ½ cups cornmeal
  • ½ cup all-purpose flour
  • 2 tsp. baking soda
  • 1 tsp. salt
  • 1 egg
  • 1 ¼ cup buttermilk
  • 6 tbsp butter

Other Cornbread Dressing Ingredients

  • 8 tbsp. butter
  • 2 cups celery; chopped 
  • 1 large onion; chopped 
  • 4 cups organic chicken stock
  • 1 tsp. salt
  • 3 tsp. sage
  • 1 tsp. rosemary
  • 1 tsp. thyme
  • 1 tsp. black pepper
  • 1 tsp. oregano
  • 8 pieces of dried bread broken into pieces

Let’s Get Cooking! 

Mix all ingredients together for the cornbread and bake at 350ºF for 25 minutes.

While the cornbread is baking, put the 8 pieces of bread in the toaster oven at 200ºF for about 10 minutes. This will help dry the bread out, just make sure you don’t get it too crispy. If you don’t have a toaster oven, you can just let the bread sit long enough for it to dry out. 

Cornbread Dressing Recipe Ingredients

Add all of the other ingredients together in a big bowl. When chopping the veggies, a Ninja Express Chop and the Clever Cutter will be lifesavers! Especially around the holidays! 

Recipe Ingredients Cornbread Dressing

Crumble the cornbread. Add the cornbread and the broken bread pieces to the other ingredients. Mix well.

Ingredients Cornbread Dressing Recipe

Cornbread Dressing Ingredients

Add the mixture to a greased casserole dish and bake at 350ºF for 50-60 minutes. This will depend on how crispy you like your dressing. If you like a softer moist dressing, bake for about 30-40 minutes. If you are like my family and you enjoy it crispier, just watch the top to make sure you aren’t overcooking the dressing.

Homemade Dressing Recipe

Cornbread Dressing Recipe

Serve with your delicious holiday spread and enjoy with some delicious brown gravy! Happy holidays, friends!

 
Southern Cornbread Dressing Recipe
Enjoy this delicious southern cornbread dressing recipe at your holiday gathering!
Write a review
Print
Ingredients
  1. Buttermilk Cornbread Ingredients
  2. 1 ½ cups cornmeal
  3. ½ cup all purpose flour
  4. -2 tsp baking soda
  5. -1 tsp salt
  6. -1 egg
  7. 1 ¼ cup buttermilk
  8. 6 tblsp butter
  9. Other Cornbread Dressing Ingredients
  10. 8 tblsp butter
  11. 2 cups chopped celery
  12. 1 chopped large onion
  13. 4 cups organic chicken stock
  14. 1 tsp salt
  15. 3 tsp sage
  16. 1 tsp rosemary
  17. 1 tsp thyme
  18. 1 tsp black pepper
  19. 1 sp oregano
  20. 8 pieces of dried bread broken into pieces
Instructions
  1. Mix all cornbread ingredients together and bake at 350ºF for 25 minutes.
  2. While the cornbread is baking, put the 8 pieces of bread in the toaster oven at 200ºF for about 10 minutes. This will help dry the bread out, just make sure you don’t get it too crispy. If you don't have a toaster oven, you can just let the bread sit out for a while.
  3. Add all of the other ingredients for the dressing together in a big bowl.
  4. Crumble the cornbread.
  5. Add the crumbled cornbread and bread pieces to other ingredients. Mix well.
  6. Add the mixture to a greased casserole dish and bake at 350ºF for 50-60 minutes.
  7. Serve with you delicious holiday spread and enjoy with some delicious brown gravy! Happy holidays, friends!
Notes
  1. This total cook time will depend on how crispy you like your dressing. If you like a softer moist dressing, bake for about 30-40 minutes. If you are like my family and you enjoy it crispier, just watch the top to make sure you aren’t overcooking the dressing.
The Sassy Southern http://thesassysouthern.com/

SaveSave

 
Continue Reading