DIY Bath Salts Using Essential Oils

This post may contain affiliate links, but all opinions are my own. Please read my disclosure policy for more information. 

One of my favorite things about going to the beach is how soft my skin feels after being in the ocean all day! Since I don’t have the luxury of living on the beach, the next best thing is relaxing in a hot bath with essential oils bath salts. They are so easy to make and they make your skin feel oh so smooth! They also look pretty fantastic on the side of your bathtub! Ready to get started? Here is what you need for DIY bath salts!

Ingredients
•Stunningly Beautiful Jars
•Epsom Salt (I buy Dr. Teal’s from Amazon)
•Your Favorite Essential Oils (I personally use Young Living)
*Make sure to use skin friendly oils to avoid skin irritation
•Glass Mixing Bowl

Directions
Add 10 drops of oil to 1 cup of Epsom salt. The amount you measure out will depend on the size of your jar. My two favorite recipes are Lavender with Stress Away and Peppermint with Lavender. Stress Away is an oil mixture from Young Living and it smells amazing! This oil is made up mostly of Vanilla and Lime and includes several other oils in its mix. Part of the fun is finding your perfect scent!

These DIY bath salts are fun to make and they make a fantastic gift! My hunky husband even loves soaking in a tub full of these bath salts after a workout! Epsom salt helps reduce inflammation and is great for sore muscles! Each essential oil has so many combinations you can make and it really is so easy!

I am always looking for relaxing and refreshing combinations to make! What are your favorite oils to add to your bath salts?

Continue Reading

How to Host the Best Tropical Themed Baby Shower

This post may contain affiliate links, but all opinions are my own. Please read my disclosure policy for more information. 

When the sweet mommy-to-be first said that she wanted a Tropical themed baby shower, I knew I was out of my element. Aside from a Hawaiian luau before my high-school graduation, I had not come close to attempting a tropical themed party! She decided she wanted the focus to be flamingos and pineapples, so I at least could narrow down the focus of my decor! It also helped that her shower was in April and every store buyer had decided that they also loved pineapples and flamingos. I started searching Pinterest for inspiration, as we all do at some point during the day, and I started to get an idea of what I wanted to do. Here are my top tips for hosting a tropical baby shower!

The biggest focal point of the baby shower decor was definitely the tropical balloon arch! This was so much fun to make and was a huge hit! Find everything you need and how to make the balloon arch here!

Tropical Themed Baby Shower

The Centerpiece! I wanted to make décor for the shower that would also act as a gift. The diaper cake was actually very easy to make and it looked wonderful as the centerpiece for the sign-in table! It was also stuffed with 96 diapers and topped with an adorable stuffed flamingo. Learn how to make this diaper cake here!

DIY Tropical Diaper Cake

I absolutely LOVE the custom door wreaths for the hospital door to welcome visitors to meet the sweet new baby! They look great at the shower and even better on the hospital door! They are also super easy to make. Check out my how to build a tropical themed diaper wreath here!

Tropical Themed Hospital Door Hanger

One of the other hostesses was handling the food and I knew it would be absolutely delicious and adorable! I wanted the plates, napkins, cups, and straws to really make a statement and fit our adorable theme. I really hit the jackpot with Etsy, Amazon, and Target!

Napkins: I found these adorable pineapple napkins on Amazon for $12 for as package of 20! The pink Flamingo napkins came from the Target dollar section and the green and pink flamingo napkins came from Papyrus.

Plates: I purchased the pink plates from Hobby Lobby and found the adorable palm plates from SPSweet Creations on Etsy!

Pineapples and Flamingos Party Decor

Cups and Straws: I am still obsessing over these flamingo stork straws! They are just too perfect! I found these at Paper Trail on Etsy! I bought the pineapple cups from TipTopSupply4U on Etsy!

Pineapple Party Cups

The mommy-to-be got her very own gold pineapple tumbler! I found this at Target and for all of my essential oil lovers, the inside is stainless steel, so you can add your favorite oils to your beverage! I thought this really put the whole tropical theme over the top!

Pineapple Baby Shower Decor

I wanted to really pull in the tropical theme with the serving platters with tropical palm leaves. Amazon has a pack of artificial palm leaves for only 11.99! 

Party Shower Food

I wanted pineapples incorporated in as many areas as possible! I found some beautiful pineapple vases, but they were crazy expensive! So instead, I cut out a pineapple and spray painted it gold! It really did look lovely with these tropical flowers! I wish I could tell you that I was able to use the pineapple after I cut it out, but it was more like pineapple pulp when I was finished with it. Maybe it will be edible the next time I try to make a vase.

Pineapple Flower Vase

I taped palm leaves to the strings of these 36” balloons to help tie in the Tropical theme. Iove these balloons, but they can be SO expensive! Even after you purchase the balloon, you still have to pay for the helium and most party places charge $15 per balloon! That is just insane! I found a pack of 10 on Amazon for only $13.99! I took them to Kroger’s floral department and the inflated them with helium for only $5 each! I was thrilled! They really make the perfect statement piece!

Flamingos and Pineapples Baby Shower

One of my favorite things about Etsy is how you can customize so many things! I messaged the shop that designed the shower invitations and asked if they could make this guess the date sign to match the invitations and they, of course, were happy create a custom listing! I had it printed at a FedEx Office and purchased a frame at Michaels. This example is an 11×14. I also bought a pineapple stamp from Hobby Lobby and had the guests stamp and initial the day they thought the mommy-to-be would go into labor. This was a great activity and looked great with the décor! Then, the mommy-to-be can display it in the baby’s nursery or use the frame for a different picture.

Baby Shower Guess The Date Print

I love the idea of a guestbook, but if we are being totally honest, most guest books just end up on a bookshelf collecting dust. I found this sweet children’s book on Amazon about Flamingos and decided this would be the perfect guest book. Each guest wrote the baby a sweet note in the book and it looked fantastic on the sign-in table!

Baby Shower Guest Book Idea

One of our closest friends gave us a wine basket for our wedding gift. Each wine bottle represented a milestone we would reach together in our first year of marriage. We are STILL enjoying this beautiful gift. I saw the same idea on Etsy from Lush Label, but for Mommy Milestones. It looked amazing on the gift table and it was a huge hit with the mommy and daddy-to-be. See the full supply list here!

Mommy Milestone Tropical Themed Baby Shower Gift

The mommy-to-be found these delicious sand dollar cookies online and thought they would make the perfect favors! I found this recipe from Mamma Miss and they turned out great! I wrapped two in cellophane and tied it with a bow and these adorable favor tags from Peekaboo Chew Prints! I also had these printed at FedEx Office on a heavy cardstock.

Continue Reading

Tropical Themed Balloon Arch for a Baby Girl Shower by The Sassy Southern

Tropical Balloon Arch

This post may contain affiliate links, but all opinions are my own. Please read my disclosure policy for more information. 

When I started planning the overall design for a tropical themed baby shower I was co-hosting, I really wanted a big focal point that guests saw the second they walked through the door. As I was searching Pinterest for inspiration, as we all do at some point during the day, I saw a pin from 100 Layer Cake-Let! They shared a balloon arch that they created for a flamingo themed birthday party. I was instantly obsessed. I saw that they used a balloon arch tutorial from The House That Lars Built. I watched the tutorial twice and felt that I could totally make this happen. I showed it to my husband and let him know that I need him to be my engineer for this project. Being the sweetest husband in the world, he jumped on board.

Since the party was held at the mommy-to-be’s home, I needed to make sure we weren’t going to destroy her wall! Painting her dining room wall was the last project she needed to handle. Since we didn’t really know what we were doing, we built the arch the night before and just prayed that it would stay! After about 2 1/2 hours of the hubs patiently standing on a ladder while listing to my directions, we finished our balloon arch. For our first, try, we were pretty happy with the results! The supply recommendations from The House That Lars Built was super helpful. Here are the materials that we used:

Baby Shower Balloon Arch

Hangman Products PCR5 Poster & Craft Tape, 5′, Roll, White – We bought this from Amazon for just $7.16. It is amazing! This was all that we used to stick the balloons and the balloon strip to the wall. Not only did it stay up for the shower, it stayed up for 7 DAYS and didn’t take any paint off of the wall! I also have more than half of the roll left to use on my next project.

Glue Dots Craft Roll, Contains 200 ( .5 Inch) Adhesive Craft Dots – We bought these from Amazon as on add-on to my larger order. However, you can find these at Walmart. We paid $3.60 for this as an Amazon add-on. These came in handy for sticking the smaller balloons on top of the larger balloons. We also used these to stick help the plants stay on the balloons.

Balloon Arch Decorating Strip 50ft – I honestly don’t know how we would have done this without the balloon arch decorating strip! It is extremely easy to work with and made designing the shape and final design extremely easy. 

Balloons – I wanted very specific colors, so I ordered most of my balloons from Amazon. However, I did buy white and pink balloons from Hobby Lobby. I purchased the coral and peach colored balloons from Amazon.

Silk Palm Leaves – Amazon has a lot of great options! If you catch Hobby Lobby on their 50% off floral week, you can find some palm leaves at a reasonable price. 

36” Giant Latex Balloons in Pink & White – I LOVE the giant 36” balloons but they are so expensive! I found a pack of 10 for only $13.99 on Amazon! I didn’t need 20 36” balloons for this baby shower, but I knew I would use them for future parties and events. I used one of these at the bottom of the arch on each side to have a nice base.

Electric Balloon Pump – Knowing that he would have the very special job of blowing up the balloons, my husband requested this particular piece of equipment and it was BEYOND worth it. He was able to inflate 100 balloons in 40 minutes. He could still breath and his hands weren’t even tired. This was a fantastic investment.

Tropical Balloon Arch
Learn how to make your own balloon arch from The House That Lars Built here!

This balloon arch was a huge hit at the baby shower and really tied the whole room together! It took us 3 hours and 10 minutes to inflate the balloons and put up the arch. We spent around $70 on supplies and we still have 18 of the 36” balloons, the electric balloon pump, balloon arch decorating strip, AND the craft tape and glue dots left over. These will come in handy for the next balloon arch!

Continue Reading

DIY Tropical Themed Hospital Door Hanger

This post may contain affiliate links, but all opinions are my own. Please read my disclosure policy for more information. 

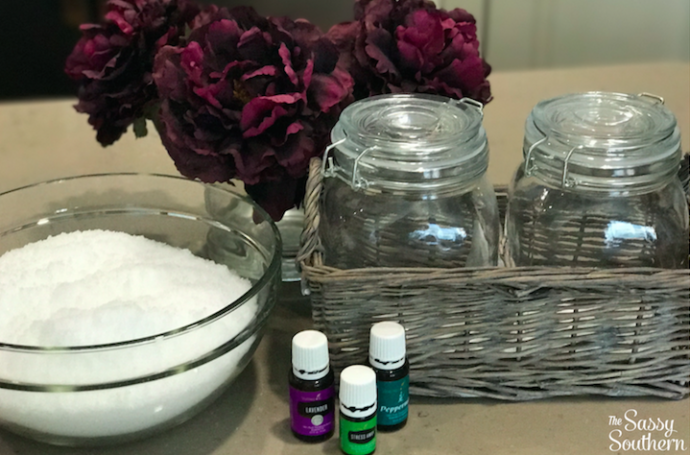
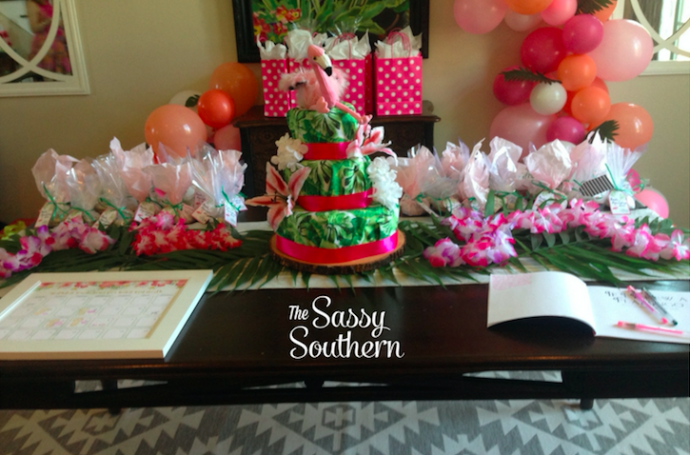
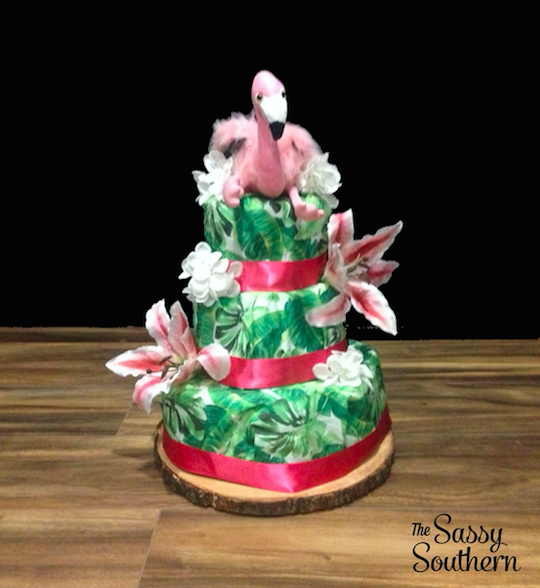
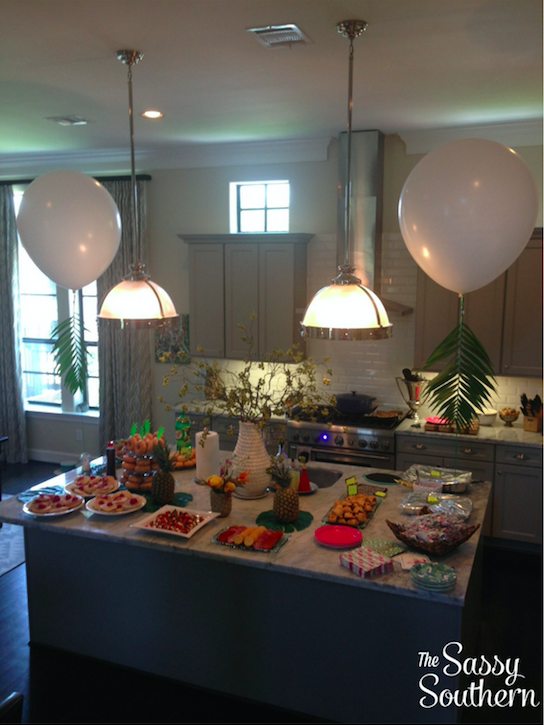
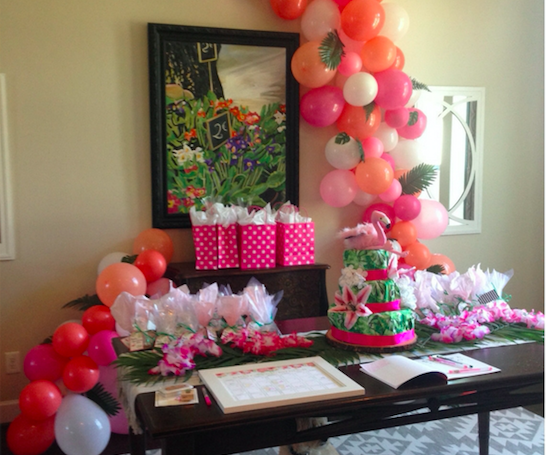
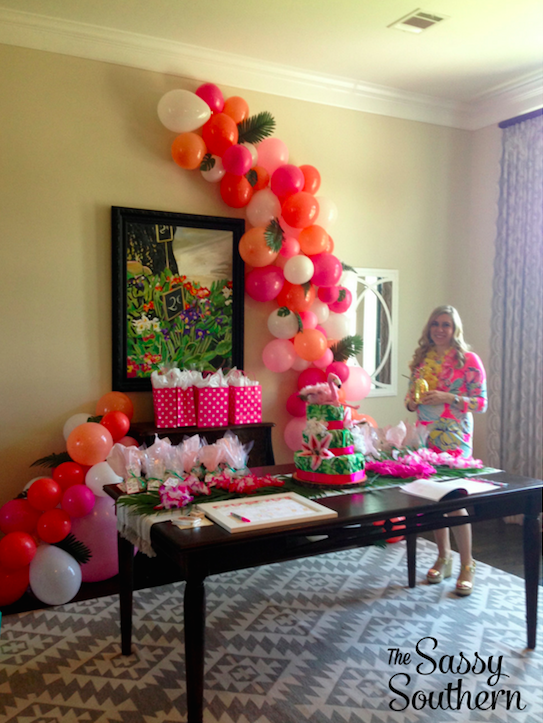
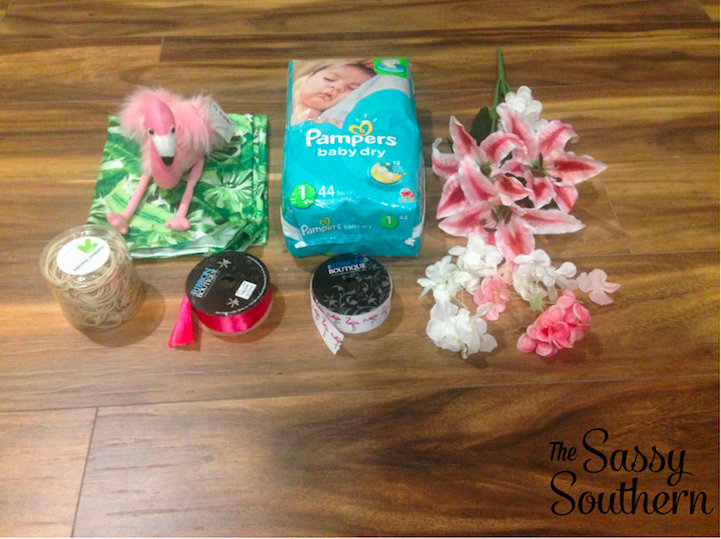
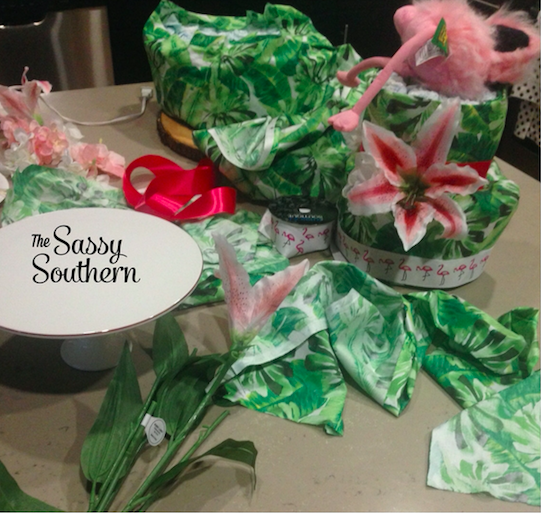
The hospital door hanger is one of my favorite things to incorporate into the décor for a baby shower. It looks great at the shower, but it looks even better on the hospital door when sweet baby finally arrives! For this example, I used a Tropical theme for my inspiration so that it also matched the baby shower décor. Here is what you need to get started!

DIY Hospital Door Hanger

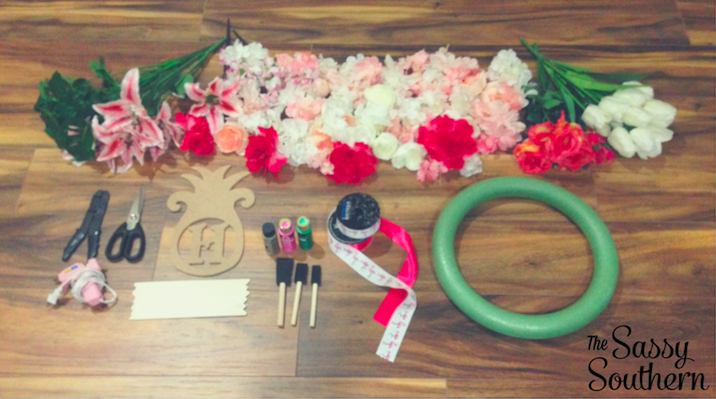
Artificial Flowers. I bought my flowers from Hobby Lobby and Michaels. Hobby Lobby puts all floral 50% off every other week and Michaels is always having sales on different flowers. If you can catch them right before a new season, this is a great time for deals on flowers.

Foam Floral Ring. I purchased mine from Hobby Lobby for $4.99 and then used my 40% off coupon. I did later see them online at Dollar Tree for $1. However, you are required to buy a minimum of 4 and you will have to pay for shipping. If you know you will eventually use 4, this is definitely the way to go! Amazon is always a really great go-to if you just want it shipped to your door! 

Low-Temp Hot Glue Gun. You can find one at any craft store for under $5.

Ribbon. I purchased my ribbon from Hobby Lobby, but you can find ribbon at any craft store.

Wooden Craft Boards. I purchased a package of 4 from Hobby Lobby for $4.99. I knew I would use them eventually and it gave me extras in case I messed up and I definitely did. You will hear about that in step 1.

Adhesive Letters. For this project, I used these beautiful gold chipboard letter stickers from Hobby Lobby. They are very easy to apply and look fantastic against the pink paint. If you already have an Amazon order going, they have some great options for adhesive letters

Wooden Initial. I purchased this adorable pineapple initial from Build-A-Cross. They have SO many options and their customer service is phenomenal! They also work with the Ministry Freedom Challenge, a Faith-Based Drug and Alcohol Discipleship Program. I love knowing that they are giving back to their community with the help of proceeds from their products. If you are looking for a very specific wooden monogram or design, this is the place for you! If you just need a simple letter initial, Amazon has plenty of options! 

Paint Brushes. I like to use the foam paint brushes. Michaels carries a set of multiple sizes in their dollar section bins at the front of the store. I purchased this set of 25 foam paint brushes for $5. Or you can just stock up on a large pack of foam paint brushes from Amazon. 

Paint. I used bottles of acrylic paint from Hobby Lobby.

Fishing Wire. I will be totally honest here. I might have borrowed mine from my brother and just never gave it back. Sorry, Face. (I call my brother Face.) Add some fishing wire to your Amazon order! It will come in handy for so many craft projects! 

Wire Cutter.

Scissors.

Step 1: Paint Your Wooden Boards and Initial

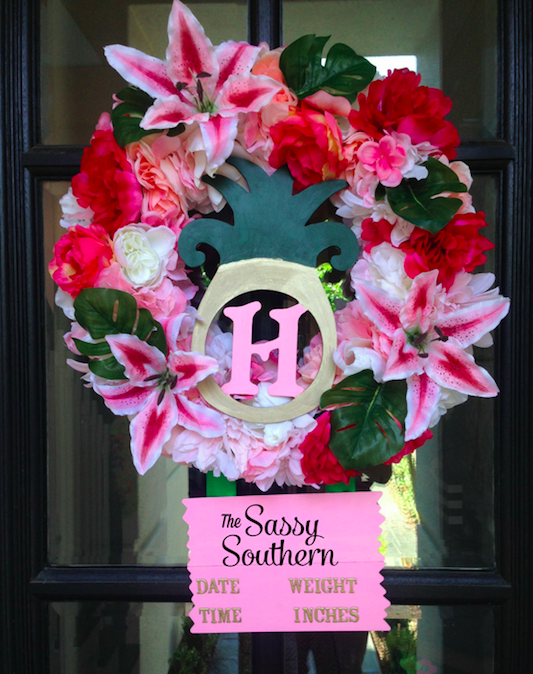
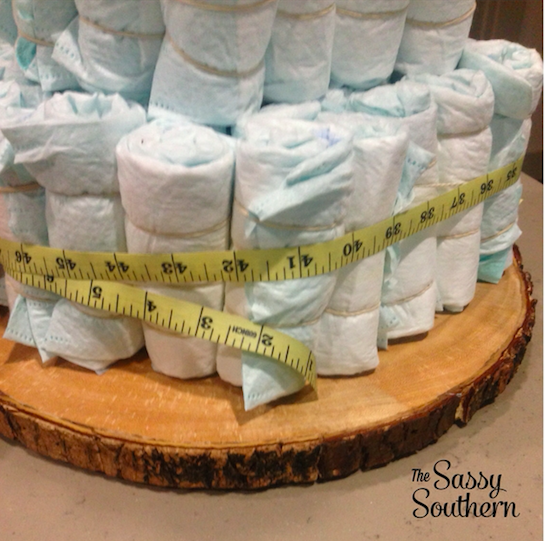
I found this adorable pineapple initial from Build-A-Cross. They have SO many options and designs. I would highly recommend checking out their site. Before I ordered the initial, I measured the length of my foam ring to make sure I selected the right size. Paint the initial and the boards you will use to display the name, weight, length, date, and time. I would recommend testing the paint colors you are going to use on the back of one of the boards to make sure they don’t clash with any of the flowers. I had this issue for this example and had to start over with a new board. While you wait for the boards and the initial to dry, move on to step 2!

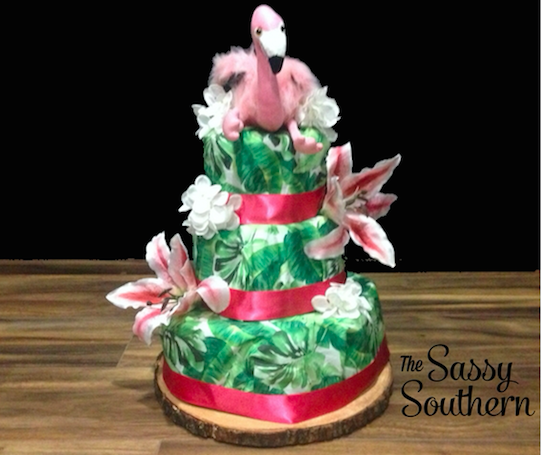
Step 2: Place your flowers!

Tropical Hospital Door Hanger

DIY Floral Hospital Door Hanger

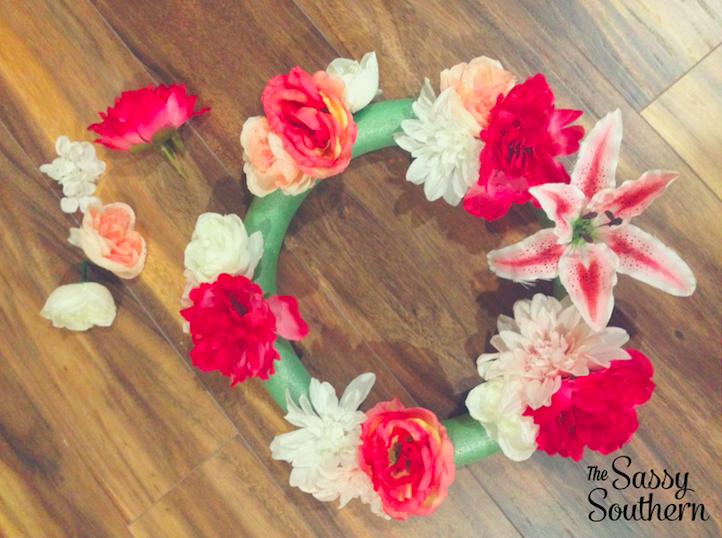
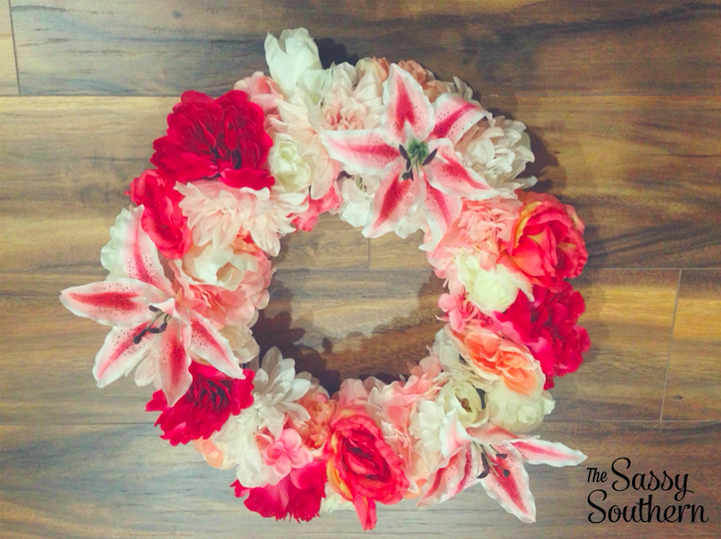
Have your hot glue gun on and ready to go. Using the wire cutter, cut the flowers from the stems leaving just enough stem to push into the foam ring. I prefer using several large flowers with smaller flowers as fillers. As you place the flowers, you can easily pull the flowers out and place them in a different spot to finalize the design. I incorporated leaves from the stems throughout to give pops of green. This also went with the tropical theme. If you notice any of the flowers not staying in place, just put a little dab of the hot glue in the hole and then stick the flower back in and hold in place for 10 seconds. Once you have all flowers and leaves in place, hold the wreath upside down just to make sure none of the flowers fall out.

Step 3: Date, Time, Weight, and Length

Now that your wooden boards are dry, add the adhesive letters for the time, date, weight, and length. You can also change this to pounds and inches if you prefer. You, of course, won’t know any of this information while you are making the door hanger, so make sure you leave enough room for mommy and daddy to add this information at the hospital. If they have already picked a name, you can add that to the first board. For this example, the mommy and daddy had not decided on the name, so I provided them with a full set of the adhesive stickers to add the name later.

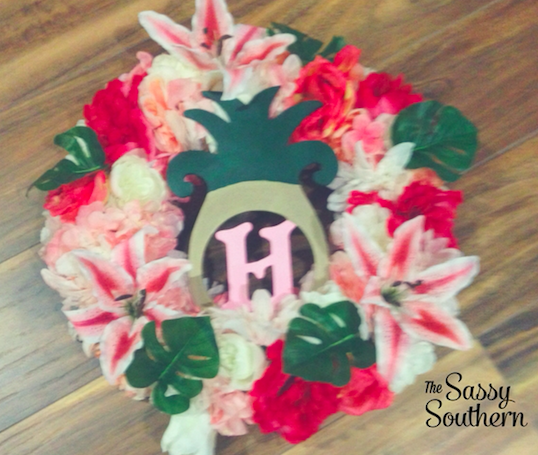
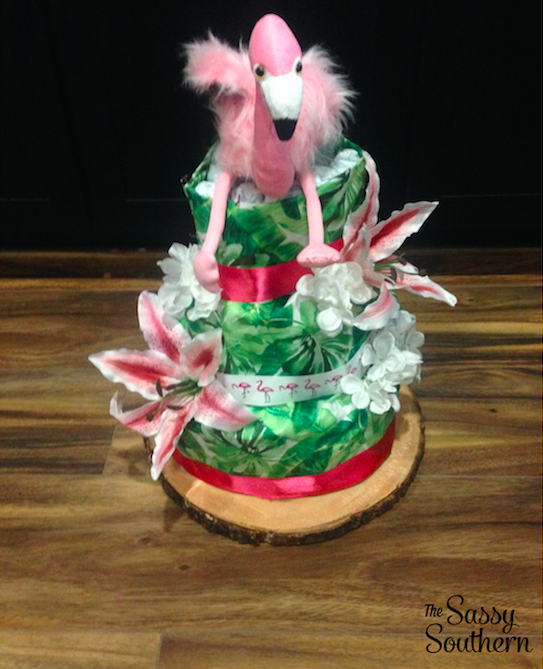
Step 4: Put It All Together!

Tropical Themed Hospital Door Hanger

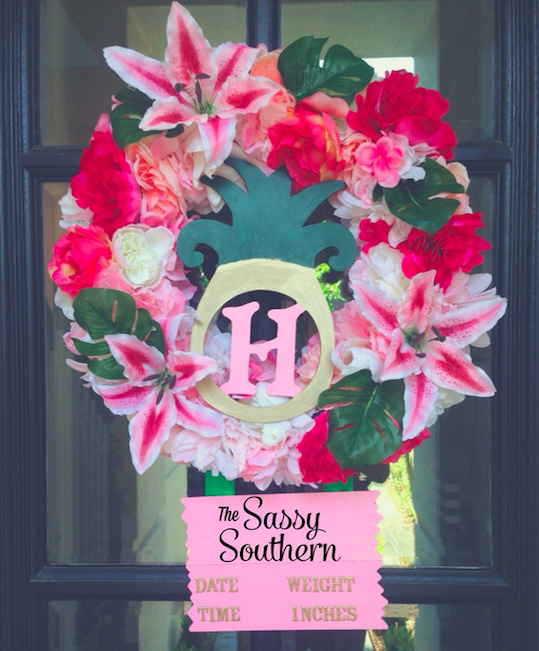
Now that all of your pieces are done, it is time to put it all together. Take the wooden initial and use fishing wire to attach it to the inside of the ring. I wrapped one piece of fishing wire around the top of the pineapple and looped in around the top part of the wreath. I tied four knots in the fishing wire to make sure it stayed. Repeat this step on your initial at the bottom of the wreath. Once the wooden initial is secure, cut two pieces of ribbon to attach at the bottom of the wreath. These pieces need to be the same length. Using the hot glue gun, attach both pieces of ribbon to the back of the wreath. Before you glue the ribbon, measure the length between the two pieces to make sure you are leaving enough space for the length of the wooden boards. Once both pieces of ribbon are secured on the back of the wreath, glue the wooden board pieces on the ribbon. If there is any additional ribbon hanging below the last board, trim that off with scissors. Cut one more piece of ribbon to use for the top part of the wreath. This will help you store the wreath leading up to the shower and can help it hang from the door hanger if needed. Just make sure you cut enough to make a full bow. For this example, the door hanger allowed us to hang the wreath without the ribbon at the top.

Continue Reading

Mommy Milestones | Wine Bottle Baby Shower Gift

How To Make a Mommy Milestone Wine Crate Basket

This post may contain affiliate links, but all opinions are my own. Please read my disclosure policy for more information. 

I know what you are thinking, wine bottles for a baby shower gift? How cruel is that? Who gives a gift to the mommy-to-be that she would love to enjoy now, but can’t have for months? But don’t worry, this is one gift that the mommy-to-be won’t mind waiting for! I first saw this when one of my bridesmaids and her husband gave this to my husband and me for our wedding gift. They gave us 10 different wine bottles all labeled for different “firsts” for our marriage. One was for our first holiday, another for our first dinner party, and one for our first anniversary. It was so creative and it really is the gift that keeps on giving! We still have three bottles left to enjoy! I loved this idea so much, that I decided to make this part of the gift for the Tropical themed baby shower I was co-hosting. As I started putting it together, I realized that this would look great as part of the shower décor! This was really fun and it was super easy to make. Here is what you need to get started:

Wooden crate. I bought the wooden crate pictured from Michaels and painted it white. The price of the crate was $10, but I was able to use a 20% off coupon from Michaels. Amazon also has some great wooden crate options as well! 

6 Bottles of Wine. Any bottle of wine will work! I chose a mixture of reds and whites.

Wine Labels from Lush Label. I found these adorable wine labels with poems on Etsy for Mommy Milestones. The poems are sweet and funny and are themed around first experiences after the baby is born. The labels pictured came from Lush Label on Etsy and included six labels: First Mommy Meltdown, Mommy’s First Full Night Sleep, First Mom & Dad Date Night, Mommy Fits in Her Favorite Pants, The First Shopping Temper Tantrum, and Mommy’s First Girls’ Night Out! This shop has multiple designs and themes and they are so easy to apply to your favorite bottles of wine! You can also add these to whiskey bottles for a groomsman gift or champagne bottles for “popping” the question to your bridesmaids!

Flowers. I bought my flowers from Hobby Lobby and Michaels. Hobby Lobby puts all floral 50% off every other week and Michaels is always having sales on different flowers. If you can catch them right before a new season, this is a great time for deals on flowers.

Hot Glue Gun. You can purchase one from Amazon or any craft store. 

Crinkle Paper Basket Filler. I happened to make this wine crate around Easter, so I found the Easter grass at Target! However, if you are making this any other time of year, Amazon has SO many color options for crinkle paper. 

Step 1: Applying the wine labels!

Baby Shower Gift Mommy Milestones

The first thing you need to do is get the original wine label off of the wine bottle. The easiest way to do this is to fill your sink with room temperature water and place the bottles in the water. I let mine stay in the water for about 30 minutes and then peel the labels off. If any of the adhesive from the label stays on the bottle, just use a wet paper towel and rub the adhesive off of the bottle. If you don’t have a sink stopper, a large mixing bowl or beverage tin will work as well! Once the labels are off and you have dried the wine bottle completely, place the labels on the wine bottles. I found that it was easiest to apply the labels from left to right. This helped me keep the label from having bubbles once it was applied.

Step 2: Decorating the wine crate!

Mommy Milestone Tropical Themed Baby Shower Gift

Once your wine bottles are ready to go, it is time to start decorating your wine crate! This particular wine crate was for a Tropical themed baby shower, but you can easily change the look to fit your theme. Use the glue gun to secure the flowers on leaves on the front of the crate. Once the glue has dried, fill the crate with the decorative grass and arrange your wine bottles. This looks great on the gift table or as a centerpiece for the baby shower. Your mommy-to-be will love you for this gift!

Continue Reading

How To Make A Tropical Themed Diaper Cake

Tropical Themed Diaper Cake DIY

This post may contain affiliate links, but all opinions are my own. Please read my disclosure policy for more information. 

One of my favorite things to do when planning a baby shower is to incorporate décor that the mommy-to-be can use later. One of my go-to staples is the diaper cake! It looks fantastic as a centerpiece and it is so easy to incorporate into any theme. You can buy pre-made diaper cakes on sites like Etsy, but making it yourself will save you a lot of money and you can really customize it to the theme of the shower. Trust me, if I can make this, you can too!

Tropical Themed Diaper Cake Supplies

Here are the supplies you will need to get started:

Fabric. I found mine at Hobby Lobby, but Jo-Anne’s also has a lovely selection. Don’t forget to use your 40% off coupon for Hobby Lobby or any of Joann’s weekly coupons!

T-pinsI purchased mine from Target, but you can find these anywhere!

Diapers (I used 88 size 1 diapers). On top of getting 5% off of your purchase with your Red Card, Target will price match. So if you find a better deal on diapers, just let them know! You also never know what deal Cartwheel has, so make sure you check that!

Ribbon. I bought mine from Hobby Lobby because, well, I love it there.

Flowers. I bought my flowers from Hobby Lobby and Michaels. Hobby Lobby puts all floral 50% off every other week and Michaels is always having sales on different flowers. If you can catch them right before a new season, this is a great time for deals on flowers.

Stuffed FlamingoThe flamingo for this diaper cake came from Amazon.

Rubber BandsI purchased an assorted pack from Target.

Hot Glue GunI bought mine from Hobby Lobby, but you can find one at any craft store. Or, if you would like it delivered to your door, Amazon is a fantastic choice. 

Scissors.

Now that you have your supplies, let’s get started!

Step 1: Assembling the cake!

How To Make a Diaper Cake

Roll each diaper like a fruit roll-up and wrap a small rubber band around the top and a small rubber band around the bottom. Take a medium sized rubber band and wrap it around 3-4 diapers. Repeat this step. Take the rubber band wrapped around one set of diapers and wrap it around one of the diapers in the first set. This will connect the two sets without stretching one rubber band too thin. I made this mistake during my first attempt and was popped in the hand while diapers fell to the ground. Good GRAVY! 

See examples 1 and 2 above on how to connect the diapers. You will take the rubber band wrapped around example b and put it over one of the diapers in example a to connect the two. From here, it is very easy to move the diapers around to make the round shape for the diaper cake.

Continue this until the first layer of your cake is formed. I used a round cake stand to help me make sure the bottom layer was round, but an actual cake pan would help hold the diapers in until you have all of them wrapped with rubber bands. Once the bottom layer is formed, start making the middle and top layers. Or, top layer if you are sticking with only two tiers. For the example pictured, I used 48 diapers for the bottom layer, 25 for the middle layer, and 15 for the top layer.

Step 2: Frost Your Cake!

How to Make a Diaper Cake

This part was the hardest part for me. I tried this two different ways. For the first try, I measured the length and circumference of each layer of cake. I cut the fabric a bit longer for the length to make sure it would go over the top of the cake and under the bottom to cover the full side of the cake. I used the t-pins to secure the fabric to the diapers. This worked pretty well, but I didn’t leave enough fabric to cover the full top of the layer, so it looked a little sloppy. I tried to cover it with flowers, but I didn’t like how that looked either. I also LOVED the flamingo ribbon, but I thought it made it look way too busy.

Tropical Themed Diaper Cake DIY

I just didn’t like the way that looked at all. So I started over.

It just looked unfished. So I tried a different approach. This time, I measured the layer from one side to the other to make sure the fabric would completely drape over the entire layer. For all of my bakers out there, this would be the same way you would cover a cake with fondant. This made the top of the cake look absolutely perfect! I used the t-pins to secure the fabric underneath the cake. However, the sides of the cake weren’t as smooth because the fabric was bunching more due to the roundness of the cake. In the end, I decided I liked this approach the best.

Step 3: Apply the Finishing Touches

DIY Tropical Diaper Cake

I started the décor process by adding ribbon to the bottom of each layer. I really love how the hot pink really pops on the lovely greens. I measured the circumference of each layer and cut the ribbon just a bit longer. I used the hot glue gun to secure the ribbon to the cake. You don’t need to glue the entire ribbon, just each end of the ribbon. For a cleaner look, fold each end of the ribbon so that the frayed ends don’t show. Once you add the ribbon, place the flowers on the cake. You can hot glue the flowers to the fabric or just stick them in the cake. Once your flowers are settled, top with your adorable flamingo!

Diaper Cake Tropical Baby Shower Centerpiece

It really was the perfect centerpiece for this tropical themed baby shower!

Continue Reading