Wild ONE Safari First Birthday Party

Wild ONE Safari First Birthday

This post may contain affiliate links, but all opinions are my own. Please read my disclosure policy for more information. 
Wild One Safari First Birthday Party Decor

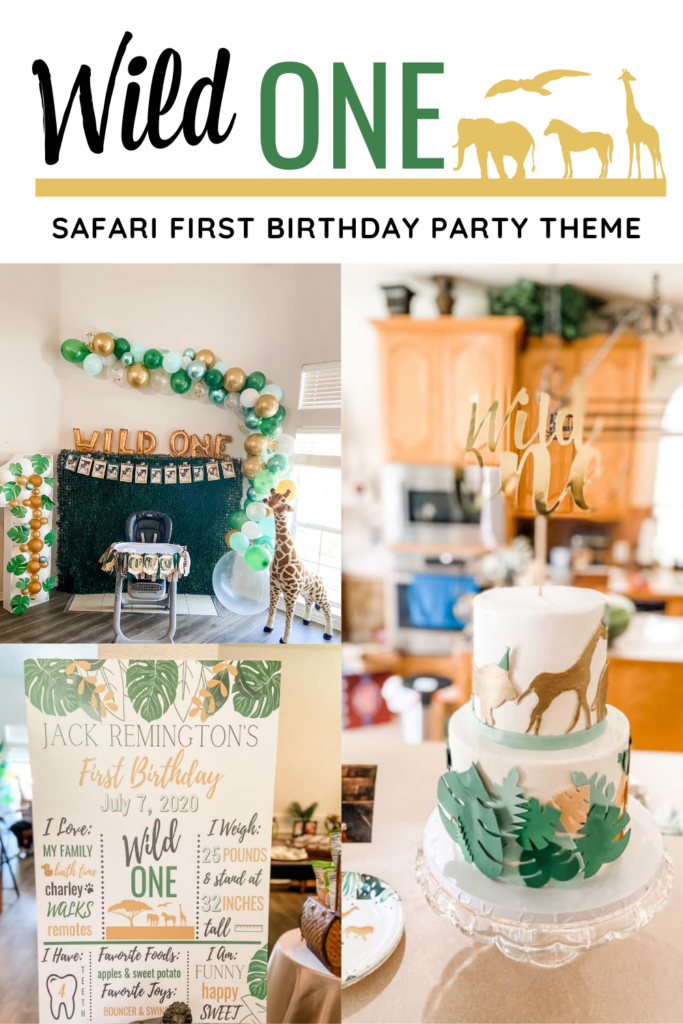
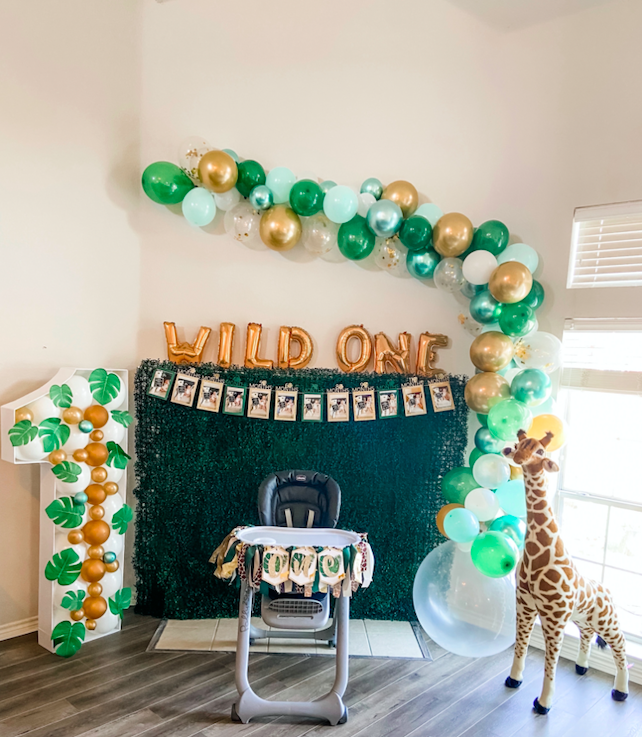
My sweet guy turned one this summer and I still can’t believe it. How is he already ONE?!?! As I was thinking of a theme for his first birthday party, I kept going back to his sweet safari decor in his nursery. So naturally, Jack’s Wild One made total sense! 

Balloon Arch
Wild ONE Safari First Birthday

I am really into balloon walls and arches these days. My rockstar of a husband is my muscle behind these projects and he is seriously such a trooper for inflating and hanging all of these balloons! You can buy balloon kits on Amazon or pick out your own balloons. If you are going to do a balloon arch, I highly recommend purchasing a balloon pump

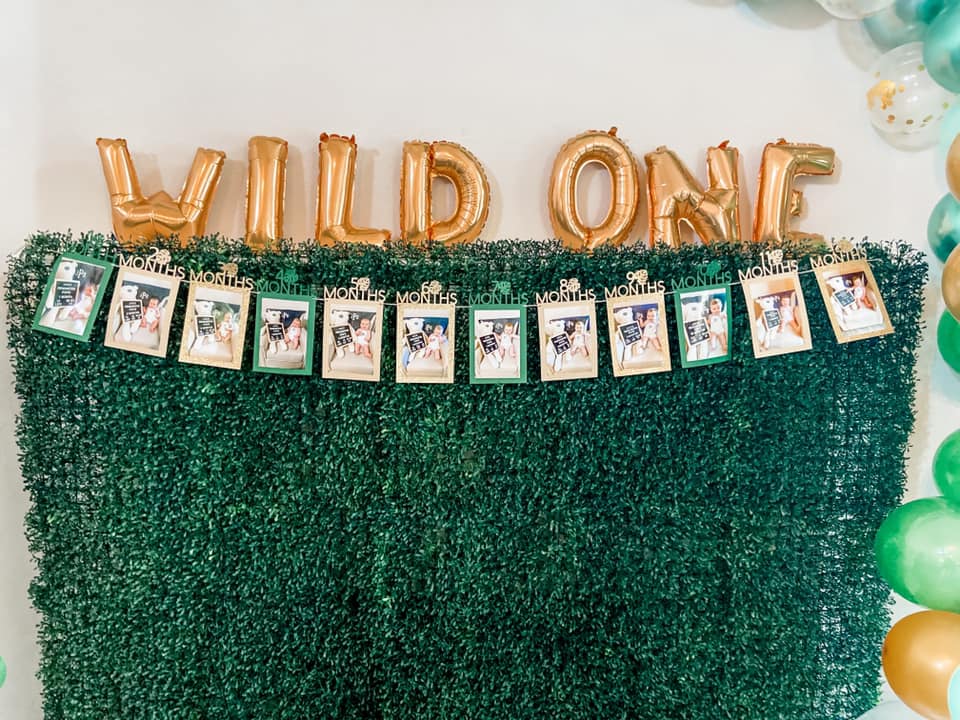
Greenery Backdrop and Wild One Balloons 
MILESTONE SAFARI BIRTHDAY BANNER

I purchased these greenery panels from tableclothsfactory.com, spray painted them, and attached them with zip ties to create the size I wanted for my backdrop. Honestly, it was completely worth the money and effort to have this look. It made the perfect backdrop for the decor and photos. However, if you aren’t wanting to spend a little less time and money, check out these adorable and very realistic greenery backdrops

I found these adorable WILD ONE balloons in copper on Etsy! I absolutely LOVED the color! 

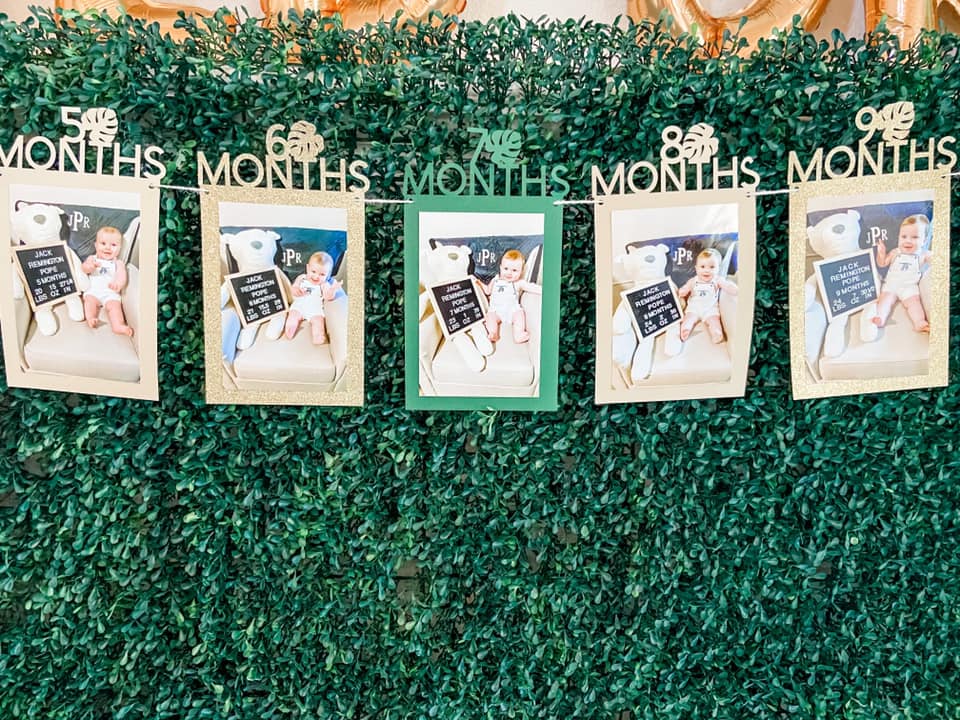
Monthly Milestone Banner
FIRST BIRTHDAY MILESTONE BANNER

I LOVE these sweet banners! It is so fun to see how much my sweet guy has changed in just 12 months! I made this banner with my Cricut, but you can also purchase these on Etsy. Also, if you don’t have a Cricut Maker, but love making crafts, I highly recommend the investment. I saved SO much money on this party by making my own decor! I was also able to customize everything and create exactly what I was envisioning for the party. 

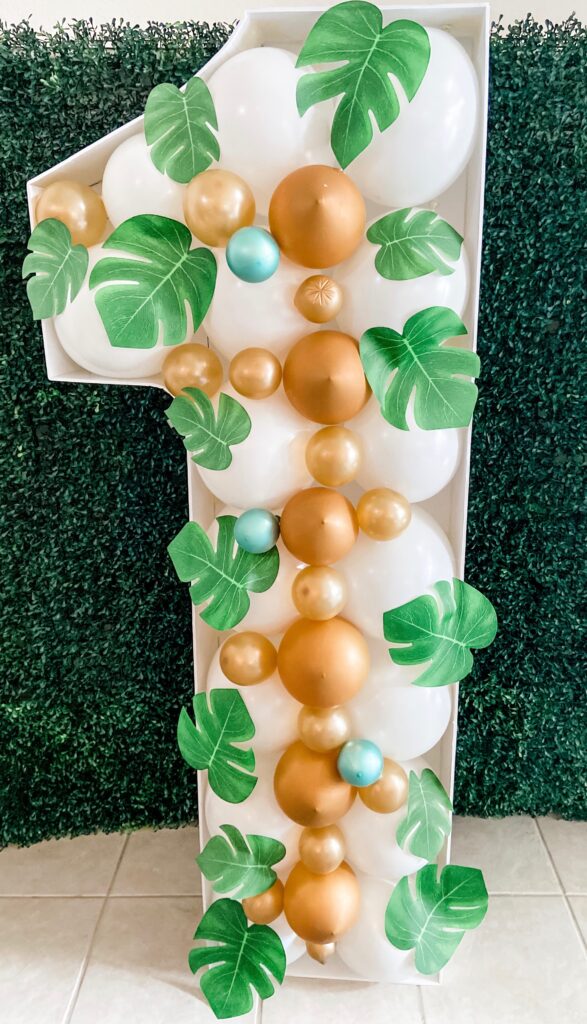
Giant Balloon ONE
SAFARI BALLOON ONE

I first saw this idea on Pinterest (of course) and immediately texted it to my Jeremy, my rockstar of a husband. We bought two pieces of the 40 x 60 foam board from Hobby Lobby. I printed out the style of 1 I liked and Jeremy measured the foam board and cut it with an Exacto Knife. We then used hot glue to attach the sides of the one. Thankfully, the foam board bends really easily so that you can shape the letter. It is such a great statement piece and makes for a great photoshoot! 

Sally The Giraffe 
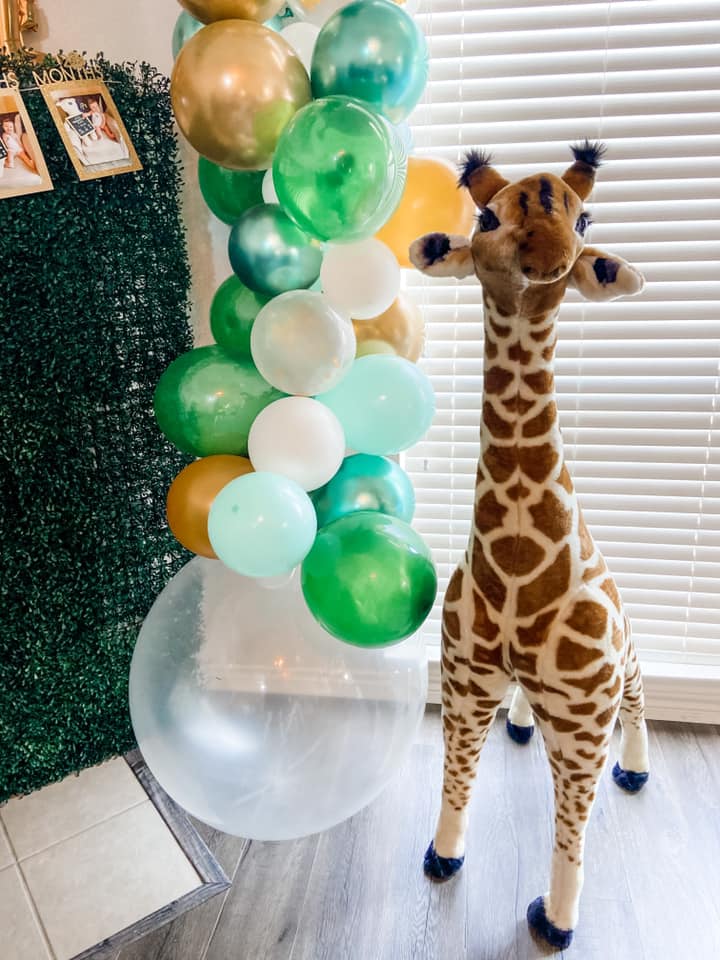
WILD ONE SAFARI BIRTHDAY PARTY

We just love Sally! My parents bought this as a “welcome home” gift when we brought Jack home from the hospital. She lives in Jack’s nursery, but was happy to be part of the decor for the party. You can purchase your own plush giraffe by Melissa and Doug on Amazon! 

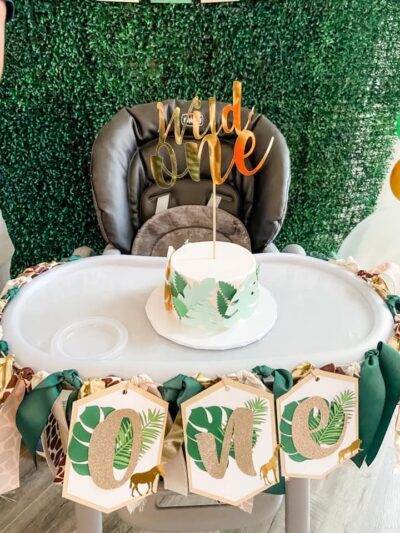
Safari Highchair Garland and One Banner 
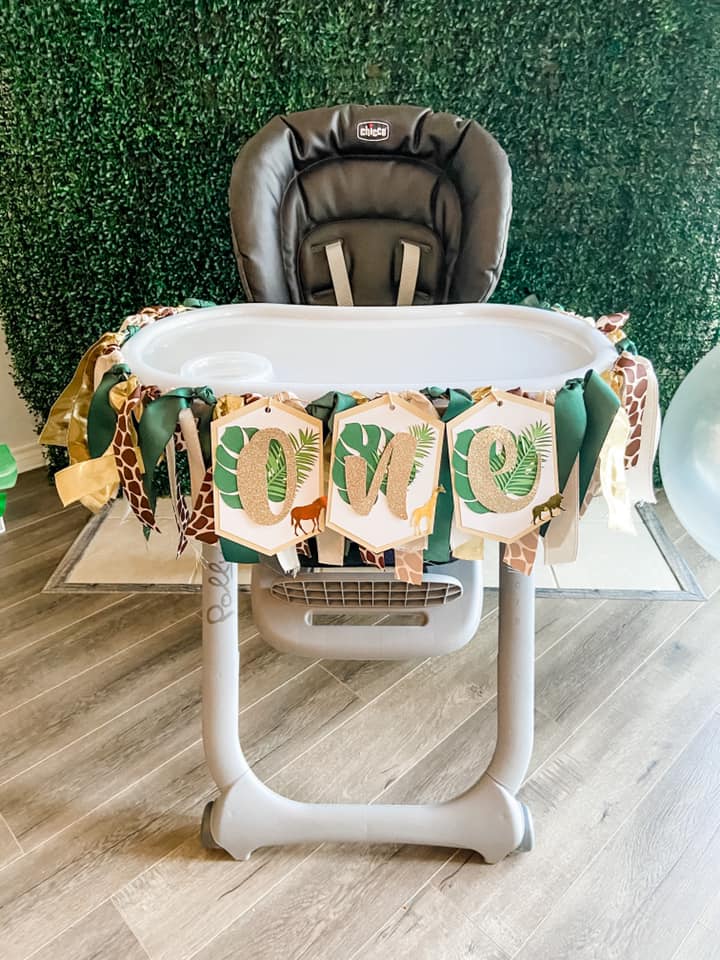
WILD ONE SAFARI HIGH CHAIR FIRST BIRTHDAY BANNER

This was honestly so easy to make! I purchased ribbon and tied it on string to create the hassle garland. I created the ONE banner on my Cricut Maker machine and attached it to the garland. This was one of my favorite pieces for the party! 

Safari Themed Cake and Smash Cake
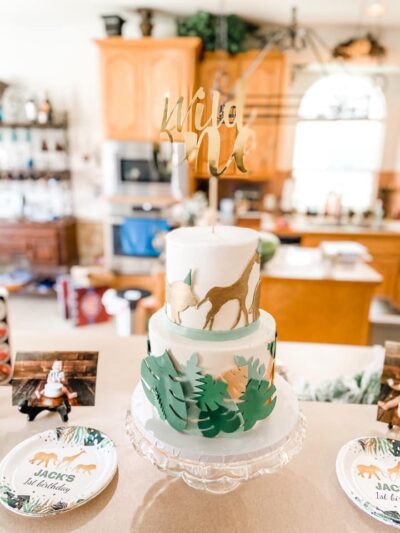
Safari WILD ONE CAKE 

I just adore this cake design from Sugar Bee Sweets Bakery in Arlington, Texas! For all my local DFW friends, I highly recommend this bakery! I sent them ideas of what I wanted and they created this perfect cake and smash cake! I made the Wild One cake topper with, yes you guessed it, my Cricut Maker! 

Safari Tassel Garland 
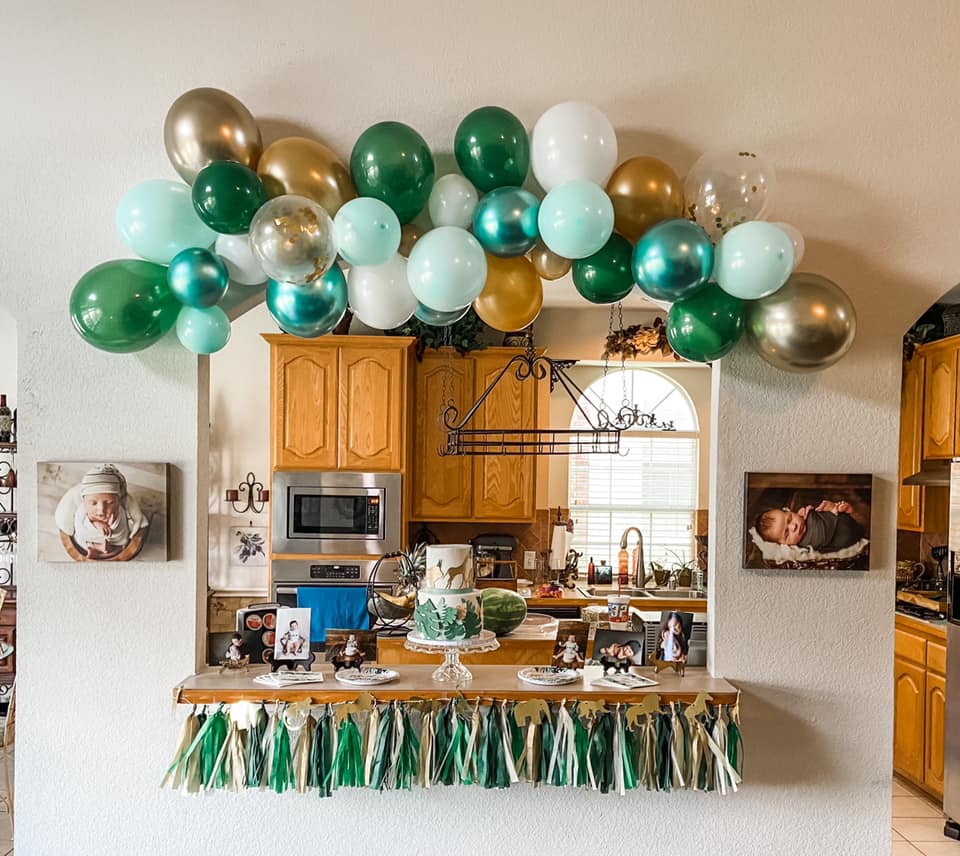
For this garland, I created and printed the safari animals on my Cricut Maker and made the tassels out of tissue paper. 

Jack’s Wild One Safari Birthday Plates and Napkins 
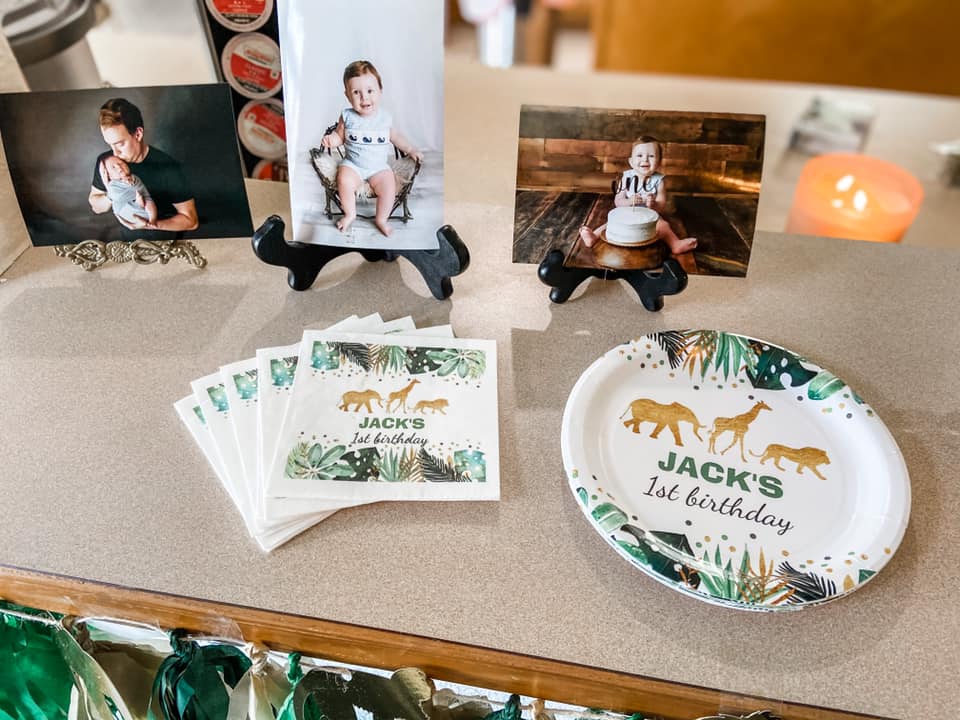
WILD ONE 1ST BIRTHDAY SAFARI PLATES AND NAPKINS

These adorable custom first birthday safari plates and napkins are on Zazzle. If you don’t need them customized, check out this super cute party pack! 

Safari Themed Wild One Birthday Cookies 
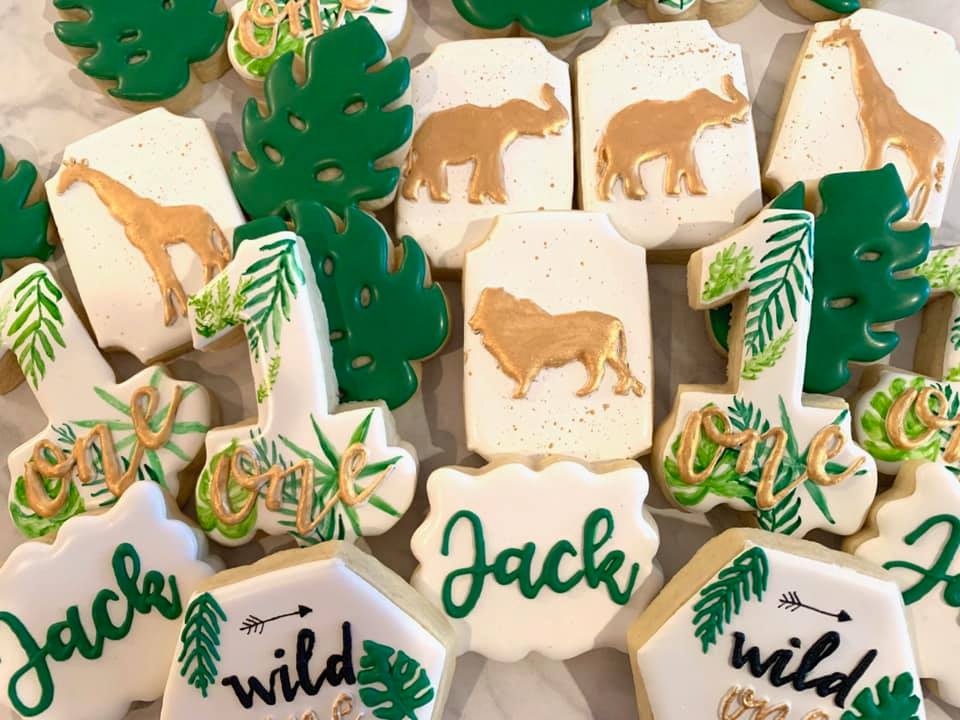
WILD ONE PARTY COOKIES

For all my DFW friends, The Velvet Crumb created these gorgeous cookies! I highly recommend! 

First Birthday Milestone Sign 
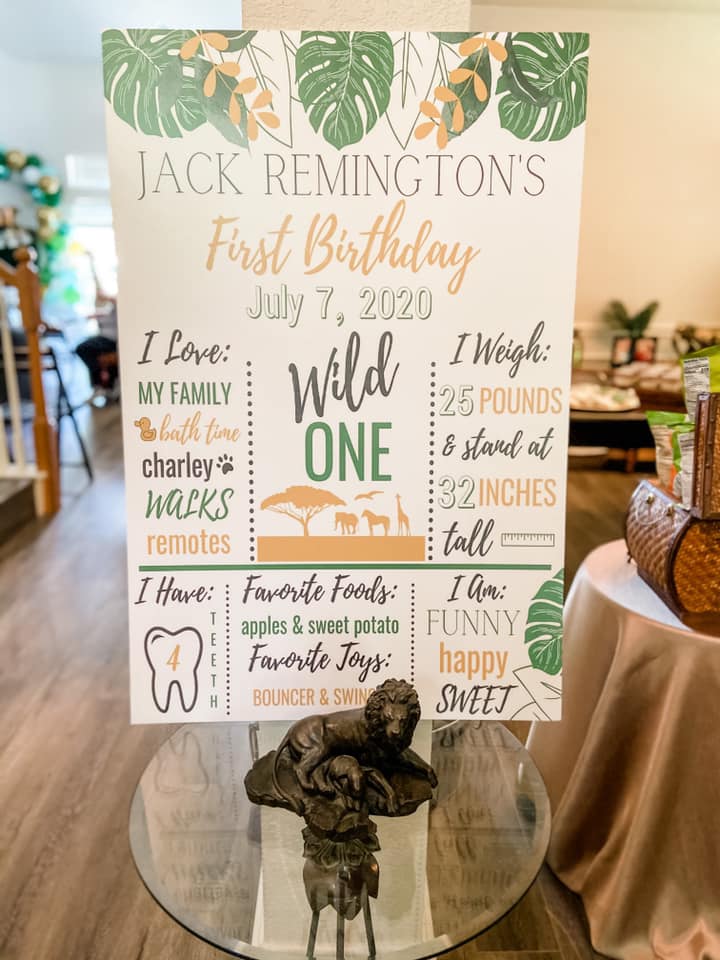
SAFARI MILESTONE BIRTHDAY SIGN

I designed this in Canva and had it printed at our local print shop for about $40. It made such a fun statement piece for the party! 

Time Capsule Activity and Sign
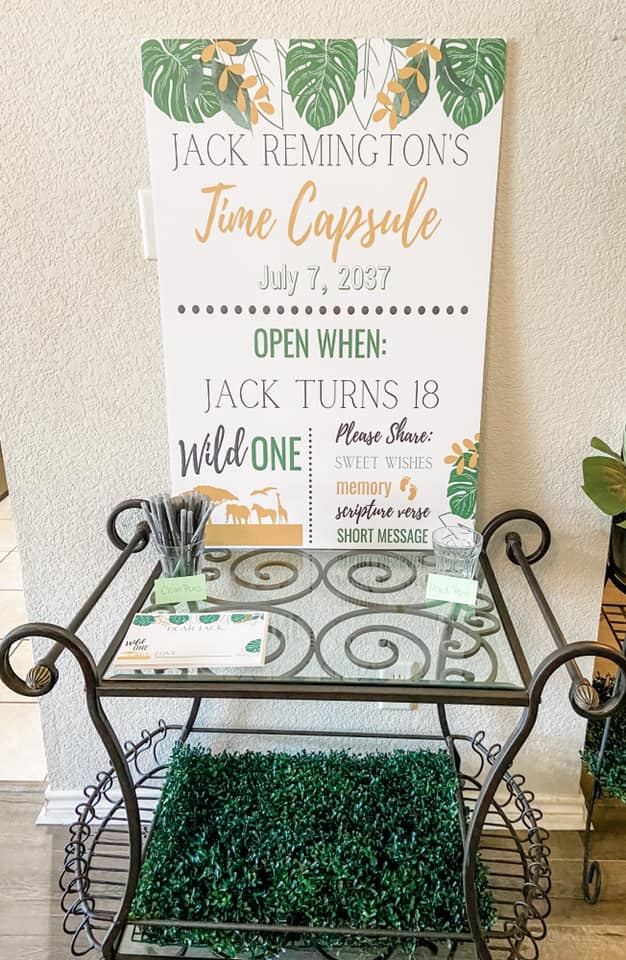
WILD ONE SAFARI TIME CAPSULE

I think this is such a fun and sweet activity for a first birthday party! Since Jack won’t remember the actual party, this is such a fun way to show him how many people were at his party to celebrate him and who love and support him! I made the sign in Canva and had it printed at a local print shop. 

ONE Balloons With Tassel Garland 
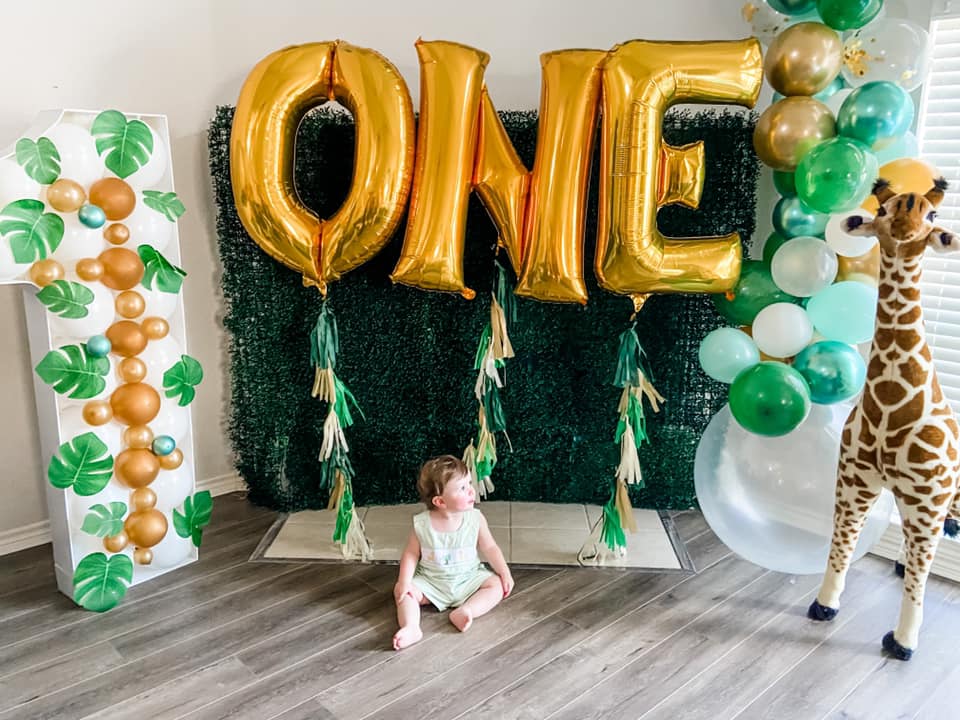
Giant Safari ONE Balloons

I purchased these balloons from Party City and added tassels (the same one form the tissue paper tassel garland) down the string of the balloons. They were SO cute! 

Safari Stuffed Animals “Adopt Me” 

This was such a fun activity for the kiddos to “adopt” a safari friend! I found these adorable safari stuffed animal party favors on Amazon for SUCH a great price! 

Safari Party Headbands 
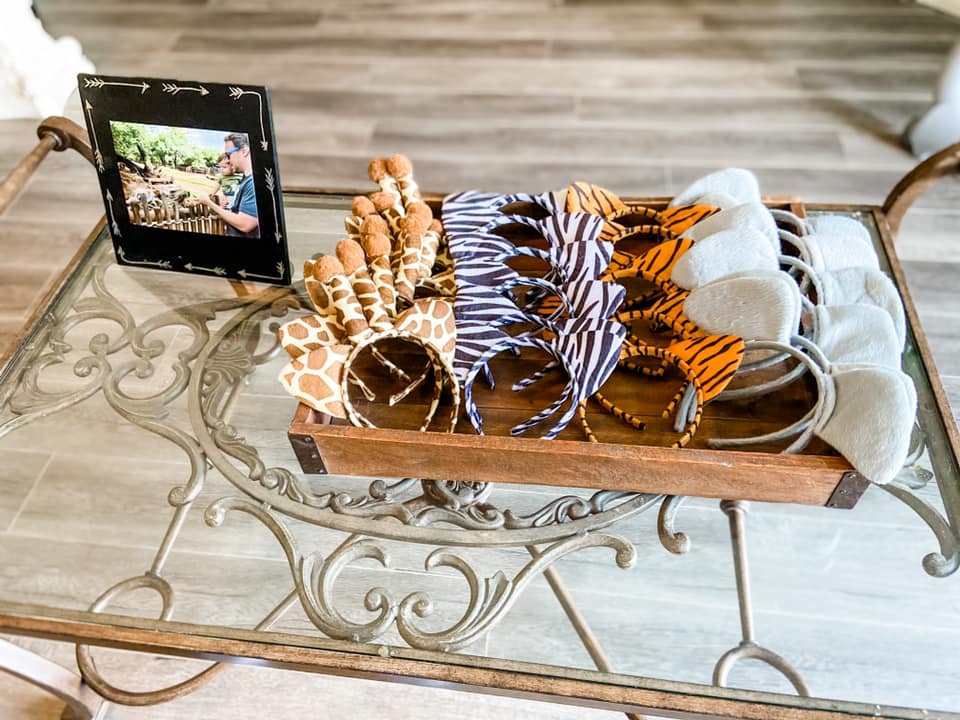
SAFARI BIRTHDAY PARTY HEADBANDS

These safari party headbands were so fun for the kiddos AND the adults! They looked so cute in all of our photos and added a really fun interactive and whimsical element to the party. 

Wild One Safari Water Bottle Labels 
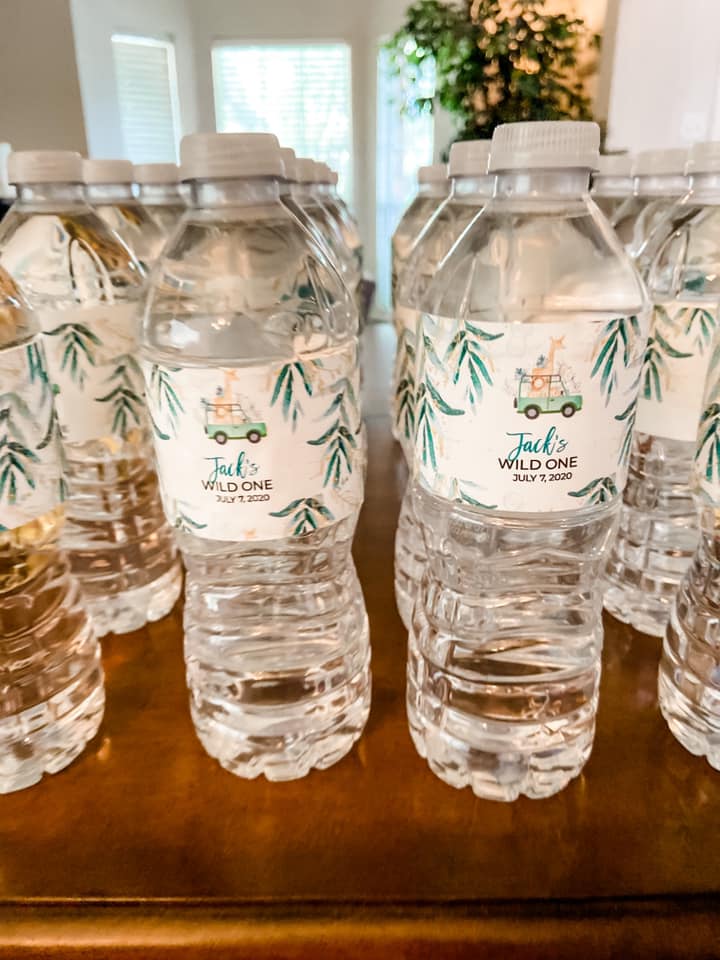
This is such an easy and inexpensive touch to help keep the theme going throughout the party. I purchased this cute design on Etsy and used labels to print them at home. 

Safari Animal Cookie Jar Party Favors
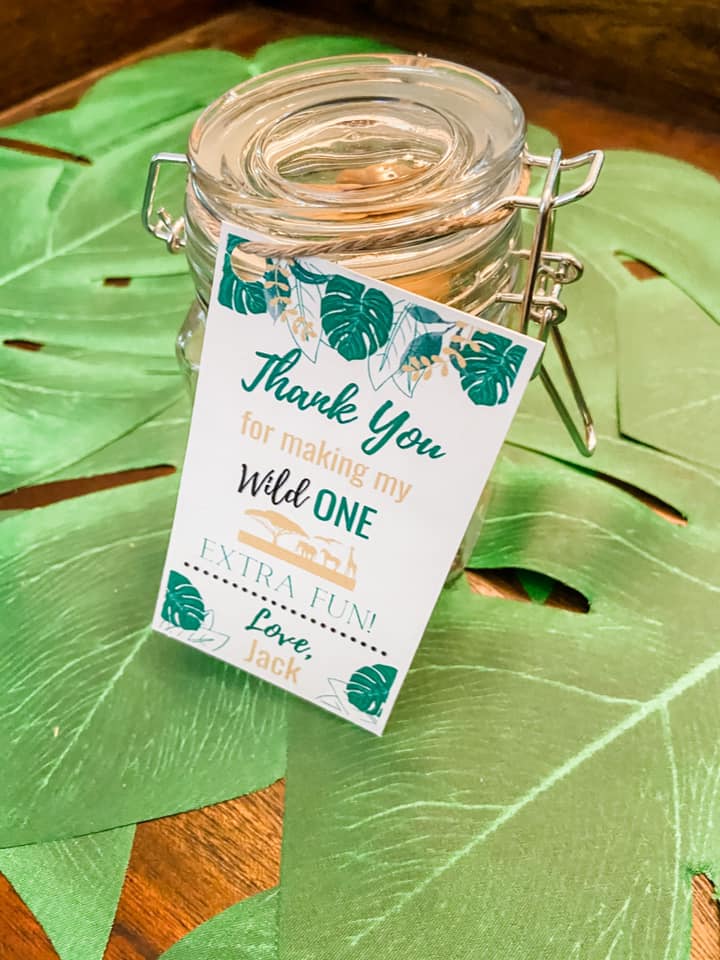
WILD ONE SAFARI PARTY FAVORS

I found these cute jars at Marshalls and filled them with Safari animal crackers I found at Costco. I made the thank you tags on Canva and printed them on my printer at home. 

Lion Veggie Plate
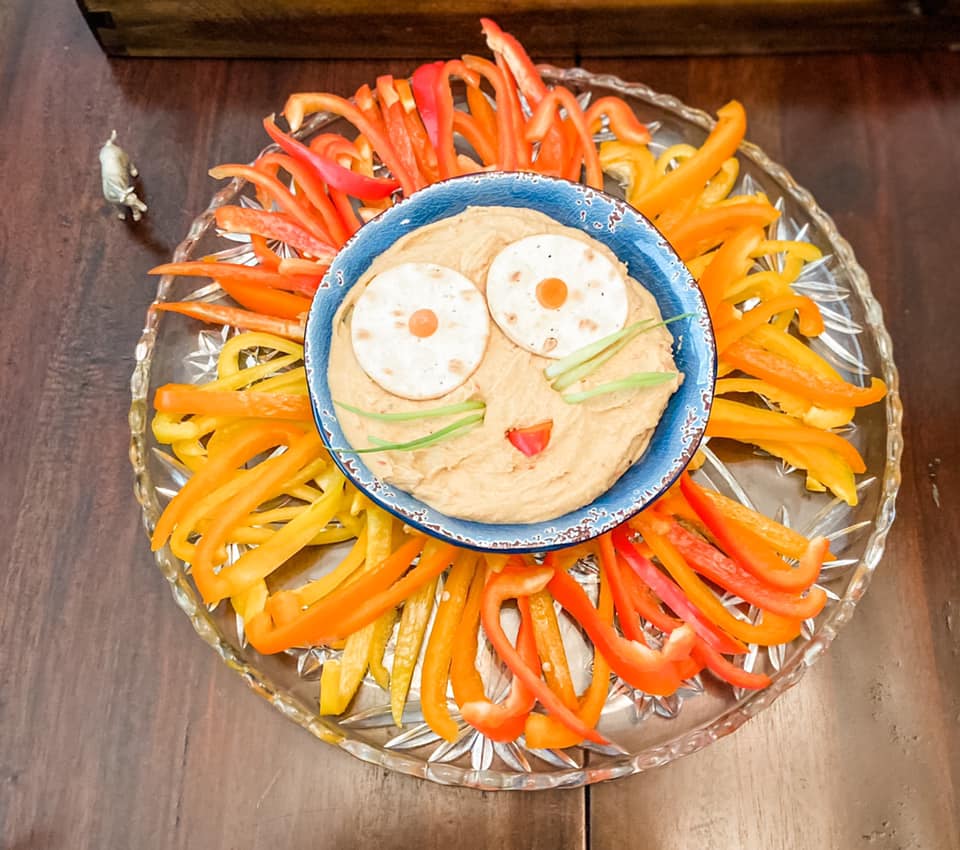
SAFARI PARTY FOOD LION VEGGIE PLATE

I had SO much fun planning and decorating for this party! I hope this post brings inspiration for an extra fun and Wild ONE for your little one! 

Continue Reading

How to Address Envelopes With Your Cricut Maker

This post may contain affiliate links, but all opinions are my own. Please read my disclosure policy for more information. 

The Cricut Maker is amazing. Just AMAZING! I’ll be honest, it took me almost 6 months to finally start really experimenting with everything it can do! I was so nervous I was going to break it or that I would waste my materials because I didn’t know what I was doing! But after a lot of research, fails, and experiments, I am finally creating some fun and beautiful crafts! I am in no way a Cricut expert yet, but I hope to be very soon.

I’m currently creating décor for my sweet Jack’s first birthday party! How in the world is my precious baby boy one?!? I’m having so much fun planning “Jack’s Wild One” and my Cricut is really saving me so much money on décor!

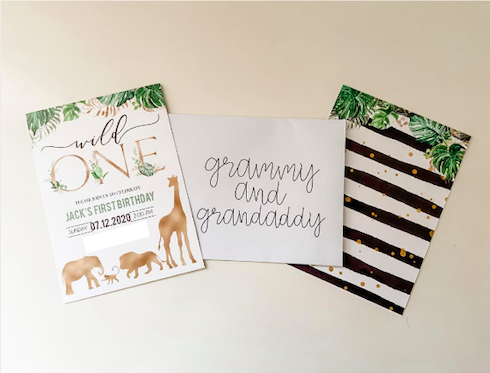
For today’s project, I’m showing you how to create beautifully handwritten envelopes with your Cricut Maker! I found these ADORABLE invitations on Etsy and I want the envelopes to look just as precious. I have been practicing my calligraphy, but it would take me DAYS to finish these envelopes! Thanks to my Cricut Maker, I can work on other party décor projects while my Cricut Maker addresses my envelopes for me!

Ready to get started with your Cricut? Here is what you will need:

Step 1

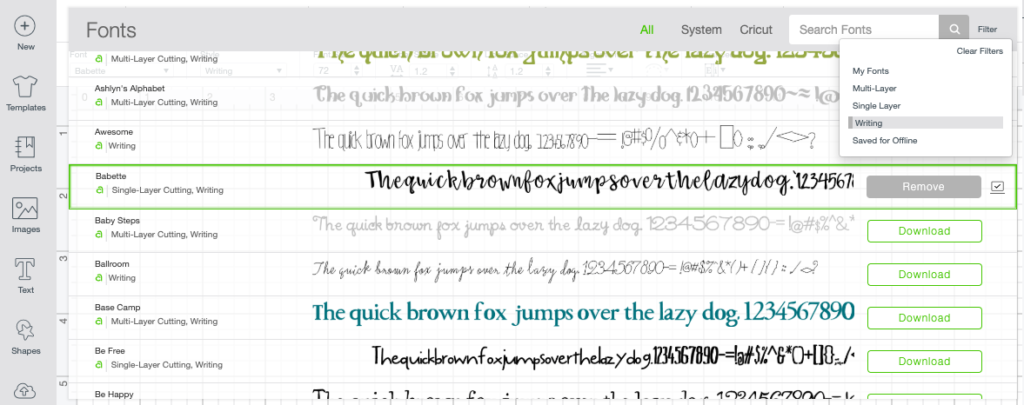
Open Cricut Design Space and start a new project. Open a text box. Select “Writing” under the style box at the top of Design Space.

Select the dropdown under font and filter the fonts to only show you the writing fonts. This will display all font options that will write with your Cricut Maker. For this tutorial, I’m using the Babette font.

Steps to address envelopes with Cricut Maker

Step 2

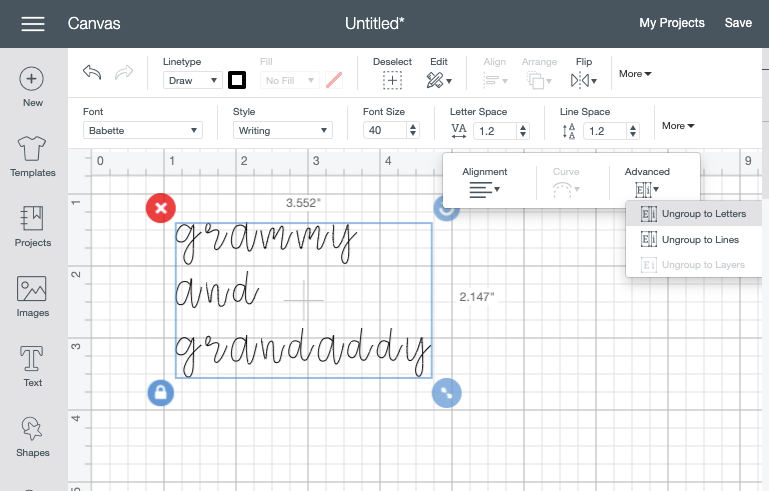
In the text box, type out the sender’s name and address or just their name if you are hand delivering your invitations. Select the text box and select more from the tool bar, advanced, and ungroup to letters. This will allow you to connect each letter to together. Just drag and attach until you like the way each word looks. Once you like how the name and/or address looks, select all words and click “attach” in the bottom right corner. If you would like the return address to show in the top left corner, take the same steps and create a separate text box.

Steps to write with Cricut Maker


Step 3

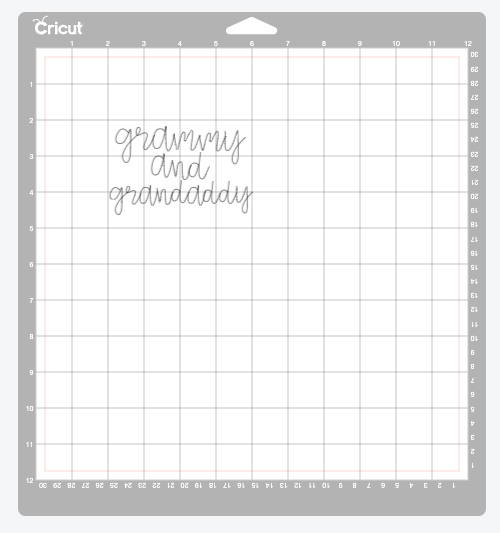
Place your envelope on the blue mat and determine where you want your text on the envelope. For me, I wanted the name and address to be between the 2” and 5” mark in the center of the envelope and the return address to show in the very top left corner. Use the grid to size the text to show between the 2” and 5” mark. Once you have the correct size, select Make It!

Move your text on the mat example exactly where you want it to write on the envelope. Click continue and select Copy Paper for your material. Place your envelope in the top right corner of your grid and press the flashing “load” button on your Cricut. Once it is loaded press the Cricut symbol to start making! You are done! How easy was that? Now just repeat for each new address.
What are some of your favorite fonts for writing with your Cricut?

Continue Reading

How To Make A Taco Cake

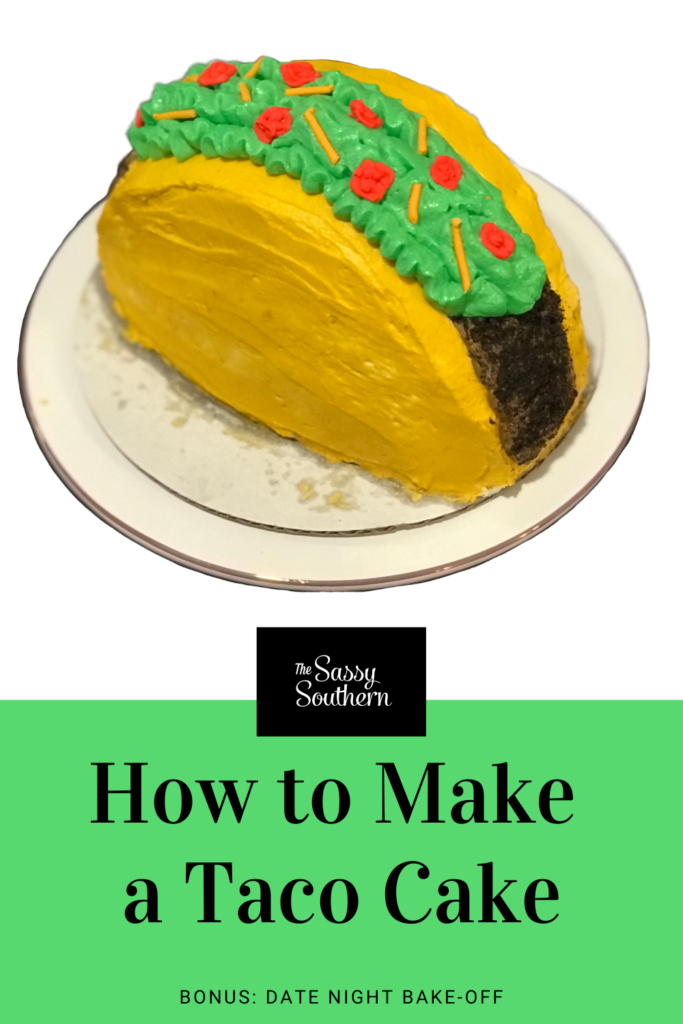
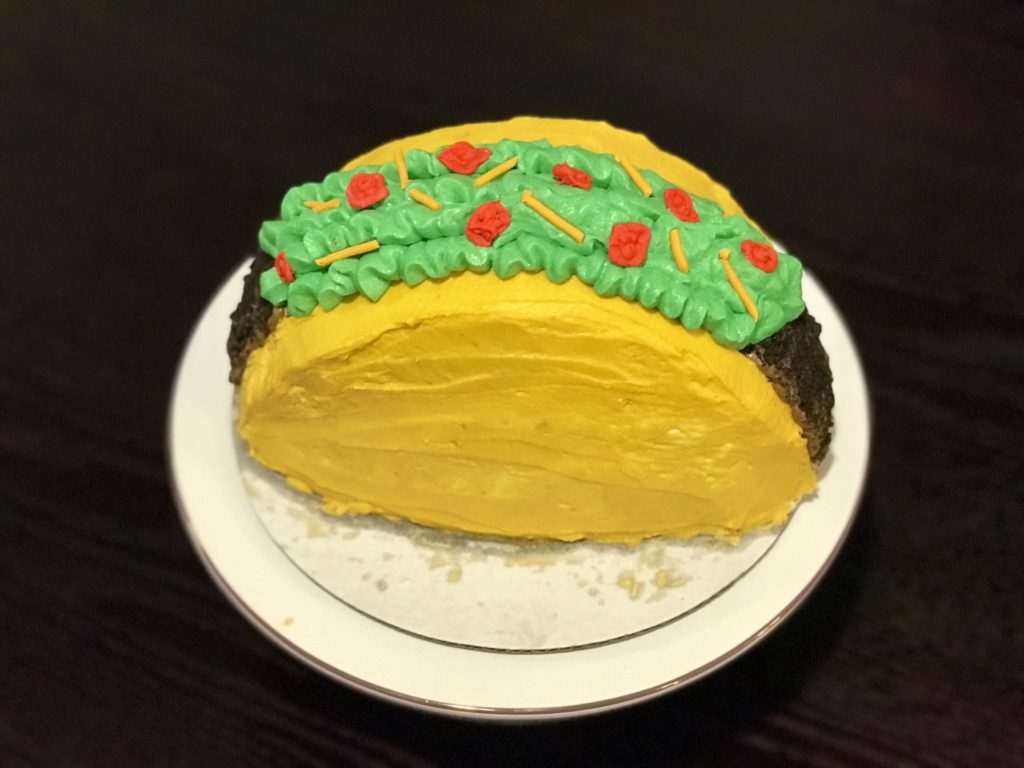
Taco Cake

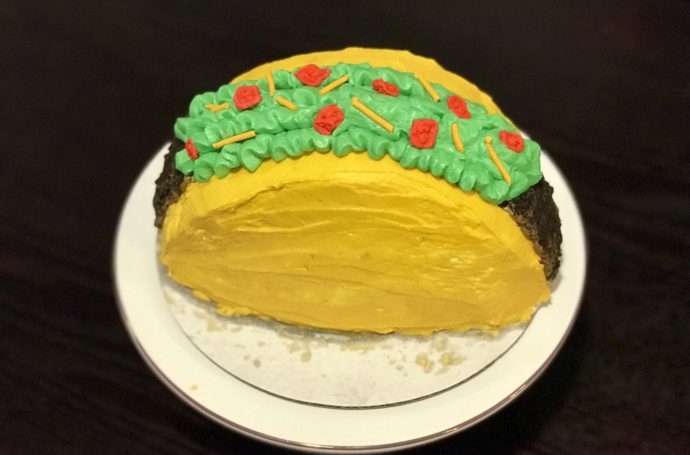
Who doesn’t love tacos? Taco night is definitely a weekly staple in our household. Last year, one of our best friends was having a taco themed birthday party. His wife was planning all the details and mentioned wanting to have a taco cake. I immediately volunteered to make the taco cake because it sounded like a really fun challenge. I had never made a taco cake before, but I figured it couldn’t be that hard, right? Thanks to this amazing tutorial from Studio DIY, it was honestly a piece of cake! Ha! But I definitely learned a couple of things during this process. 

How To Make A Taco Cake

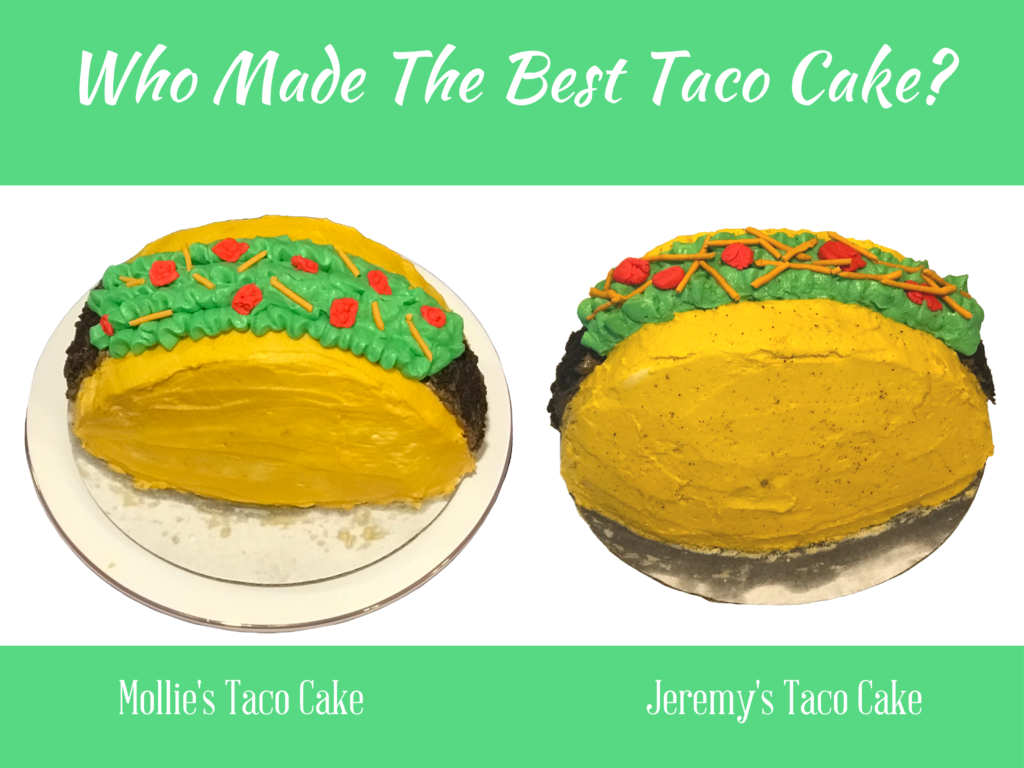
The cake batter I made was enough for two 8-inch round cakes so my husband decided to make one too so that we could have a little bake-off! It was so fun y’all. We took the taco cakes to our friend’s party and had everyone vote on the best looking taco cake. So I HAVE to ask y’all, which one is your favorite? 

Taco Cake

Side Note: See the terrible grease showing on the cardboard from the buttercream? I definitely learned my lesson. See my quick tip below Step 1 to see how to prevent this rookie mistake. Face palm for sure. SO embarrassing. Lesson learned. 

Okay now that you have already made your mental vote, I will tell you that my hunky husband won the votes at our friend’s party.  We both took one different creative liberty while decorating that made our cakes stand out. As I was mixing the yellow buttercream for my taco shell, I left some specs of white in the mix to make it look more like a corn taco shell. Jeremy decided to add some of the crushed Oreos to the frosting on his shell to make it look more realistic.

While I was so annoyed I didn’t win, it was honestly so fun and we had two cakes to enjoy! We even had a request to make another taco cake for another friend’s birthday the following week! And not that I’m bitter or anything, but my husband is a dentist so he is required to have steady hands while working with hand tools on a daily basis. Again, not bitter or anything! =P I’m honestly so proud. 

Date Night!

For a fun date night, enjoy these super easy chicken tacos for dinner and have a taco cake decorating competition for a fun activity and dessert! 

Are you ready to make your own taco cake? Gather all of your supplies and let’s get to decorating! 

Taco Cake Supplies and Ingredients: 

  • 1 8-inch round baked cake 
  • 1 Batch of Buttercream (Check out one of my go to recipes from Paula Dean) 
    • I started with 1 batch of buttercream, but depending on your recipe, you may need to make half of a second batch to make sure you have enough. 
  • Red Food Coloring
  • Green Food Coloring
  • Yellow Food Coloring
  • Brown Food Coloring
  • Orange Food Coloring
  • Crushed Oreos
  • 3 Tbsp. Meringue Powder
  • 4 Cups Powdered Sugar
  • 5 – 7 Tablespoons Warm Water 

Step 1: 

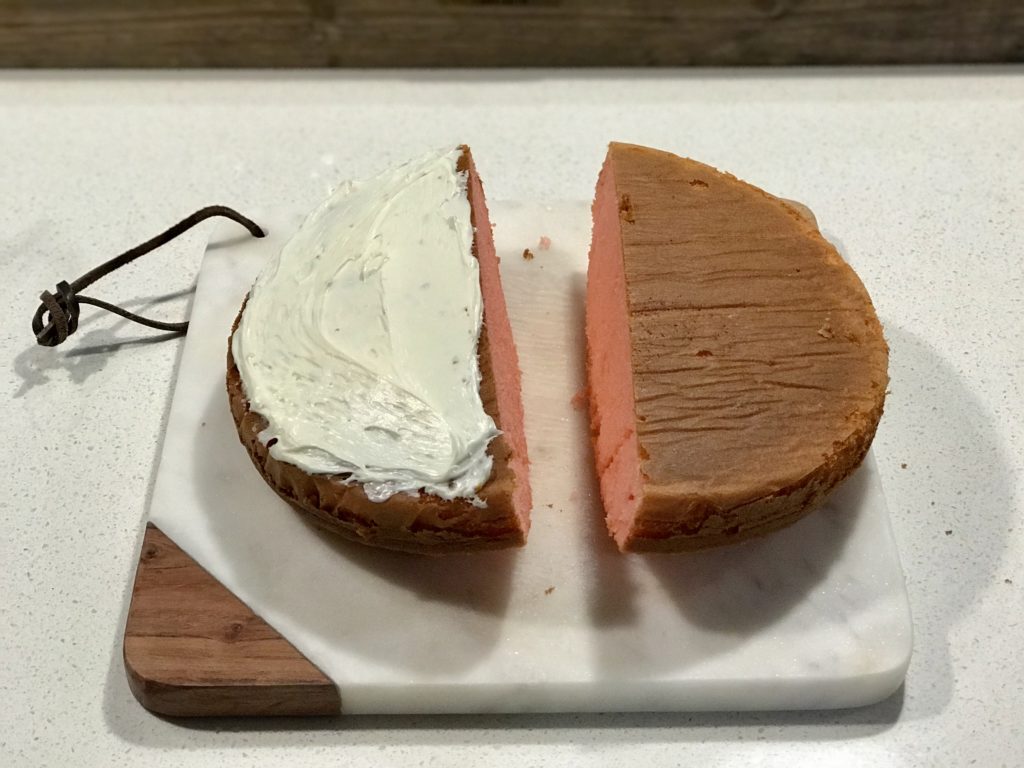
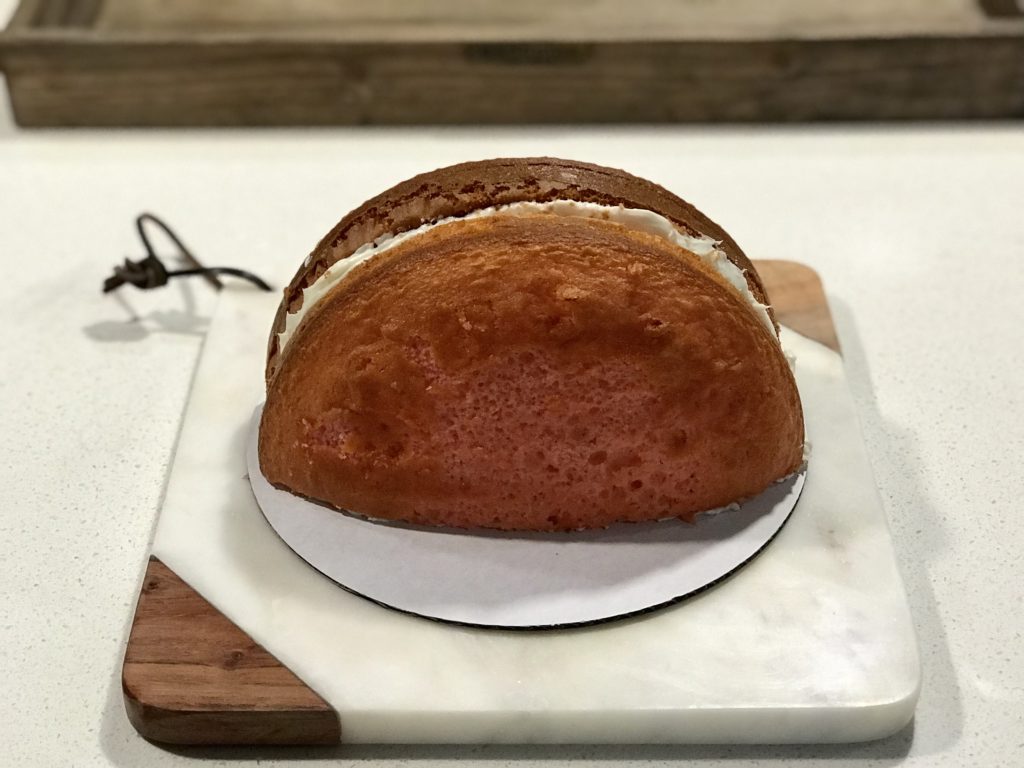
Cut your 8-Inch round cake in half. Spread buttercream on the bottom of each cake half and sandwich them together. This will act as your filling so be generous! Spread a little bit of buttercream on the flat edge of your sandwiched cake and place the flat edge on your cake stand. You should now have the shape of a taco on your cake stand. 


How to Make a Taco Cake

Decorate A Taco Cake

Quick Tip: As you can see, I made the rookie mistake of using a round cardboard cake board as my base to decorate. Since my cake is not round, you see SO much cardboard and it just looks terrible! And once you start decorating, there is no moving the cake without absolute disaster! This is why I recommend first placing it on the cake stand you plan to serve the cake on. 

Another Quick Tip: The birthday boy requested a strawberry cake, so of course that is what he received. However, the strawberry cake did make it look like raw taco meat when we cut into the cake. Ha! SO if you don’t have a cake flavor preference, a chocolate cake would be the most appetizing visual in my opinion. 

Step 2: 

Cover the cake in a thin layer of the buttercream frosting and place it is the fridge for 30 minutes to chill. This is known as your crumb coat to prevent crumbs from getting into your final layer of buttercream. 

Step 3:

Taco Cake Decorations

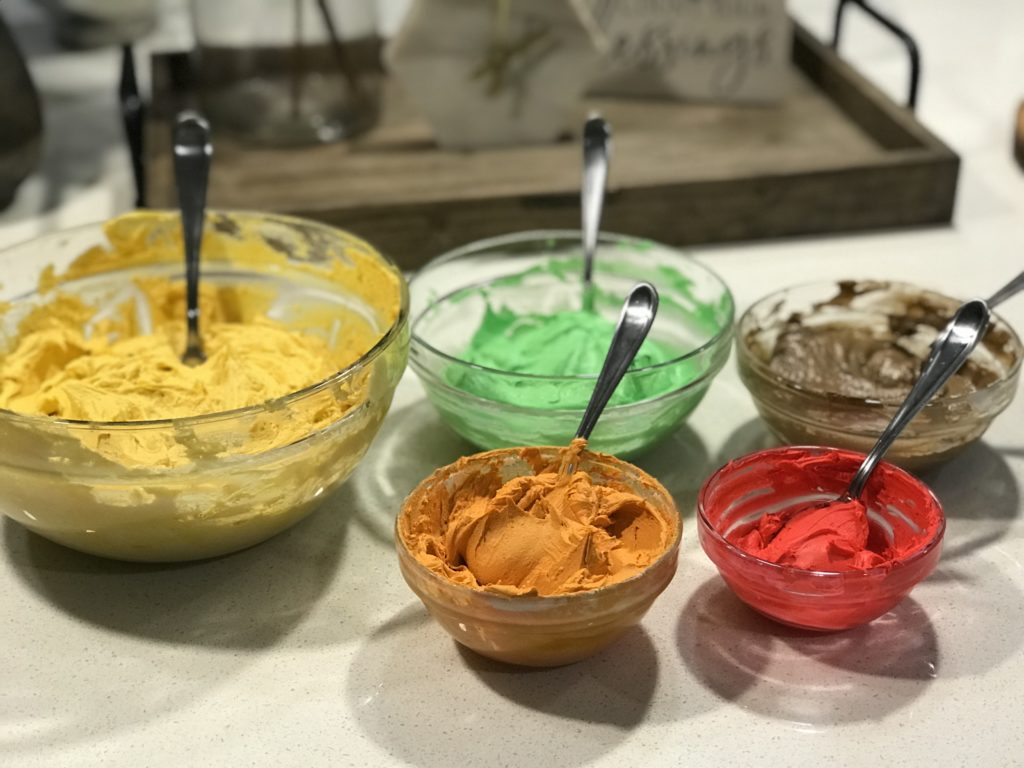
While the crumb coat chills, make your buttercream and icing paste colors. 

Buttercream:

¼ cup brown buttercream.

¼ cup green buttercream

Color the remaining buttercream yellow

Icing Paste:

Mix the meringue powder with 5 tablespoons of water to form the icing paste for the cheese and tomato toppings. You want it to be thick, but thin enough for you to pipe. Just add a tablespoon at a time until you have the right consistency. I personally needed 6 tablespoons of warm water. 

Step 4: 

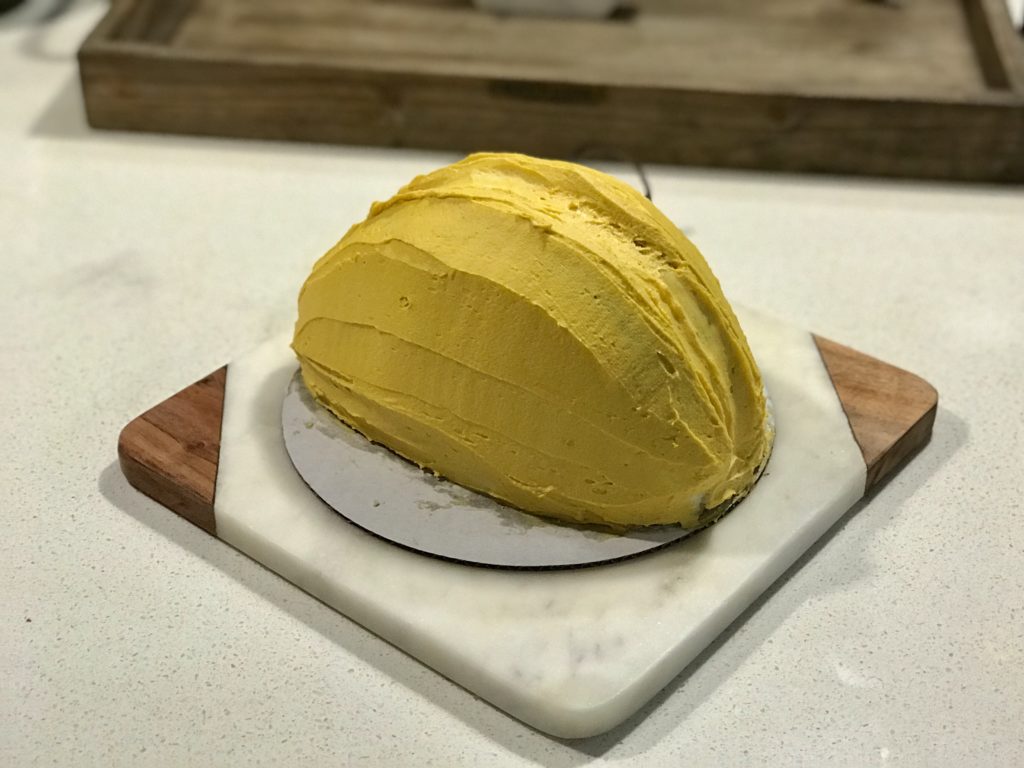
Remove the cake from the fridge and cover the cake in the yellow buttercream until the cake looks like a yellow taco shell! 

Taco Cake

Quick Tip: Use a knife or frosting spatula to smooth the top of the taco and help create a groove for your toppings. See how the picture above doesn’t quite look like a taco? Keep working with your knife or spatula until you have more defined edges on top. I worked on this step until I was pleased with the top. 

Step 5:

Place your brown buttercream in a piping bag and cut a small whole at the bottom of the bag. Fill each side of the taco with the brown frosting about ¼ of the way up each side of the taco. Carefully coat the brown frosting with the crushed oreo pieces to make the “ground beef” for the taco. 

Place your green buttercream into a piping bag and use the Wilton 366 Leaf Tip to pipe the lettuce on the top of the cake. You will cover the remaining yellow top of the taco cake with the lettuce buttercream. 

Quick Tip: Practice using the leaf tip on a paper towel before you pipe the buttercream lettuce on top of the cake.

Step 6:

Divide the icing paste into two bowls and color one red and one orange. Add each icing color to a piping bag with a round tip. Pipe small lines onto parchment paper to make the shredded cheese. For the tomatoes, pipe tiny squares to resemble diced tomatoes. Let the toppings sit until set enough to remove with a knife or small spatula. I waited about 10 minutes.

Place the shredded cheese and tomatoes on top of the cake to finalize your beautiful and delicious taco cake! 

Taco Cake

I would LOVE to see your finished taco cakes! Please leave me a link to your post below. If you want a little more inspiration, check out this Nailed It! themed emoji cake decoration competition I had one my friends last year!

Cake Decorating Emoji Cake

Have you made an awesome cake? I would love to see your finished cakes! Happy decorating, friends!

Continue Reading

Staches or Lashes Baby Gender Reveal Party

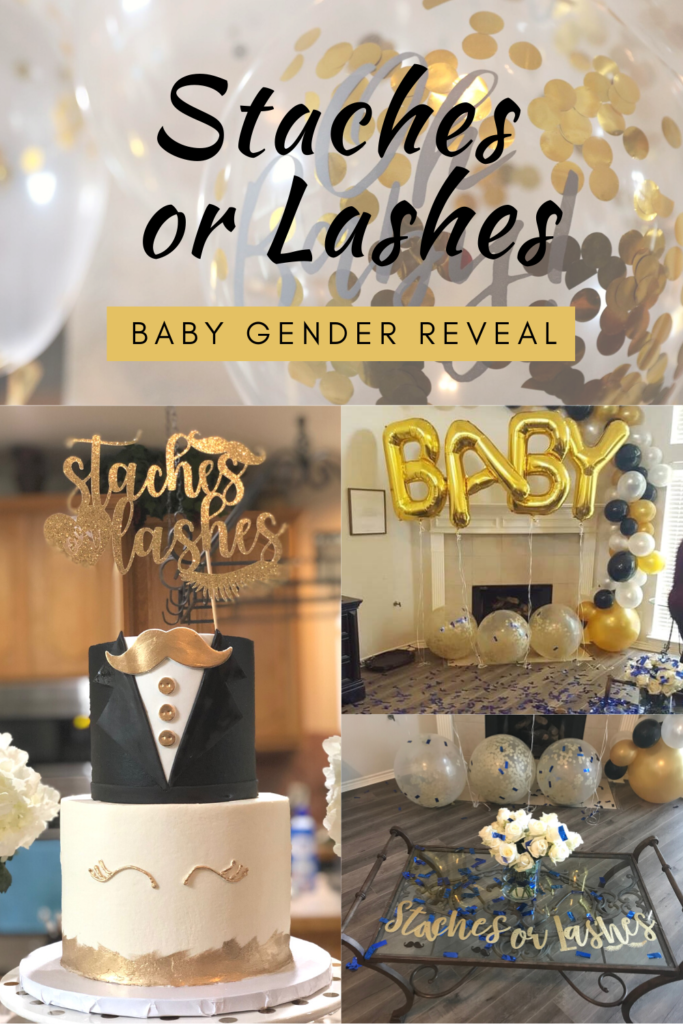
Staches or Lashes Gender Reveal

Oh I just LOVE gender reveal parties! For me, this was my first baby and I was just overwhelmed with excitement and emotion. I honestly didn’t care if I was having a boy or a girl, I was just beyond excited to be a mommy and I wanted to celebrate! 

Staches or Lashes Gender Reveal

There are so many cute theme ideas for a gender reveal party. Tutus or Touchdowns, Bows or Burnouts, and the classic Pink or Blue theme. However, the Staches or Lashes theme was absolutely perfect for us! My husband has grown a curly mustache for Movember for several years and I am all about some lovely lashes. 

The Reveal! Staches or Lashes? 

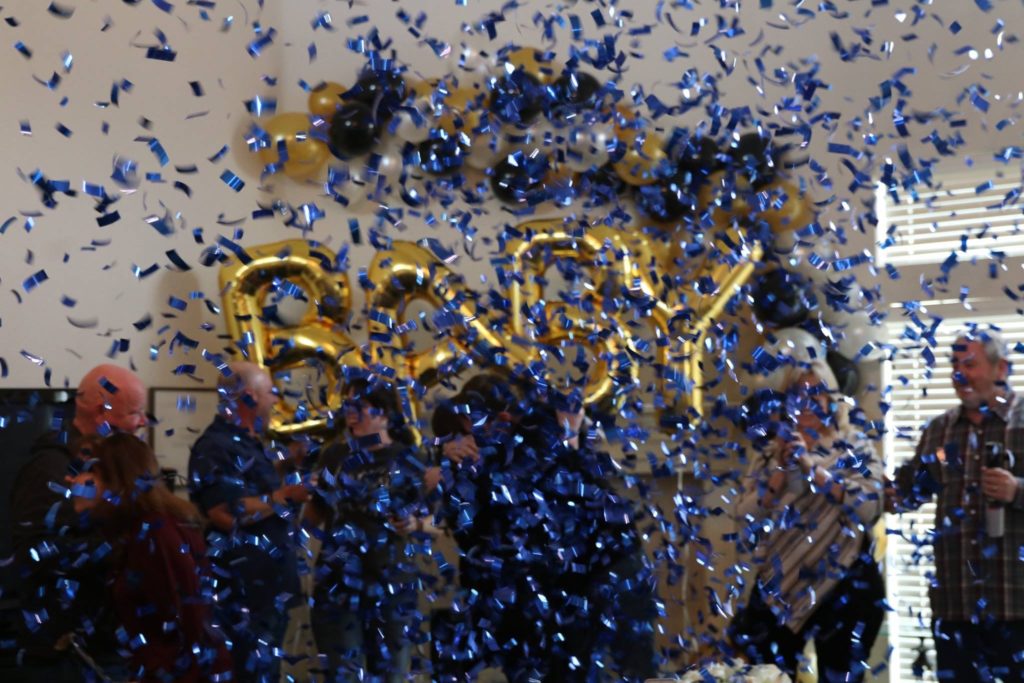
Blue Confetti Cannon Gender Reveal

I wanted the reveal to be spectacular. After a lot of research, I decided to use confetti cannons. I purchased confetti cannons from Holi Cannons on Etsy. Y’all. I HIGHLY recommend this shop. The price is so reasonable and they are so impressive! I wanted our family to participate in the reveal, so I ordered 10 confetti cannons in blue and 10 confetti cannons in pink. The confetti stays in the air for a long time, so the videos and pictures are perfect. I had my doctor write the gender on a piece of paper and seal it in an envelope. I gave the envelope to my dear friend Sarah and she was responsible for bringing the correct confetti cannons to the party. For a fun little extra, she also called the bakery so that they could incorporate a blue or pink buttercream inside of the cake. 

The Gender Reveal Party Cake

Gender Reveal Cake Lashes or Staches

As soon as we had the theme, I immediately ordered the cake. The cake for any event acts as the centerpiece of the decor and I wanted this cake to stand out! I saw a few ideas on Pinterest that I liked, but nothing exactly like I was picturing. I drew a really terrible sketch of what I wanted and called Sugar Bee Sweets Bakery in Arlington, Texas. Y’all. If you are anywhere in the Dallas/Fort Worth metroplex, I highly recommend Sugar Bee Sweets. They are so professional and their cakes taste even better than they look! After going over what I wanted for the cake, they asked me to email my sketch and created exactly what I envisioned. It was stunning and oh so delicious! I found this adorable gold glitter cake topper on Etsy and it totally completed the cake. 

The Staches or Lashes Decor

Staches or Lashes Guest Favors: How did we ever plan parties before Etsy and Pinterest? I found these super cute lashes and staches glitter pins for the guests to wear to represent their guess. 

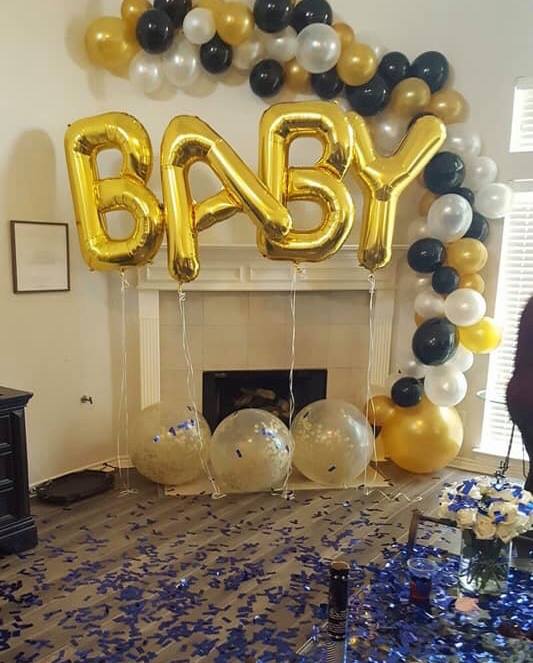
Balloon Arch and Balloons: Balloon arches have become one of my favorite party staples. They are perfect for a statement wall and are really inexpensive to make. Check out my post on how to make your own balloon arch! We purchased all of the balloons for the balloon wall from Party City. 

Baby Gender Reveal Balloon Arch

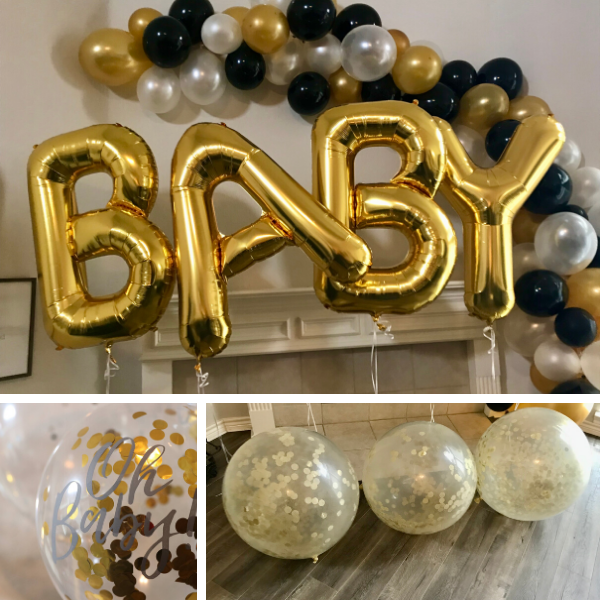
These super cute gold confetti “Oh Baby!” balloons from Hooray Days on Etsy are absolutely adorable! We also purchased 36” clear balloons from a local party store and filled them with gold confetti. These looked so fun on the floor and some of our younger guests really enjoyed playing with them during the party! 

Staches or Lashes Banner: This glitter Staches or Lashes banner looked so great with our blue confetti and was a great prop for the photo backdrop. 

Gender Reveal Balloon Decor

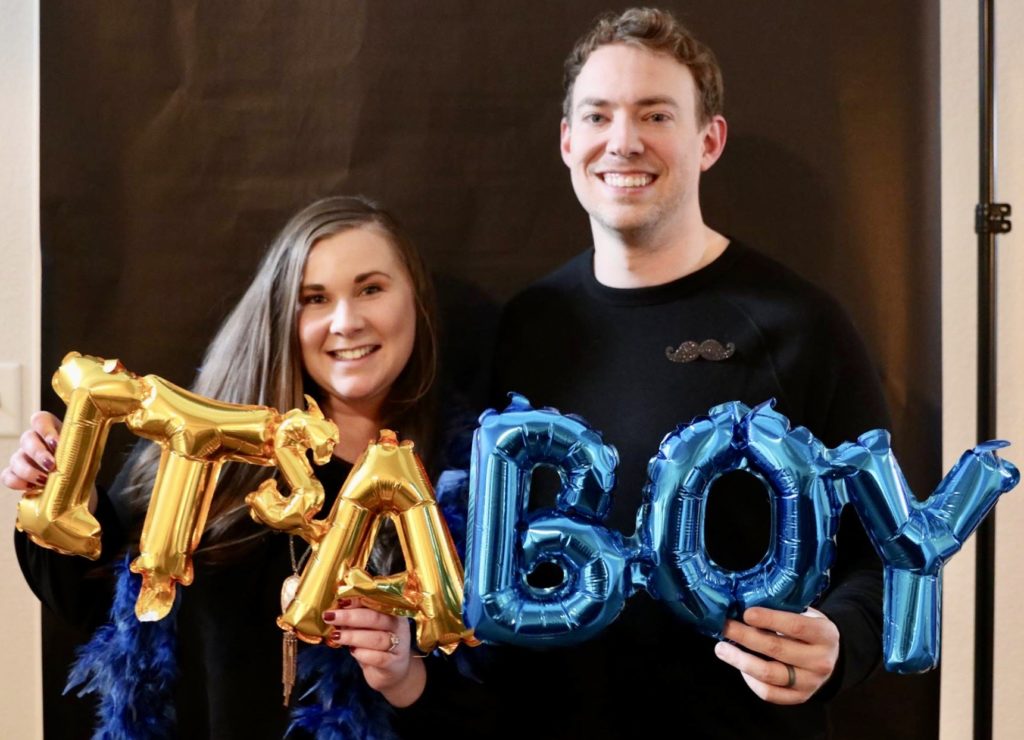
Photo Backdrop: While I know this isn’t the most impressive photo backdrop ever created, it was a last-minute addition and was really fun! One of my best friends happens to be a super talented photographer and let us borrow one of her backdrop stands. We purchased a roll of black butcher paper to hang from the backdrop stand and added some fun props for guests to use. One of my other best friends had quite a few props for us to use and we purchased these really cute and inexpensive gender reveal baby shower balloons from Party City.

Gender Reveal Photo Booth

Hooray! It’s a boy! This theme was so much fun and I loved every minute of this gender reveal. 

Have you hosted a gender reveal? I would love to see your party theme and pics! Please leave me a comment below so that I can check it out!


Continue Reading

Dinner Party Theme: Nailed It! Cake Competition

Cake Decorating Emoji Cake

In honor of the FOURTH season of Nailed It! debuting on Netflix, I thought I would share a super fun dinner party night we had with our friends last year! A Nailed It! cake decorating contest!

Please note, this was definitely before quarantine, so while you can’t do this in person with a large group of friends right now, you can do this with your quarantine crew, or even try it virtually! 

Some of my very best friends in the whole wide world have been my besties since we were in 2nd grade. Thankfully, all of our now husbands are friends too (did they have a choice?) and we just know our children will be besties for life. We will find any excuse to hang out and it usually involves food! We all LOVE watching baking shows together and we especially love Nailed It!, so we decided to have our very own Nailed It! competition!

We set very strict rules and guidelines (not really) and had our husbands judge the final winner. Our husbands are also super fun and took this very seriously. They had a grading rubric, sat at the kitchen table in hushed conversations while we waited patiently in the other room, and they even walked in from outside while playing the music to The Great British Baking Show. Totally wrong show but we loved the dedication. 

Honestly, we all surprised ourselves with how well the cakes turned out and they were all so tasty! Full disclosure, we gave ourselves four hours to bake and create our masterpieces, so we definitely had more time than the contestants on Nailed It!. Here are the guidelines we used for our competition. 

Cake Decorating Baking Competition

The Baking and Cake Decorating Guidelines 

  • Bake and decorate an emoji cake.
  • Use a box cake or make it from scratch, but contestant will receive bonus points for a cake completely from scratch. 
  • Contestant must make the buttercream, but they can use store bought fondant.
  • Contestant must include a filling in your cake. 
  • Contestant has four hours from start to finish.

We had initially planned to make our cakes, frostings, and fillings in our own kitchens and then decorate and assemble together. However, one of our friends gave a super vague reason as to why she needed to do hers completely at home and just bring it over before dinner. Are you thinking we have a cheater on our hands? Because the rest of us all thought the same thing. We were convinced she was going to use way more than four hours, but we let it slide and agreed.

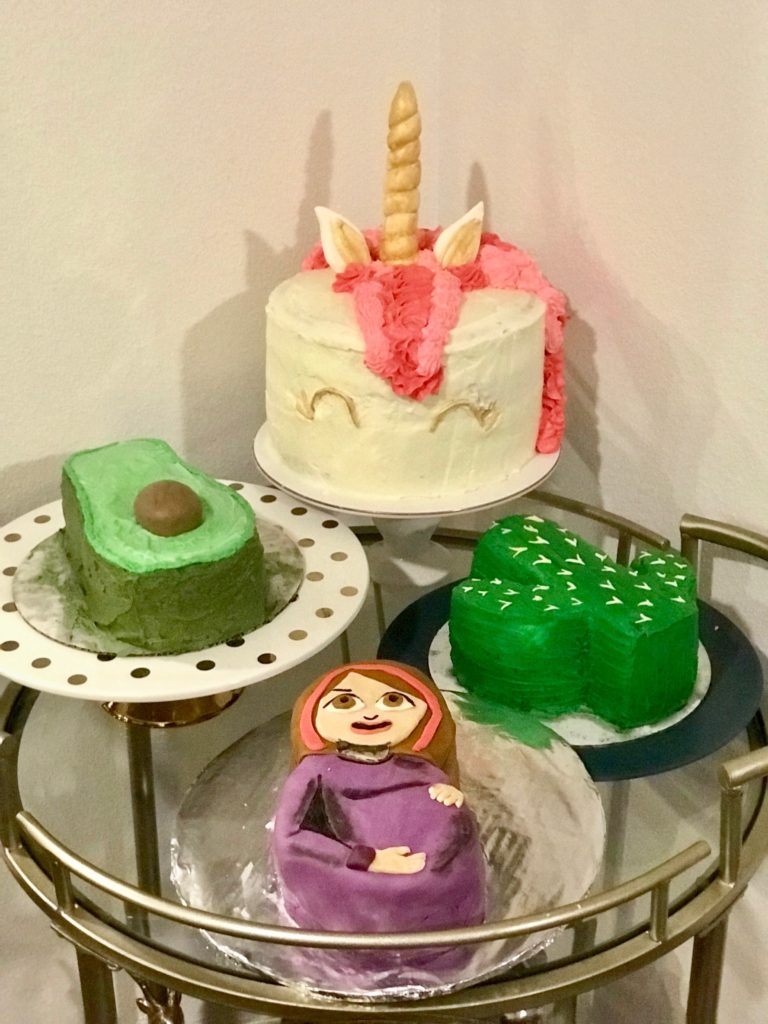
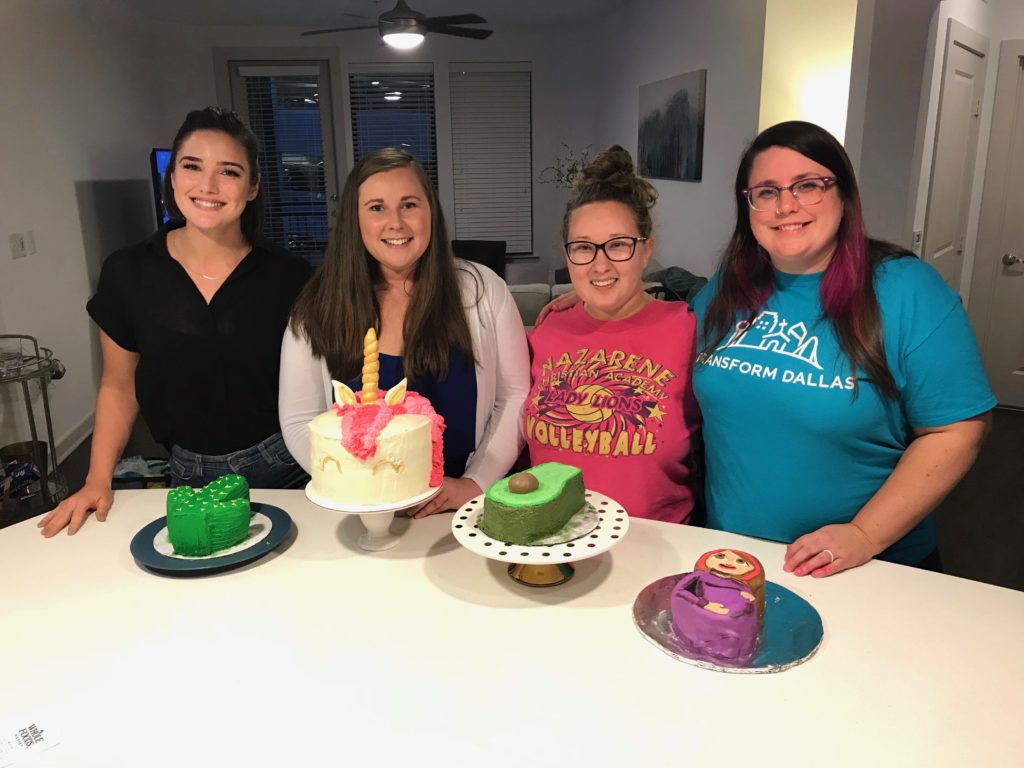
When she arrived for dinner, her cake was completely covered and she didn’t want to take it out until we finished dinner. We had all of our cakes lined up on the island ready for the judging. Finally, she lines all of us up in front of the island and reveals her secret cake. When she pulled the cover off, we all started screaming. Instead of making a fish emoji cake like she told us initially, she made the pregnant mommy emoji. She was pregnant! And not just pregnant, pregnant with TWINS that we would all later find out were actually TRIPLETS! Yes, TRIPLETS! This was such a fun surprise and made our night. 

Cake Decorating Emoji Cake

The Judging 

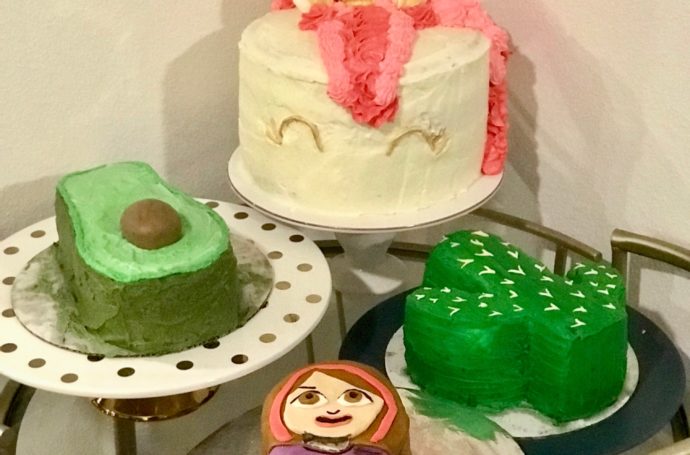
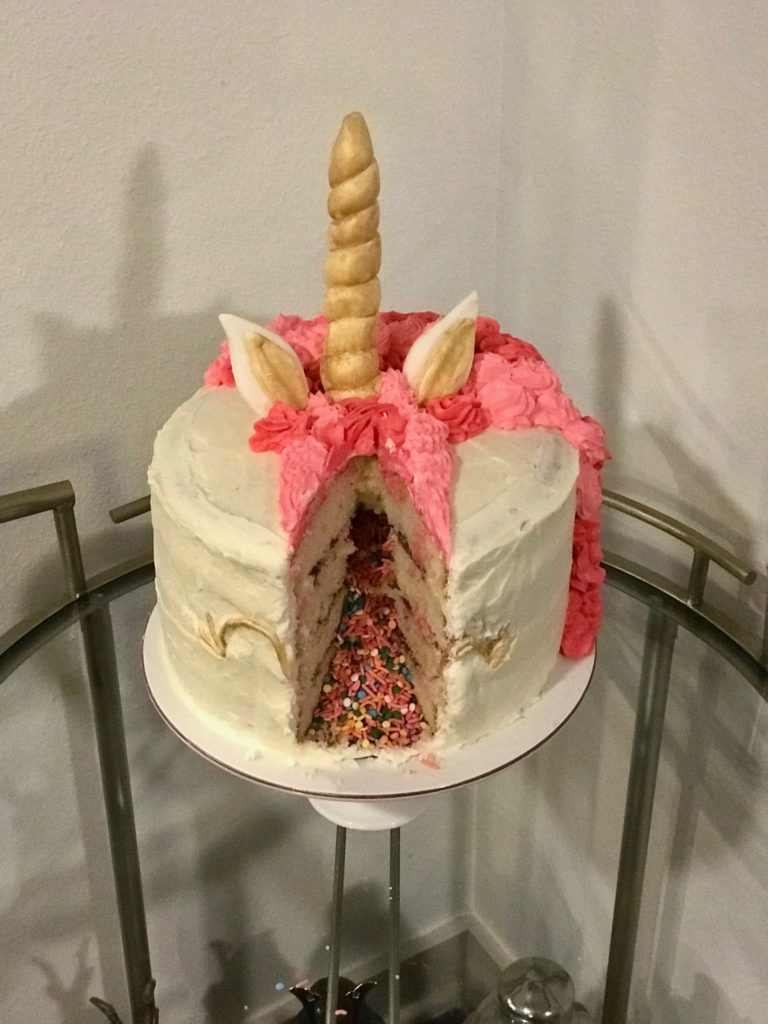
Based on the super fun surprise pregnancy announcement, how could her cake not win?! It really was so great! But our husbands knowing all of us very well, decided to award each cake something special. But let’s be honest, pregnancy announcement cake trumps all other cakes! While I enjoyed all of the cakes, I was so proud of my unicorn cake! It was a four tiered white chocolate raspberry cake with white chocolate buttercream, a raspberry filling and a sprinkle center! 

Unicorn White Chocolate Raspberry Cake

This was such a fun and inexpensive group activity and made for a great dinner party with oh so many yummy cakes! Have you had a baking or cooking competition? I would love to see your results! For more fun cake decorating ideas, check out my taco cake post! 

Taco Cake


Continue Reading

Floral Baby Shower Party Décor

Baby Shower Paper Flower Decor

This post may contain affiliate links, but all opinions are my own. Please read my disclosure policy for more information. 

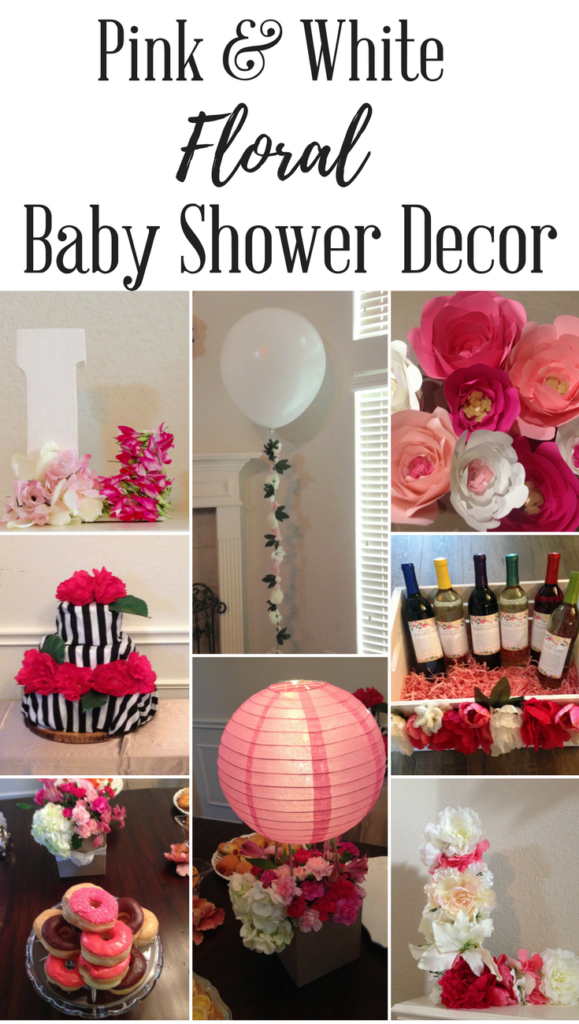
Pink and White Floral Baby Shower Decor

I love planning baby showers. There are so many creative décor themes and I love finding new DIY crafts to conquer. When I’m asked to host a baby shower, the first thing I like to do is ask the mommy-to-be if she has a certain vision for the shower. This is such a big day for the mommy-to-be and daddy-to-be, so I always want to make sure that it is what they want. If they don’t have something in mind, I will usually suggest three themes that I am envisioning and we will go from there.

The Baby Shower Theme

Floral Baby Shower Decor Crafts

For today’s featured baby shower, the floral baby shower décor was not difficult to select. This sweet shower was for precious baby Lily. I talked with the mommy-to-be and asked what colors she was doing for the nursery. I wanted to make sure that she could incorporate any of the décor that she wanted to keep into the nursery. Since she was doing pinks and whites for the nursery, I used those colors for the majority of the décor.

The Invitations, Thank You Notes, and Guess The Date Calendar

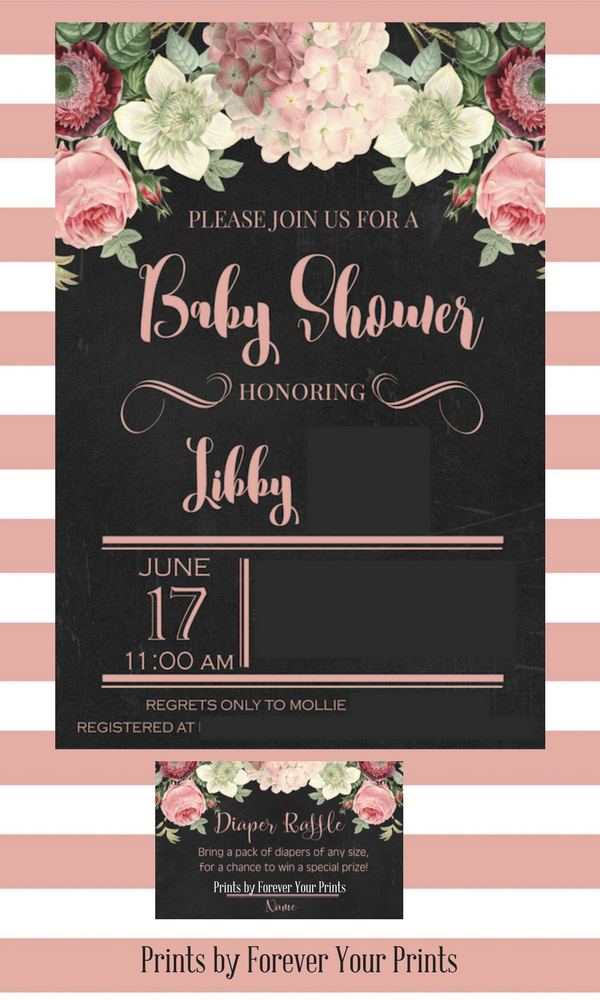
Designed by Forever Your Prints

Baby Shower INvitations by Forever Your Prints

I had so much fun searching for the perfect invitation! The invitation for a party sets the entire scene, so it is important to make sure it is absolutely stunning! I found so many beautiful invitations on Etsy! I decided to narrow it down to three and let the mommy-to-be choose! She finally decided on this gorgeous design by Forever Your Prints on Etsy!

I also love diaper raffles! When you order the invitations, make sure to also order diaper raffle cards! Include the diaper raffle card in the invitation. If guests would like to participate in the raffle, ask them to bring a pack of diapers to the shower and their name written on the raffle card. As they arrive, collect the diapers and drop all diaper raffle cards in a jar. During the game portion of the shower, draw a raffle winner and award them with a really fun prize! Just remember to make the prize extra special since the guests are bringing an additional gift! I love diaper raffles because guests don’t feel obligated to participate and it is a great way to collect a nice stash of diapers for the mommy and daddy-to-be!

I also ordered thank you notes in the same design! I had a station at the party next to the guest book and I asked the guests to please fill out their address on an envelope. This saves the mommy and daddy-to-be a lot of time and makes thank you notes a breeze! Also, don’t forget to keep track of who gives what during presents! That list will be very helpful when it comes time to send thank you notes! 

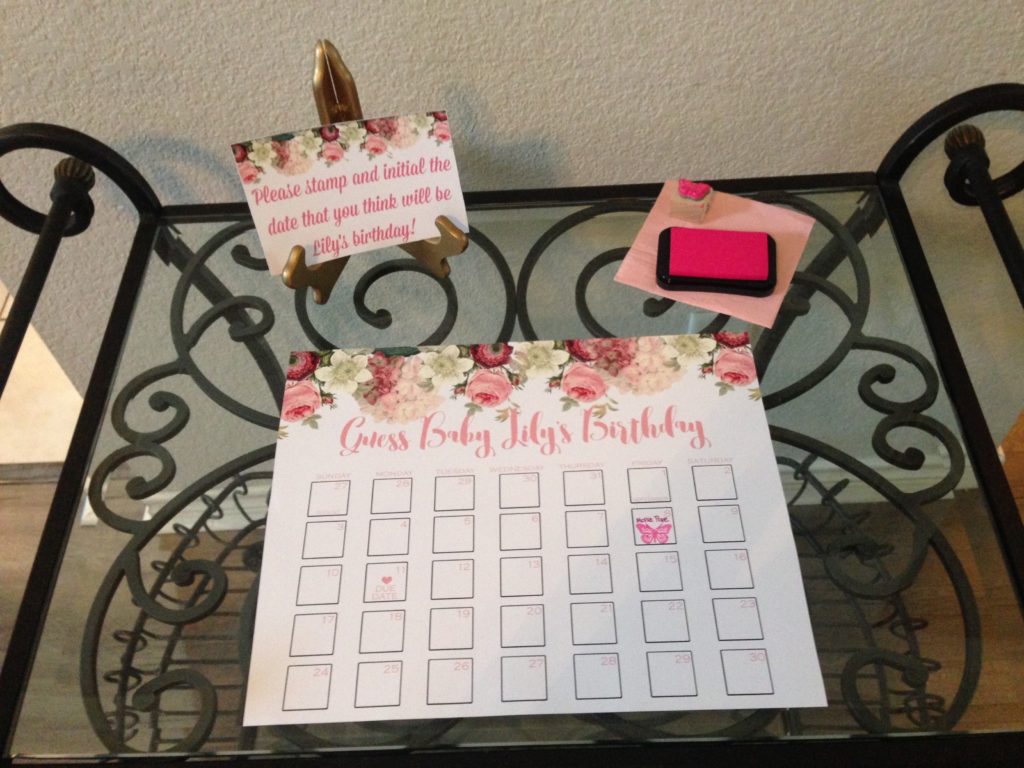
Guess The Date Calendar

This adorable shop also makes Guess The Date calendars! For those who are not familiar, a guess the date calendar is for guests to guess what date they think the baby will arrive! I purchased a butterfly stamp with pink ink and had all of the guests guess their date!

The Baby Shower Décor

Baby Shower Paper Flower Decor

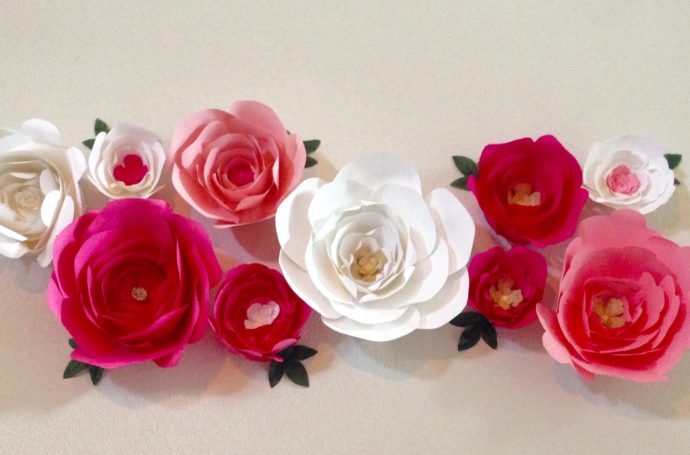
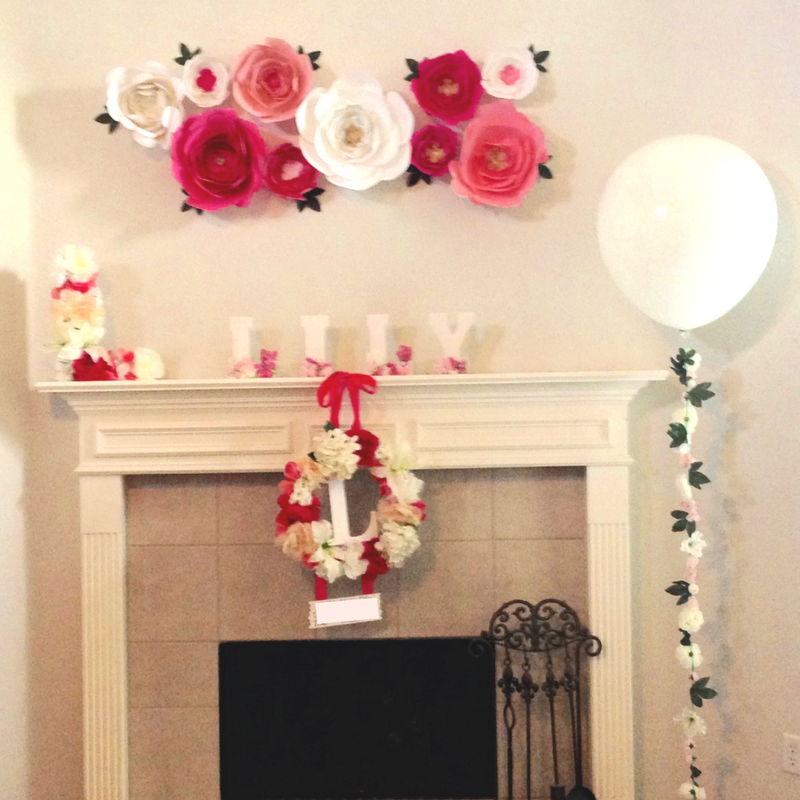
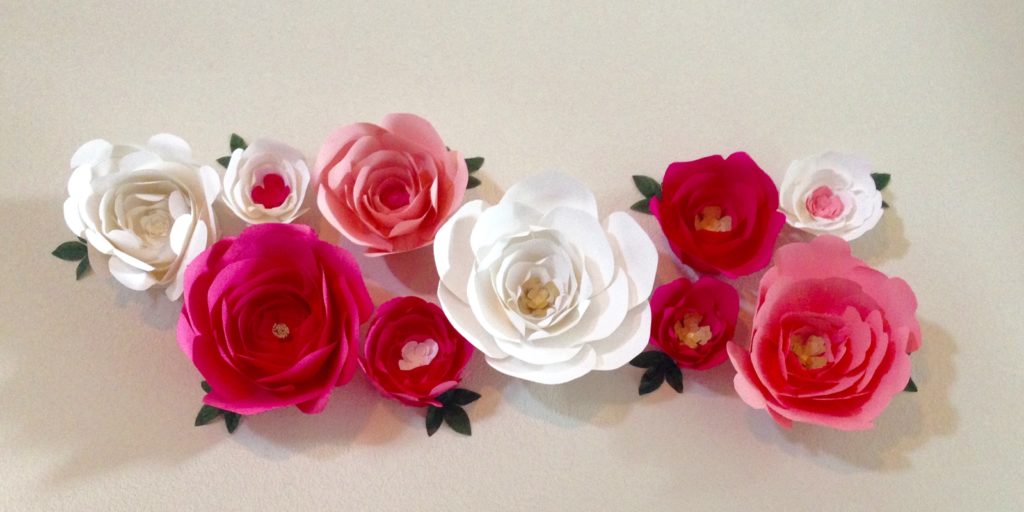
I wanted everything to be covered in flowers with a show-stopping backdrop for the mommy-to-be to sit in front of during the shower activities. I found these beautiful paper flower templates on Etsy by Paper Flora. They are SO EASY to make and you can make multiple sizes from the same design. I chose my two favorite designs and purchased stock paper in the colors I wanted for the shower.

Paper Flower Baby Shower Decor

I made multiple sizes so that I could create a floral arch on the wall and I used fake leaves that I had left over from a Tropical Themed Baby Shower that I hosted to add a pop of green to the flowers! I purchased the Hangman Products PCR5 Poster & Craft Tape, 5′, Roll, White from Amazon to hold the flowers to the wall and it worked beautifully! This is the same tape I like to use when I make a balloon arch!

Floral DIY Wooden Block Letters

I purchased these adorable wooden block letters from Hobby Lobby and painted them white. I then glued small fake flowers to the bottom and up the sides of the letters. I LOVED how they turned out and so did the mommy-to-be! She has these in sweet baby Lily’s nursery now! 

DIY Floral Craft Letter Initial

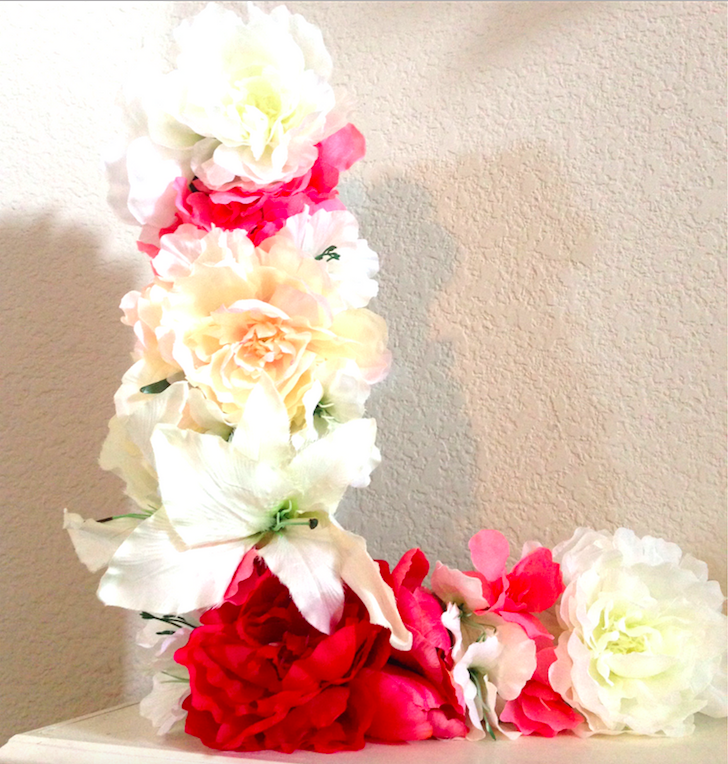
I really love monograms and initials, so I purchased this giant cardboard L from Hobby Lobby and stuck fake flowers all over the L. I cut the flower off of the stem and just left a small part of the stem to stab into the cardboard. It worked perfectly and looked so pretty!

Shopping Tip: #HobbyLobby marks all of their flowers 50% off every other week! #DIY Click To Tweet

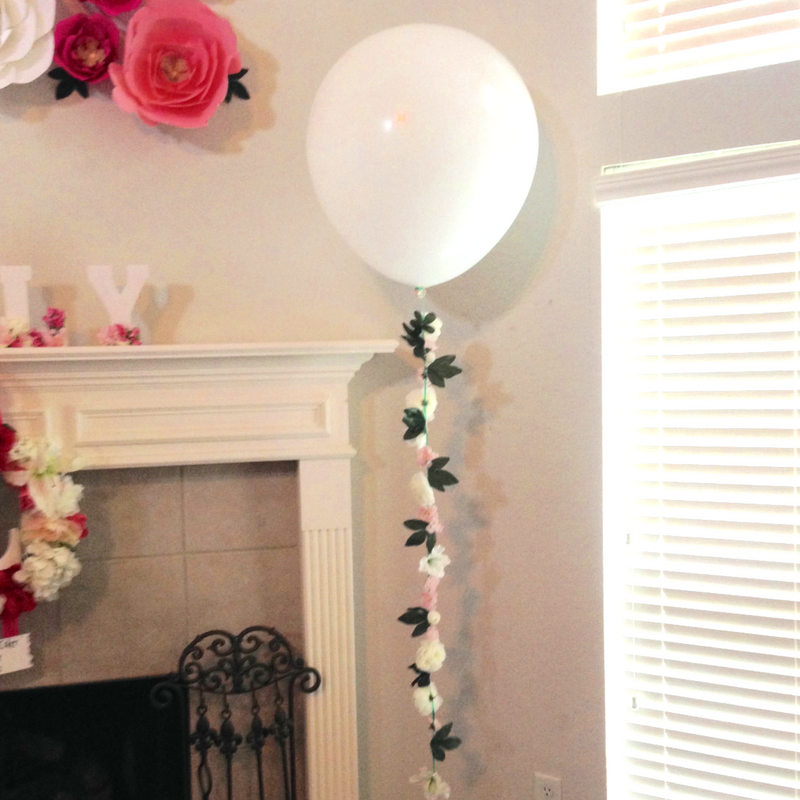
Floral Balloon String

I LOVE these gorgeous 36” balloons! They make such a statement when you walk in the room! For this floral themed baby shower, I decided to add flowers to the balloon string to give it a little extra glam! I took small flowers and leaves and hot glued them down a balloon string. The morning of the shower, I tied the floral string around the balloon and cut the actual balloon string off of the balloon. It turned out so cute and the shower guests were asking where I bought it! Purchase your own pack of 36″ Balloons on Amazon! 

Pro Tip: Party supply stores charge as much as $15 to inflate a 36” balloon with helium. Instead, take it to the floral department at your local grocery store. I took mine to Kroger and they only charged me $2 to fill this giant… Click To Tweet

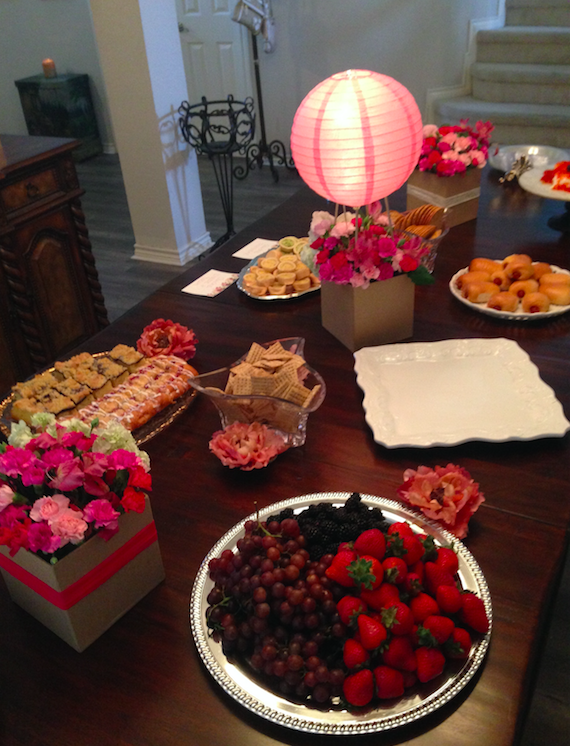
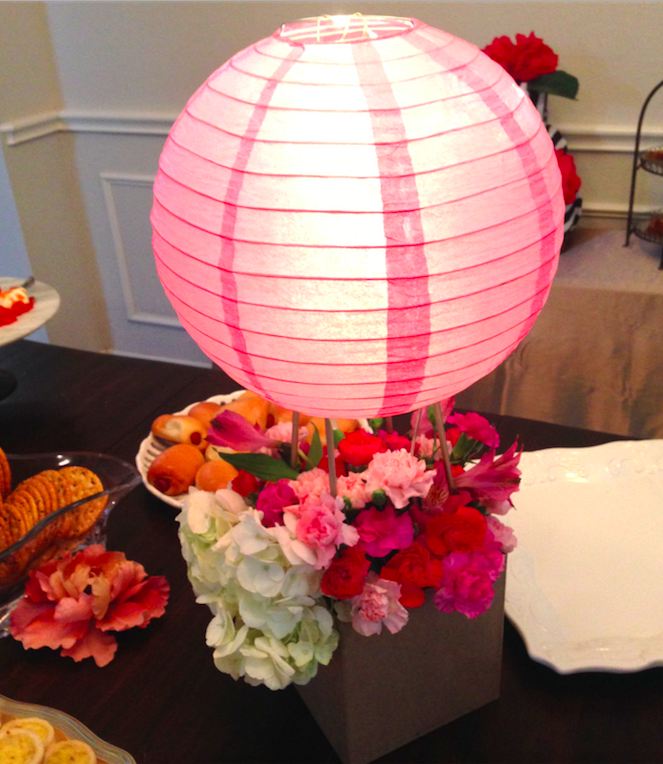
Hot Air Balloon Floral Centerpiece

I wanted something extra special for the floral centerpieces on the buffet table! I saw this adorable hot air balloon flower box craft on Pinterest and I had to make it! It was so easy and looked amazing on the table! Here is what I used to make it:

Diaper Cake

Diaper Cake Floral Baby Shower

While diaper cakes don’t sound at all appealing, they make for fabulous baby shower décor and it is a great hidden gift for mom and dad! For this diaper cake, I decided to go with a black and white striped fabric and then use giant pink peonies to make it pop! Check out my blog on how to make a diaper cake here!

Pro Tip: Purchase diapers that are larger in size for the diaper cake. Most people purchase infant sized diapers for the shower. This will help mom and dad already have diapers for later! Click To Tweet

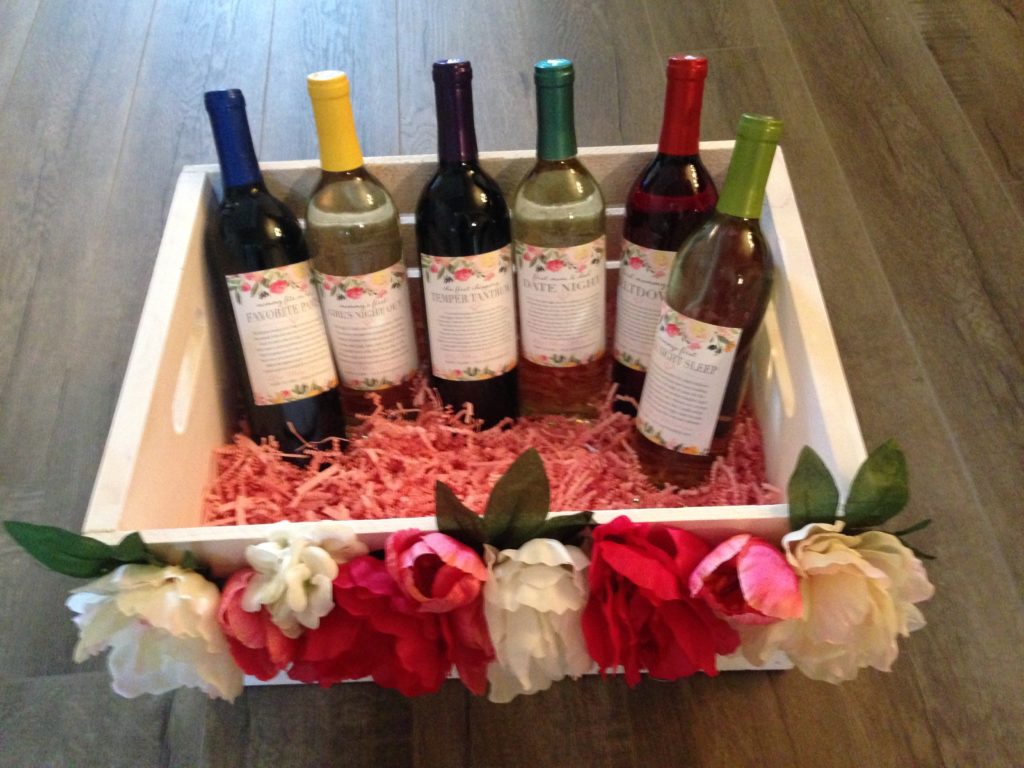
Mommy Milestone Wine Crate

Mommy Milestone Custom Wine Label Basket

I always love to include this with my gift! While all of the gifts are to the mom and dad, they are really for baby! This is a creative and fun gift that mom and dad can enjoy together to celebrate after the baby is born! I found these adorable Mommy Milestone custom wine labels on Etsy by Lush Label! Each wine label celebrates a different occasion after baby is born and includes a cute poem! You can have the babies name on the bottom to make it extra special! Check out my blog post on how to make a mommy milestone wine basket here!

Hospital Door Hanger Wreath

Floral Hospital Door Hanger

Help mom and dad welcome baby into the world with a beautiful hospital door hanger! This is a great way to show off sweet baby’s name and their official birthday as the loved ones visit the hospital! This also looks amazing at the shower! Check out my blog post on how to make a hospital door hanger!

Baby Shower Guest Book


 Baby Shower Guest Book: Guess How Much I Love You

Special moments like a baby shower go by so quickly! I always like to include a guest book for mom and dad to look over and remember their sweet friends and family who showered them with love and support. Instead of a blank book that may end up stuffed on a shelf, I like to buy a favorite children’s book for the guests to sign and leave sweet messages. Each time mom and dad read this to sweet baby, they are reminded of the love and support from their friends and family! As baby gets older, they will be able to read the sweet messages of love and support and know how much they were loved before they were even born!

Baby Shower Games


Munchkin Bristle Bottle Brush
I love playing baby shower games where my game supplies can also act as a gift for the mommy and daddy-to-be! The Price Is Right is SO much fun and mom and dad end up with a lot of necessary items for baby! I pick out 10 necessity items listed on their registry for the game. I give each guest a piece of paper with each item numbered. I introduce each item to the guests reading them all of the necessary information. For example, if one of the items were a baby bottle cleaning brush, I would include that this particular brush is BPA free, has a suction cup base and a flexible neck for easy cleaning. Each guest would then write down their estimated guess of the price of that item. Once I go through each item, each guests adds up the total of all items and the guest with the closest estimated total to the actual total of all 10 items wins! Mom and dad take home all of the items for the game and the guest leaves with a fun prize! Target gift cards are always a popular prize!

Baby Shower Food

Baby Shower Food

For this shower I went with a brunch theme. We had a donut cake, fruit tray, veggie tray cheese, crackers, coffee cake, quiche, Danish, and pigs in a blanket! For the beverage station, I had a coffee bar, juice bar, hot tea, iced tea, and water. There were very few leftovers!

If you are still trying to select the perfect theme for you shower, check out my tropical themed baby shower décor ideas!

SaveSave

SaveSave

SaveSave

SaveSave

Continue Reading

FREE Printable Wine Labels

Printable Wine Label

This post may contain affiliate links, but all opinions are my own. Please read my disclosure policy for more information. 

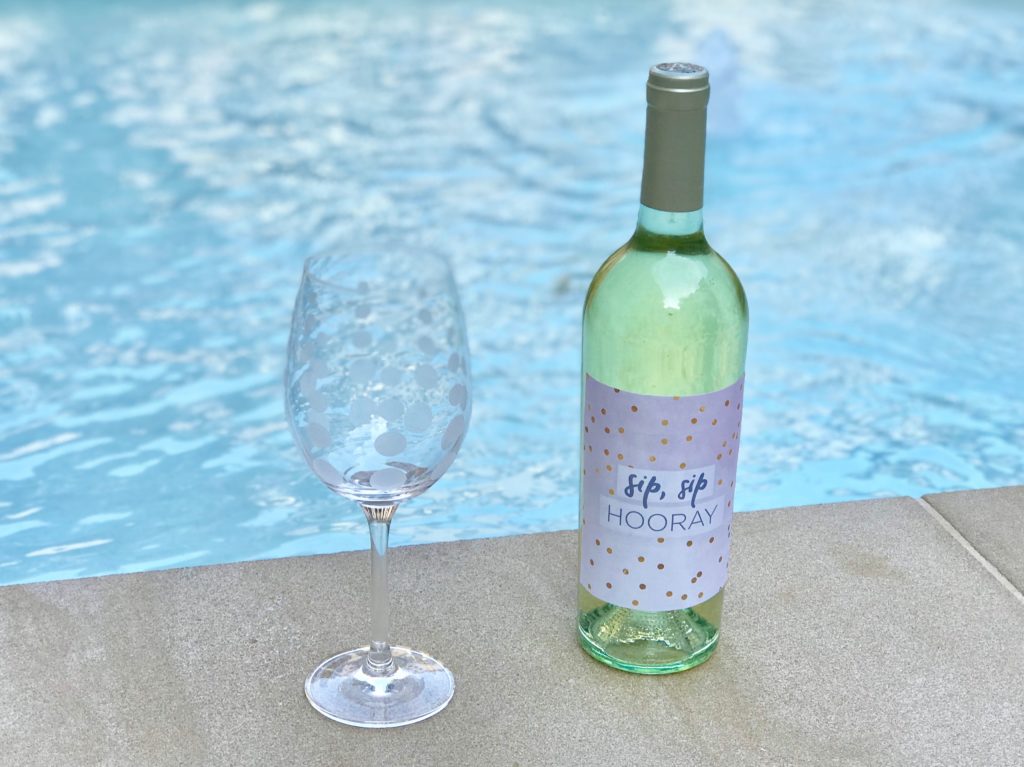
Happy National Drink Wine Day! As many of you already know, I love custom wine labels! They make for a very personalized and thoughtful gift and they are great for parties! One of my favorite ways to use personalized wine labels is by gifting a bride a groom a year of firsts with a wedding milestone wine basket! We received this at our wedding and we had SO much fun enjoying the different bottles of wine for each new milestone in our marriage! I also love to give a Mommy Milestones wine basket at baby showers for the mommy-to-be and daddy-to-be to enjoy after the baby is born!

Wine Bottle Labels

Printable Wine Label

Free Printable Wine Labels

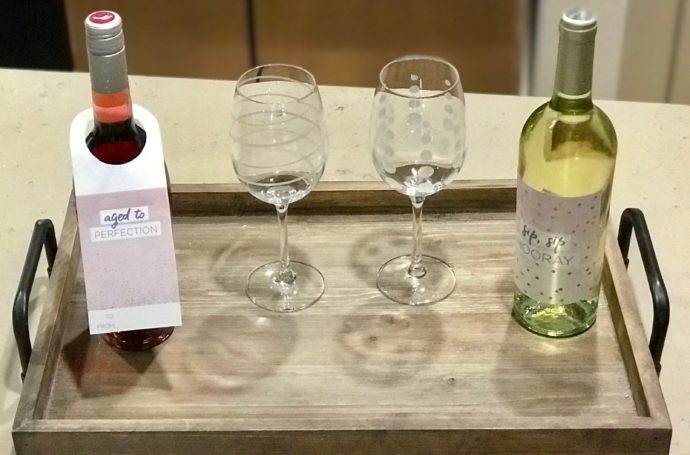
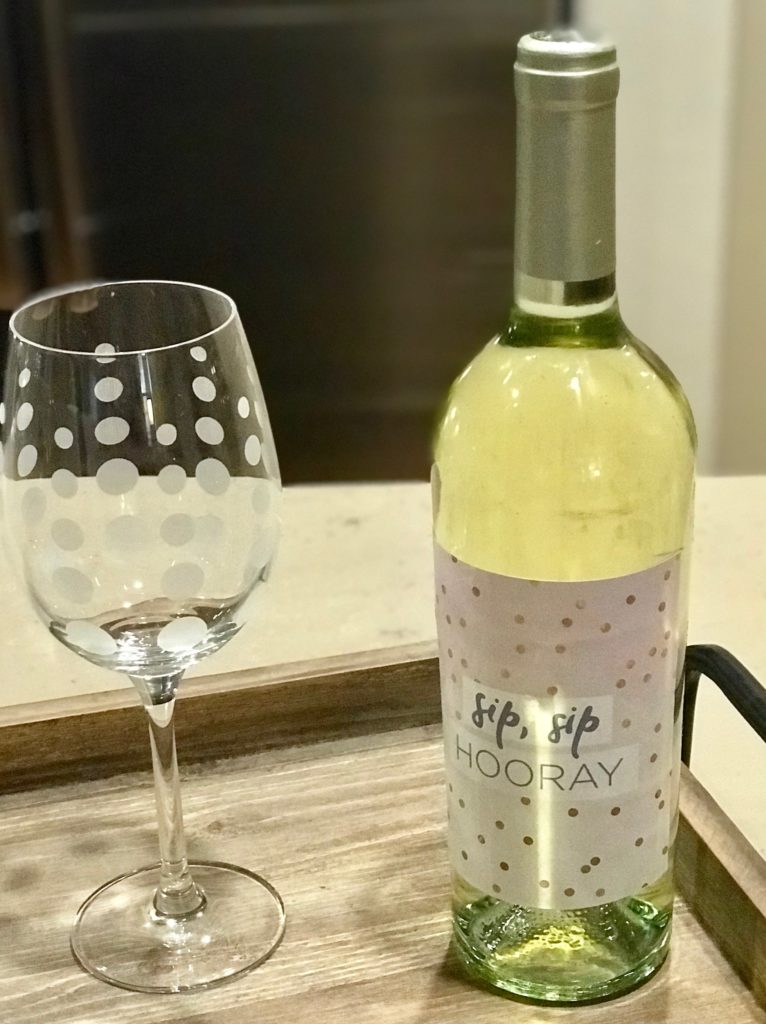
While custom wine labels are perfect for these types of occasions, you might want to dress up a wine label without having to order custom labels! Well thanks to FTD by Design, you can wow your party crowd with a custom bottle of wine in just a few minutes! All you need is a printer, double-sided tape, and a bottle of wine! It was super easy and it turned out beautifully! 
Wine Label Gift Tags

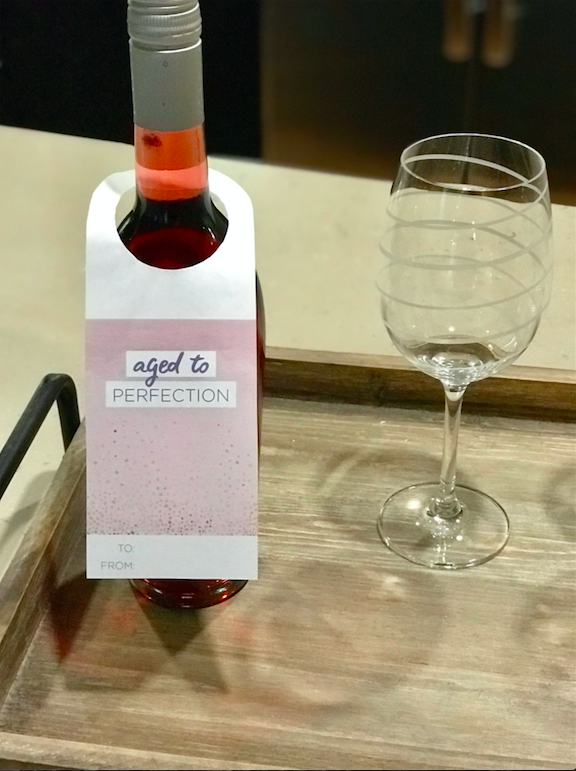
Visit FTD by Design’s blog post for their super easy instructions and to download their 6 free printable wine bottle labels for special occasions! They are all so adorable, but I think my favorite label has to be the Sip Sip Hooray! It’s hard to read that and not want to cheer! You can apply them directly to the bottle, or print the hanging label that you can easily hang on the bottle! You will never want to show up to a birthday party, dinner party, or family gathering without these show-stopping wine labels dressing up your delicious bottle of wine! If you love these gorgeous Mikasa Cheers Red Wine Glasses as much as I do, they are very affordable and are perfect for a romantic dinner or a party! Cheers! 
 

SaveSave

SaveSave

SaveSave

SaveSave

Continue Reading

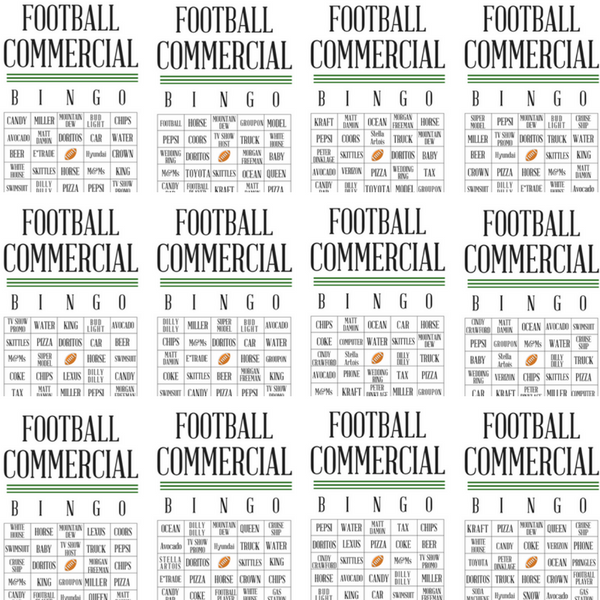
FREE Football Commercial Bingo Printables

Football Commercial Bingo

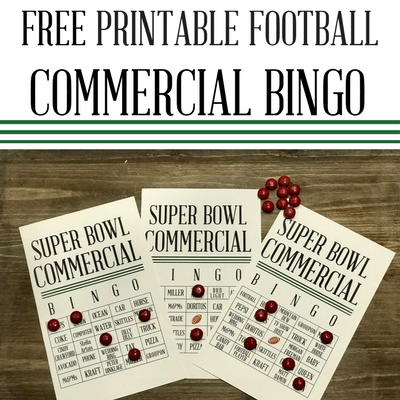
It’s almost Super Bowl Sunday! I absolutely love hosting a Super Bowl party each year. Well, let’s be honest, I’m pretty much always looking for a reason to host a party. But the Super Bowl is just so much fun! The food, the commercials, the halftime show, and of course, the game! While I personally love football and enjoy the game itself, I know a lot of people who attend our parties each year really don’t care about the game they just like the experience and hanging out with their friends. So this year, I thought it would be fun to have Super Bowl commercial BINGO as a fun game for our guests!

2018 Big Game Commercial Bingo

Guests can use markers or candy to keep track of their card during the commercials! I have a first and second place prize for the first two people to get a blackout or who come the closest to getting a BINGO blackout! We went with a bottle of wine and a bottle of whiskey for the prizes, but you can get really creative depending on your crowd! I used 2018 Super Bowl commercials to make these cards extra fun for this year’s game!

Football Commercial Bingo

I have created 12 different versions of the cards! Click here to download your FREE Super Bowl Commercial BINGO cards for your Super Bowl party! Is your team in the Super Bowl this year?

Continue Reading

Christmas Sangria Holiday Cocktail

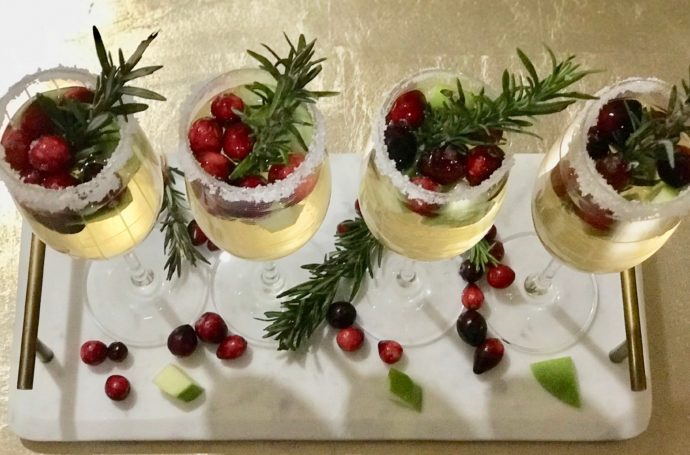
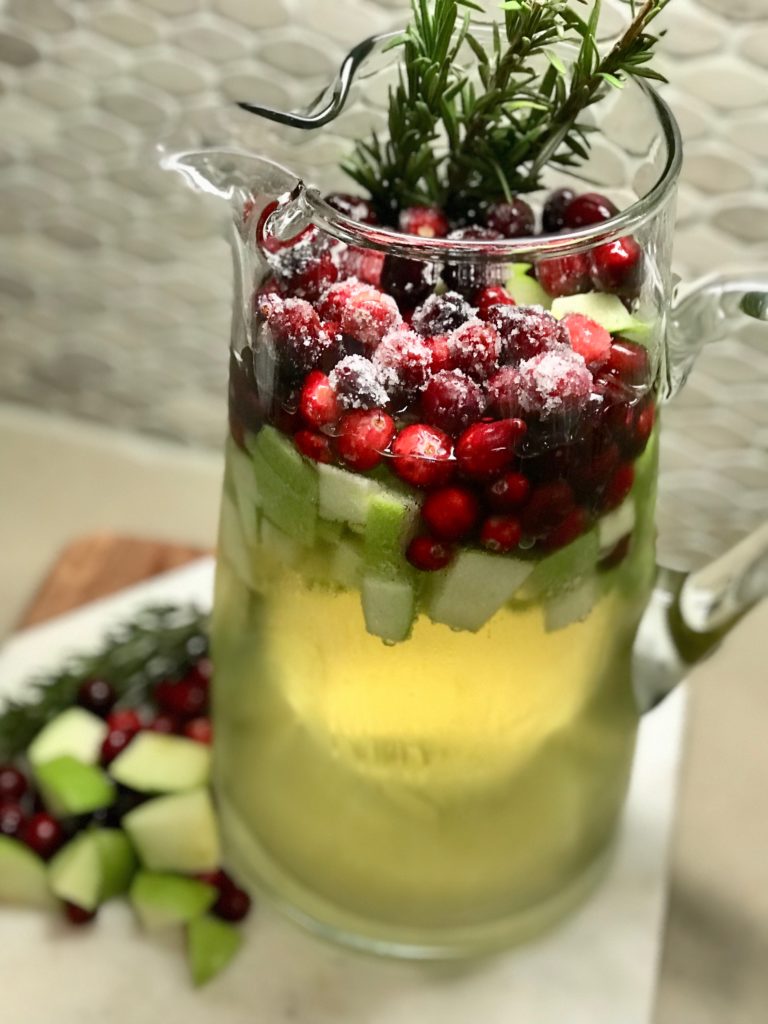
Christmas Sangria Holiday Cocktail

This post may contain affiliate links, but all opinions are my own. Please read my disclosure policy for more information. 

I LOVE sangria! If it is on the menu, I’m probably going to order it. The hubs and I had signature cocktails at our wedding and mine was a White Berry Sangria. It was so delicious! I still have people tell me how much they loved my signature cocktail! I love making delicious cocktails for dinner parties, but I really love making them around the holidays. There are just so many delicious flavors and fruits to incorporate and let’s be honest, they just look lovely on serving trays and bar carts. My favorite cocktail to make around the holidays is this apple and cranberry Christmas Sangria! It is so crisp and refreshing and is absolutely lovely in a champagne glass! It takes no time to make and will really impress all of your holiday guests!

Cranberry and Apple Sangria

Christmas Sangria Ingredients:

2 Green Apples; Chopped

2 Cups of Fresh Cranberries

½ Cup of Granulated Sugar

1 Bunch of Rosemary

1 Bottle of Moscato

1 Bottle of Sparkling Apple Cider

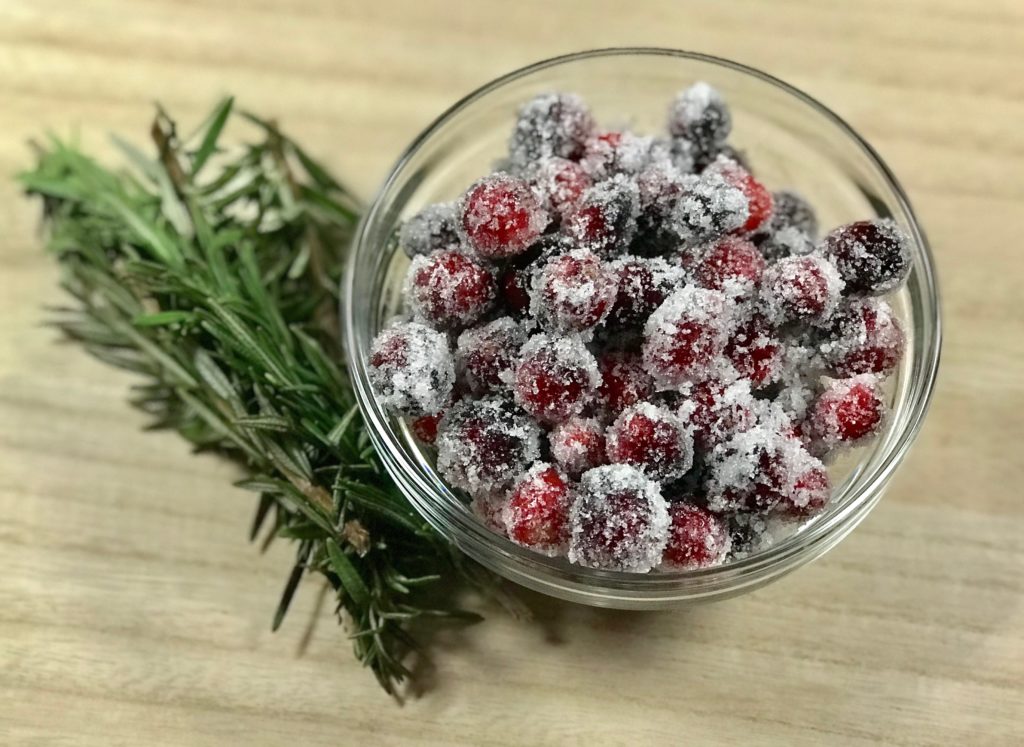
Sugared Cranberries - Christmas Sangria Recipe

Chop both green apples into small pieces. Add all but a few of the pieces of green apple to the bottom of your drink pitcher. You will use the other pieces for garnish.

Rinse the cranberries in a colander and immediately roll a handful into the sugar. Set aside the sugared cranberries to use for the garnish.

Add all cranberries except the sugared cranberries to the pitcher.

Christmas Sangria Recipe Cranberries

Use a muddler or wooden spoon to crush some of the fruit in the bottom of the pitcher. I crush just a few pieces of fruit, specifically the cranberries, to leave a nice flavor. I like to leave most of the fruit whole because it looks so lovely in the pitcher and in the glass.

Pour in the moscato and the sparkling apple cider. Add rosemary to the top to garnish.

Sangria Holiday Cocktail

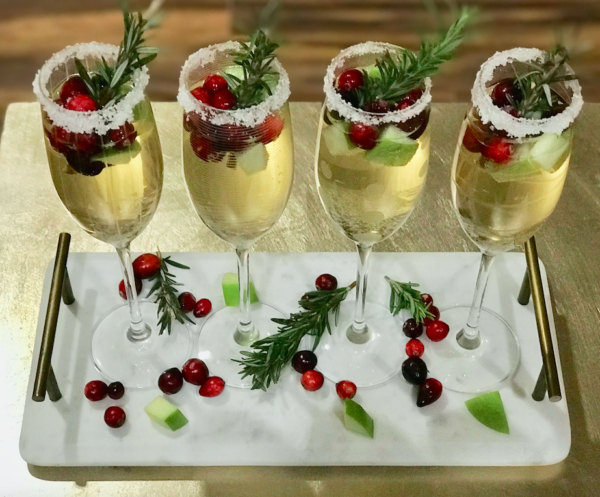
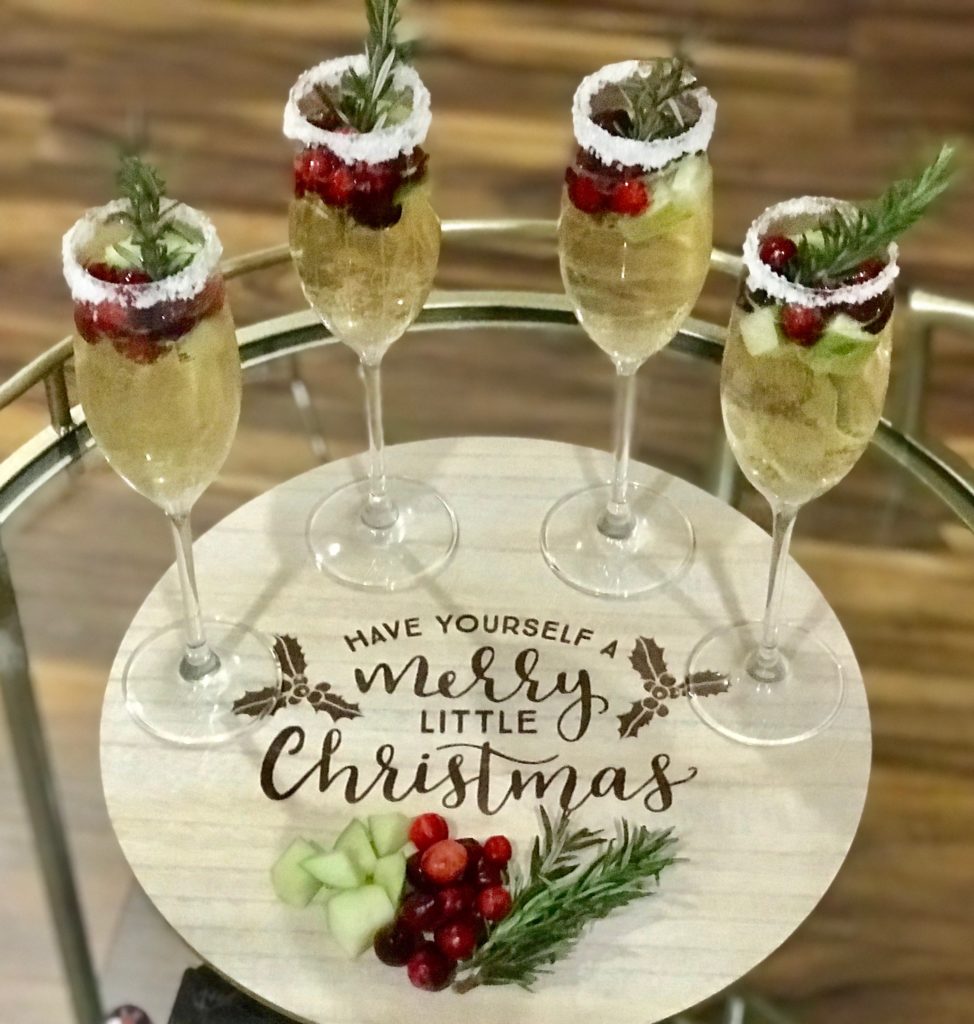
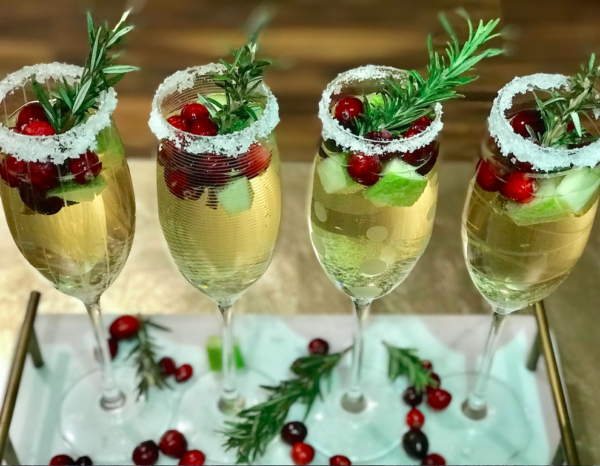
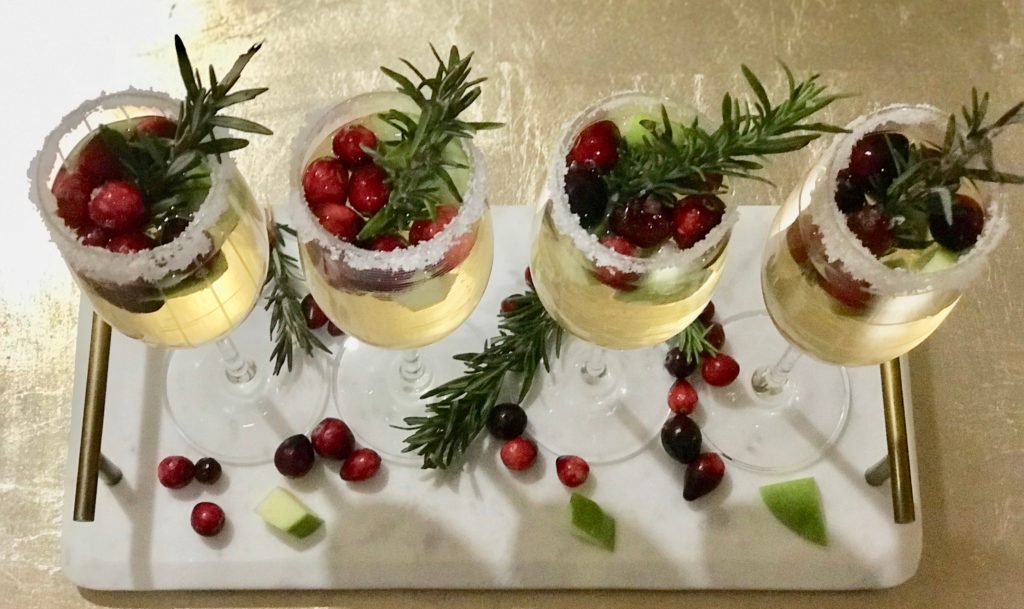
Wet the rim of your champagne flutes with a little bit of water and roll in granulated sugar and fill with the Christmas Sangria. Also, can we just take a moment to admire these beautiful Mikasa Cheers Champagne Flutes? I’m in love with this design! I have this design for all of my bar glasses and I love that each glass has its own unique design!

Holiday Sangria Cocktail

Add a few of the sugared cranberries and apple pieces to the top of the cocktail. Garnish each glass with one piece of rosemary and enjoy!

Holiday Sangria

Christmas Sangria Recipe

What’s your favorite holiday cocktail? I’m always looking for new recipes!

Christmas Sangria Cocktail
This delicious holiday cocktail will impress all of your guests!
Write a review
Print
Prep Time
10 min
Prep Time
10 min
Ingredients
  1. 2 Green Apples; Chopped
  2. 2 Cups of Fresh Cranberries
  3. ½ Cup of Granulated Sugar
  4. 1 Bunch of Rosemary
  5. 1 Bottle of Moscato
  6. 1 Bottle of Sparkling Apple Cider
Instructions
  1. Chop both green apples into small pieces. Add all but a few of the pieces of green apple to the bottom of your drink pitcher. You will use the other pieces for garnish.
  2. Rinse the cranberries in a colander and immediately roll a handful in sugar. Set aside the sugared cranberries to use for the garnish.
  3. Add all cranberries except the sugared cranberries to the pitcher.
  4. Use a muddler or wooden spoon to crush some of the fruit in the bottom of the pitcher.
  5. Pour in the moscato and the sparkling apple cider. Add rosemary to the top to garnish.
  6. Rim your champagne glasses with sugar and fill with the Christmas Sangria.
  7. Add a few of the she sugared cranberries and apple pieces to the top of cocktail. Garnish each glass with one piece of rosemary.
  8. Enjoy!
The Sassy Southern http://thesassysouthern.com/
Continue Reading

5 Holiday Gifts For The Entertainer In Your Life

KitchenAid Stand Mixer Holiday Gift Guide

This post may contain affiliate links. Please read my disclosure policy for more information. 

I LOVE picking out Christmas presents for my friends and family. However, it can also be very stressful. I want to make sure that I’m gifting something that they will love and probably wouldn’t have purchased on their own. As someone who loves to entertain, I’m always looking for products that will help me present a stunning meal and presentation from start to finish. Even if I’m just having people over for a game night, I want them to love every second! Here is my list of 5 Holiday Gifts for the entertainer in your life!

Copper Chef Pan

Copper Chef Pan Set

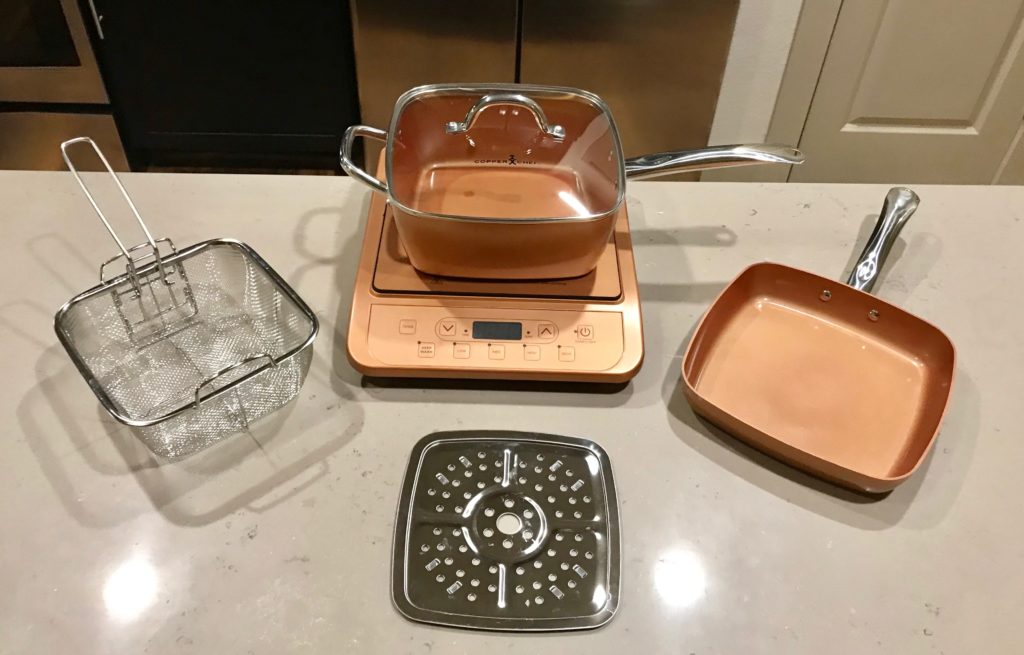
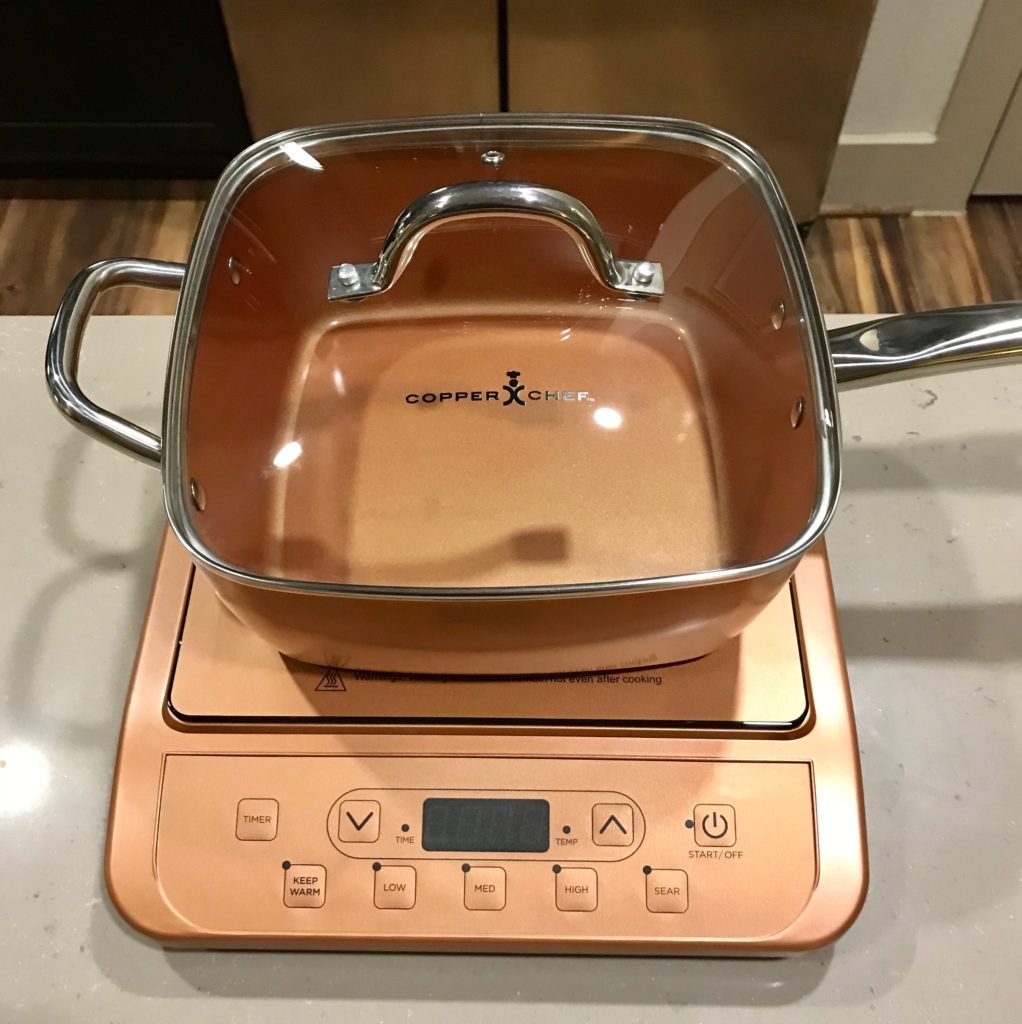
For those of you who follow my recipe posts, you probably know how much I LOVE my Copper Chef! It is perfect for weeknights when I’m just cooking for two, but it is also FANTASTIC for making larger amounts of food when I host dinner parties. I purchased the Copper Chef 5-Piece Cookware Set and Copper Copper Chef Induction Cooktop off of Amazon. The 5-Piece set comes with the 9 1/2 inch pan, Glass Lid, Fry Basket, Steam Rack, Square Fry Pan and Recipe Book. I also purchased the Copper Chef Induction Cooktop. The Induction Cooktop is extremely helpful because it keeps your stovetop available to cook other dishes on your stovetop.

Copper Chef

The Copper Chef has a stainless steel induction plate on the bottom that allows for fast and even cooking. It is also non-stick, so you don’t have to cook with oil or butter. This makes cleaning the pan a breeze and it is dishwasher safe! It is safe to use on all stovetops and you can even place it in the oven! There are multiple package options available or you can just buy the Copper Chef by itself. I already have several more products from Copper Chef on my Christmas wish list this year. The Copper Chef is an entertainer’s dream! One tip, you might want to give this gift a bit early this year so that they can use it for their holiday entertaining!

iRobot Roomba Vacuum 

Roomba Vacuum Cleaner Wedding Registry

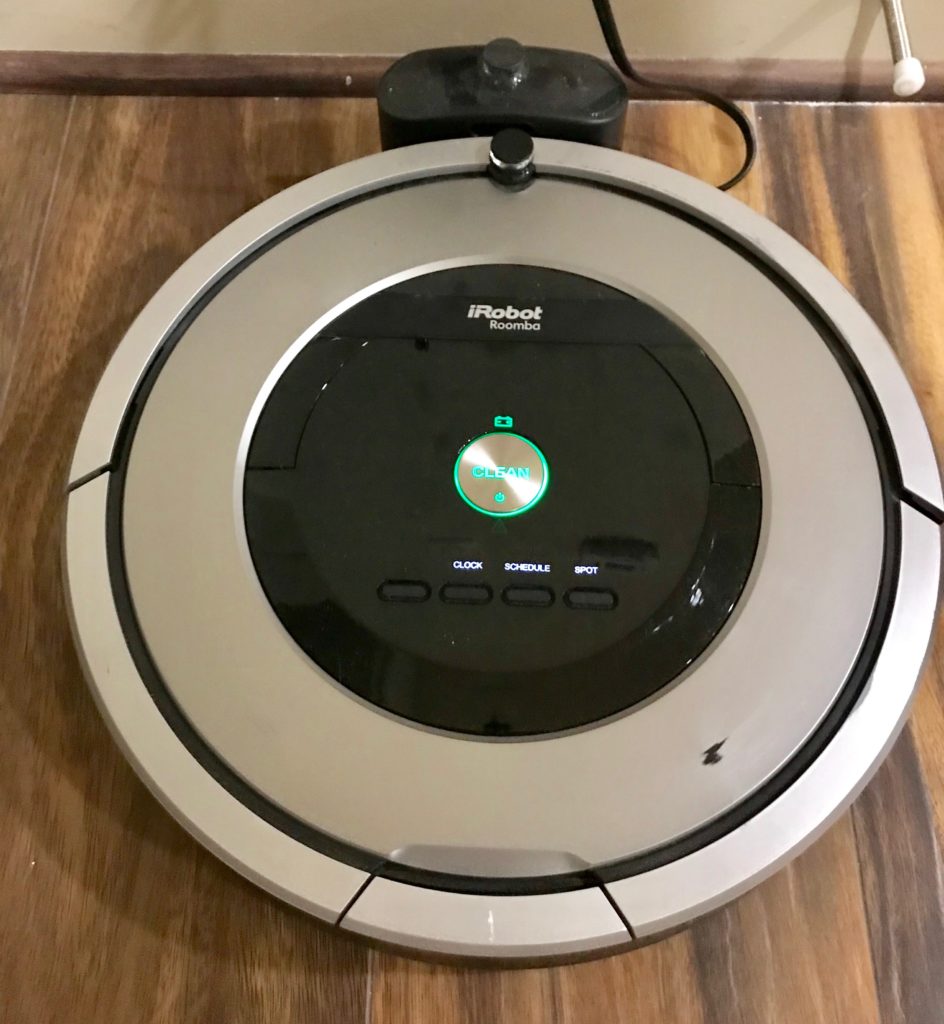
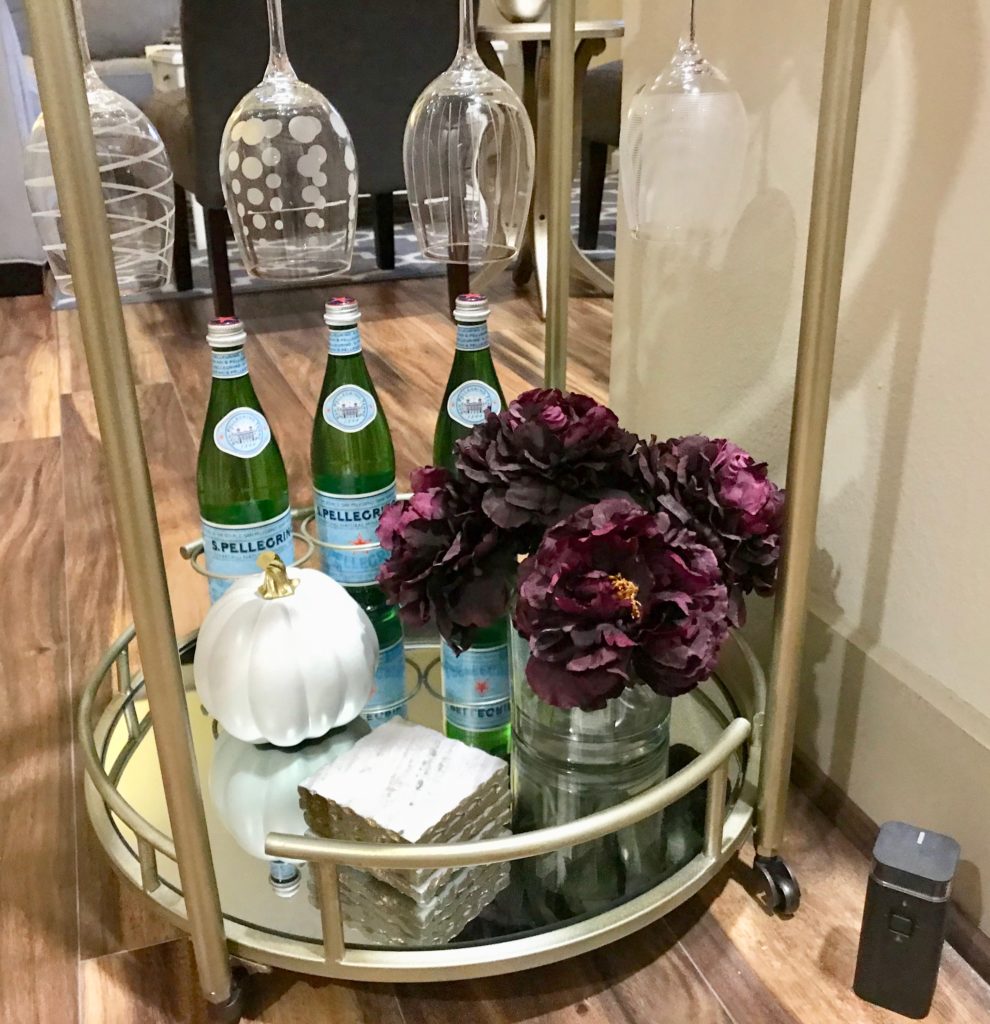
Oh the Roomba. Where do I even start! Now this gift is on the pricier side, but it is definitely a winner. We received the Roomba as a wedding present and I don’t remember how I kept my floors clean before owning the Roomba. I must give my husband the credit for this one. I was hesitant to even register for this, but I am so glad I did. Yes, it is on the pricier side, but it is TOTALLY worth it! There are multiple versions of the Roomba depending on your specific needs. For example, our Roomba has patented tangle free brushes that prevent pet and human hair from getting stuck and tangled. We don’t have any pets, but I have long hair and this is a lifesaver! You can also program the Roomba to run at certain times on certain days. So basically, you never have to think about vacuuming! You can also purchase an iRobot Virtual Wall Barrier that will keep the Roomba from bumping into certain pieces of furniture or entering a room at all! The Roomba is super gentle when it does bump a wall, so it doesn’t cause any damage, however, even if it lightly bumps our bar car, it could cause our hanging wine glasses to break. The virtual wall prevents the Roomba from getting too close to our bar cart! 

iRobot Roomba Virtual Wall

Most of the Roombas also come with an app where you can schedule it to run from anywhere! The navigation system helps it maneuver around your furniture and it is low enough that it fits under most pieces of furniture in our home. This was a big deal for me, because let’s be honest, I’m not moving furniture every time I need to vacuum, so without the Roomba it is like waiting to see how much dust has collected under that piece of furniture when we move one day. This really comes in handy for entertaining because I don’t have to spend an hour vacuuming right before company arrives! I just press a button and let the Roomba do its thing while I cook or get myself ready. It honestly feels like we have a housekeeper here every day! I love having the lines in my carpet after the room has been vacuumed! Check out my full review on the Roomba here.

Mikasa Cheers Wine Glasses and Electric Wine Opener

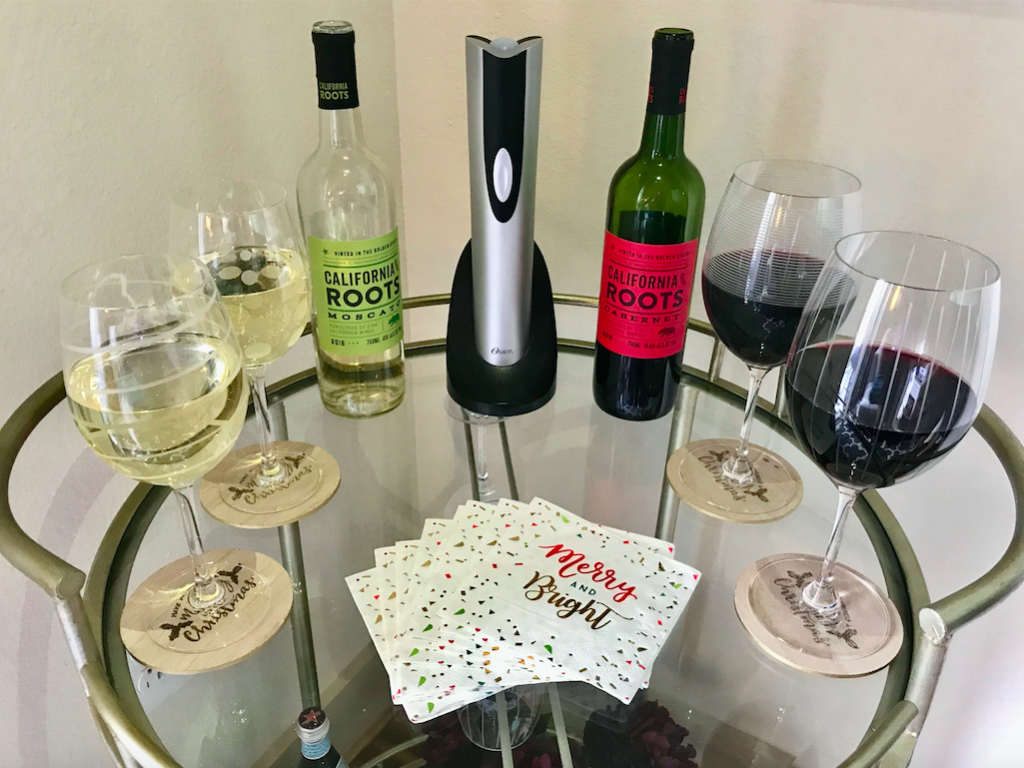
Electric wine opener and Wine Glasses

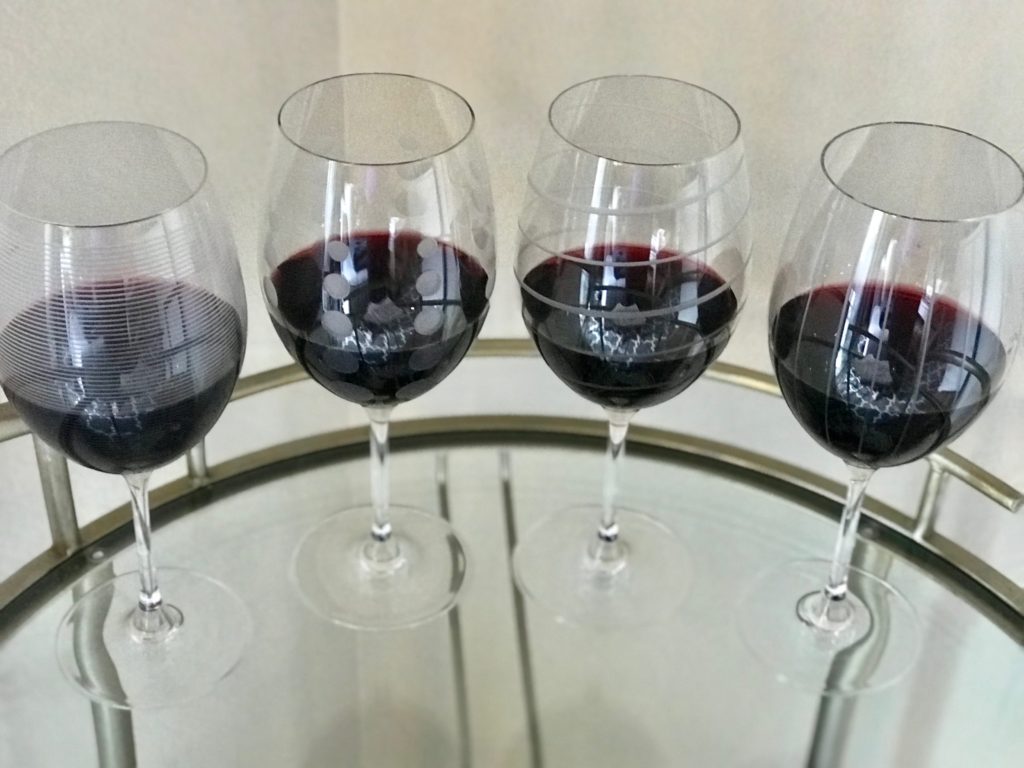
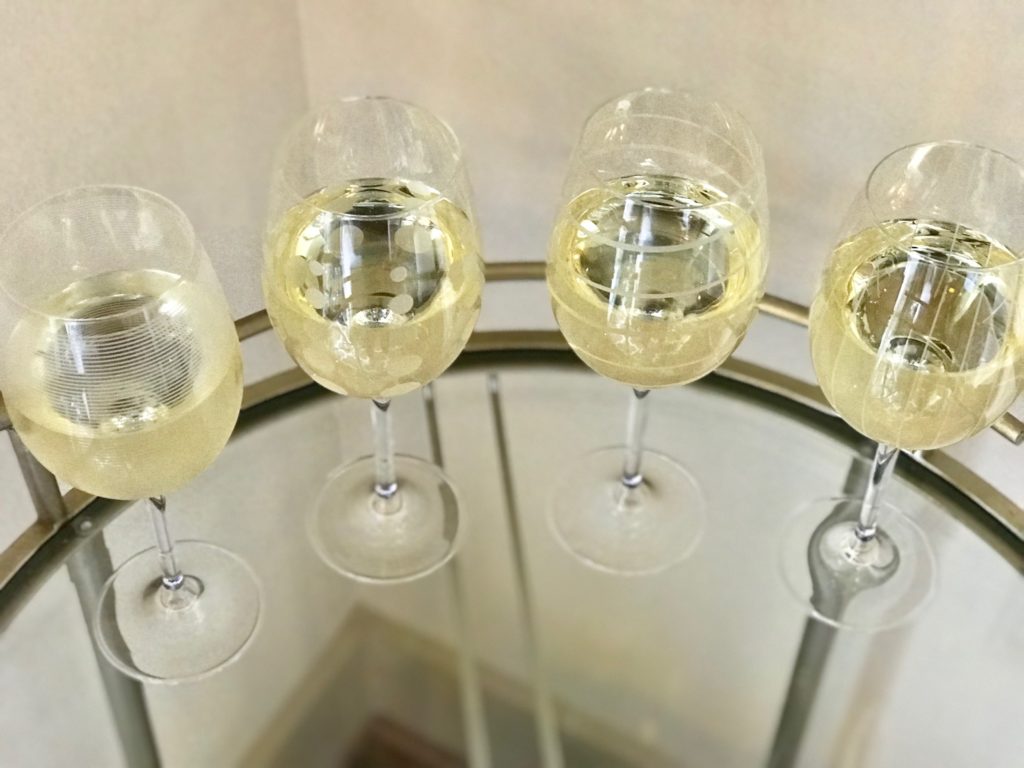
The Mikasa Cheers Wine Glasses are a must for all of my wine lovers out there! First, they are absolutely beautiful and have four different coordinating designs per set. This adds a stylish aspect to the glasses, but it is also very helpful for being able to identify your glass during a dinner party. How many times have you lost track of which glass was yours at a dinner party? I don’t like drinking after other people, so this has always been so annoying to me! With the Mikasa Cheers Wine Glasses, you don’t have to worry! The collection includes multiple styles of glasses, so there is a glass for all of your favorite beverages! For example, I love these Mikasa Cheers Stemless Wine Glass. They are perfect a yummy cocktail or serving a beautiful custard or ice cream for dessert! They also have Mikasa Cheers Martini Glass, Mikasa Cheers Champagne Flutes, and Mikasa Cheers Beer Glasses to satisfy everyone at your party. Several of my friends have told me that they always get so excited to drink out of these glasses when they come over for a dinner party or game night!

Mikasa Cheers Red Wine Glasses

Mikasa Cheers White Wine Glasses

Now that you have the perfect glasses, it’s time to open that bottle of wine! Normal corkscrews don’t always work and let’s be honest, they have been known to make you break a sweat and nobody wants that while hosting guest. Let’s not even talk about those embarrassing times the cork broke! This Oster Electric Wine Bottle Opener makes opening a bottle of wine a breeze and also serves as pretty handy party trick! It will open 30 bottles of wine on a single charge and has a stylish charging station that is small and looks great on your countertop or bar! Let one of your guests try it out, it is a great conversation piece! This one is not as expensive and will be a very popular white elephant or secret Santa gift! They also have an Oster Cordless Wine Opener with Chiller combo pack to make opening and chilling a breeze! If you are feeling extra generous, throw in a bottle of wine, too!

KitchenAid Stand Mixer

KitchenAid Stand Mixer Holiday Gift Guide 

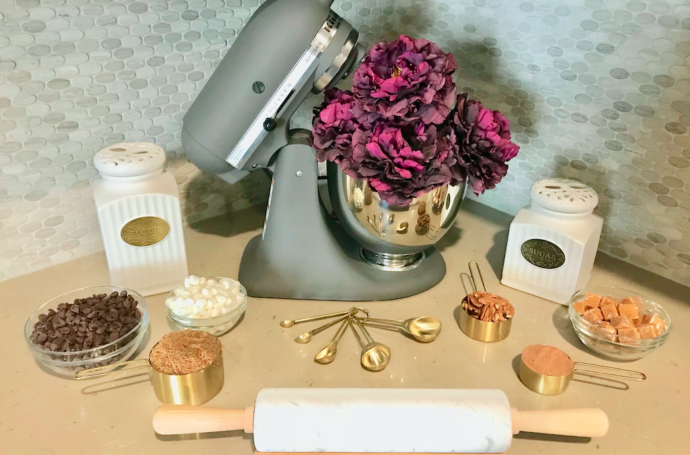
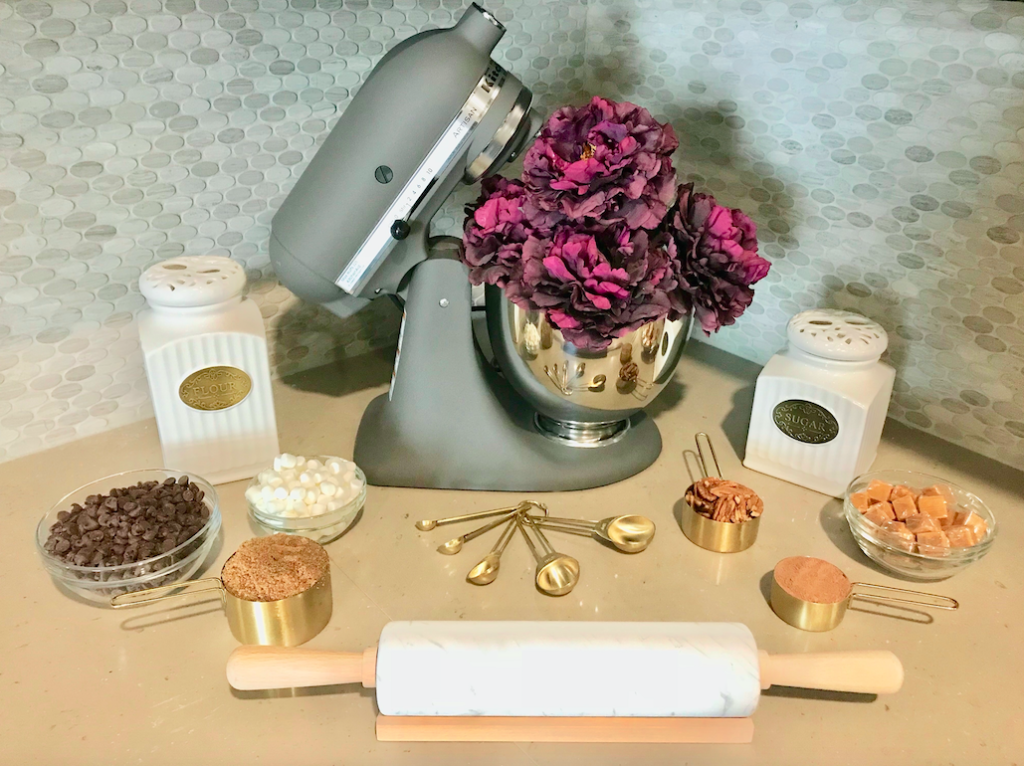
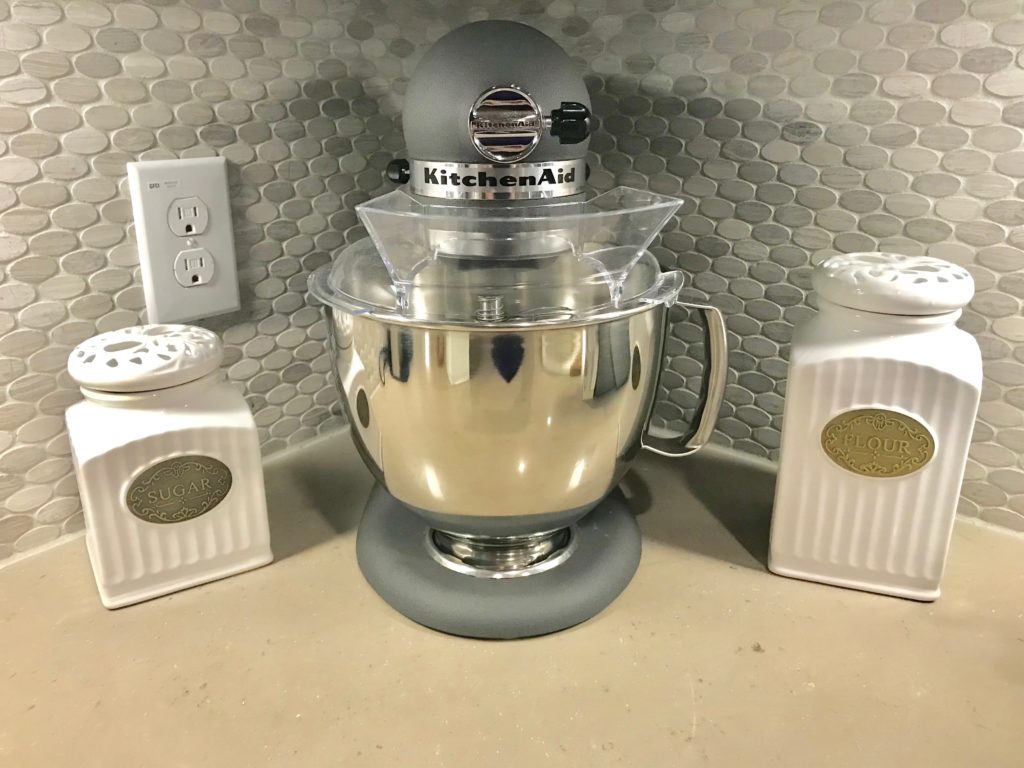
Who doesn’t love the KitchenAid Stand Mixer? It has almost become a kitchen staple or décor piece for your countertop! With so many colors and styles to choose from, you can find the perfect Kitchen Aid Stand Mixers to fit your kitchen! When the hubs and I were registering for our wedding, I made a beeline for the KitchenAid Stand Mixers. I knew the exact color and style I wanted to register for. We decided to go with this KitchenAid Artisan Series 5-Qt. Stand Mixer with Pouring Shield In Imperial Grey and I so was thrilled when my amazing team at work purchased this for my work wedding shower!

KitchenAid Stand Mixer Imperial Grey

I’ll be honest, I was a little bit intimidated at first, but it is SO EASY to use and is a lifesaver in the kitchen! It saves me so much time and my hands and arms are so thankful for the break! The KitchenAid Spiralizer Plus Attachment with Peel, Core & Slice is currently on my Christmas list! There are so many different attachments available and to help you create recipes you never thought would be possible! While this is on the pricier side, it is the perfect gift for the chef in your life!

Keurig Coffee Maker

Keurig Coffee Maker

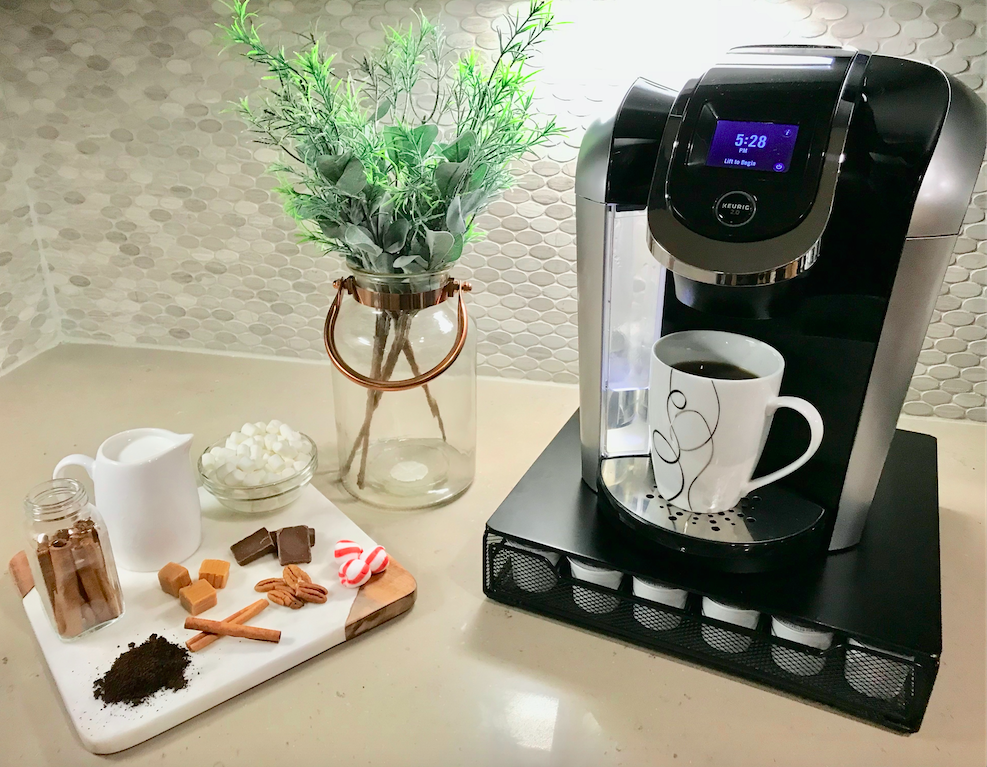
Coffee, iced coffee, tea, hot chocolate, apple cider, you name it, the Keurig Coffee Maker does it all! This is especially wonderful if not everyone in your home loves coffee or tea. That is definitely the case in our home. Jeremy can’t stand coffee! However, he does love hot chocolate, so the Keurig is perfect for both of us! I don’t have to make a full pot of coffee that will go to waste when I’m the only one drinking it! With so many different K-Cup options, there is something for everyone.  Keurig also has a The Keurig Rivo Cappuccino and Latte System that is definitely on my Christmas list! While this is initially an expensive purchase, think of how much money and time you will save by skipping Starbucks every day! Check out my breakdown of how much I save every year on coffee since switching to a Keurig Coffee Maker !It is also great when you have guests over. If you need a large carafe of coffee for a brunch or dinner party, you can purchase a Keurig Thermal Carafe and brew a large pot. However, if you only have one or two guests, your guests can each pick a different flavor to suit their taste! I also love the K-cup Storage Drawer that goes under your Keurig! It doesn’t take up any extra counter space and it super convenient for having your K-Cups ready to brew! 

I’m always looking for new ways to entertain! What are your favorite entertaining products?

SaveSaveSaveSave

SaveSave

SaveSaveSaveSave

SaveSave

SaveSave

Continue Reading