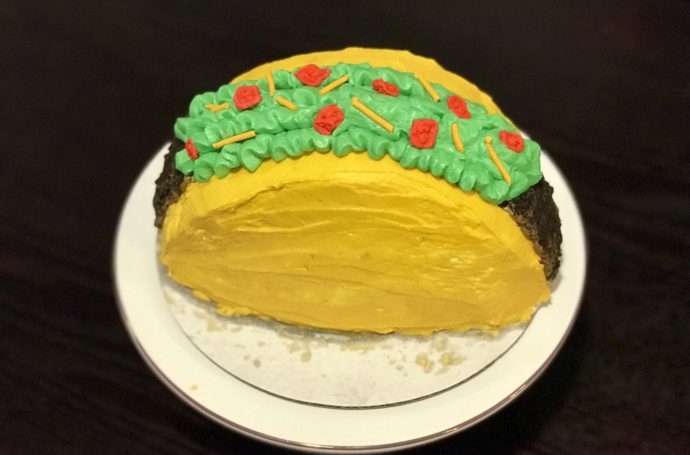
Who doesn’t love tacos? Taco night is definitely a weekly staple in our household. Last year, one of our best friends was having a taco themed birthday party. His wife was planning all the details and mentioned wanting to have a taco cake. I immediately volunteered to make the taco cake because it sounded like a really fun challenge. I had never made a taco cake before, but I figured it couldn’t be that hard, right? Thanks to this amazing tutorial from Studio DIY, it was honestly a piece of cake! Ha! But I definitely learned a couple of things during this process.
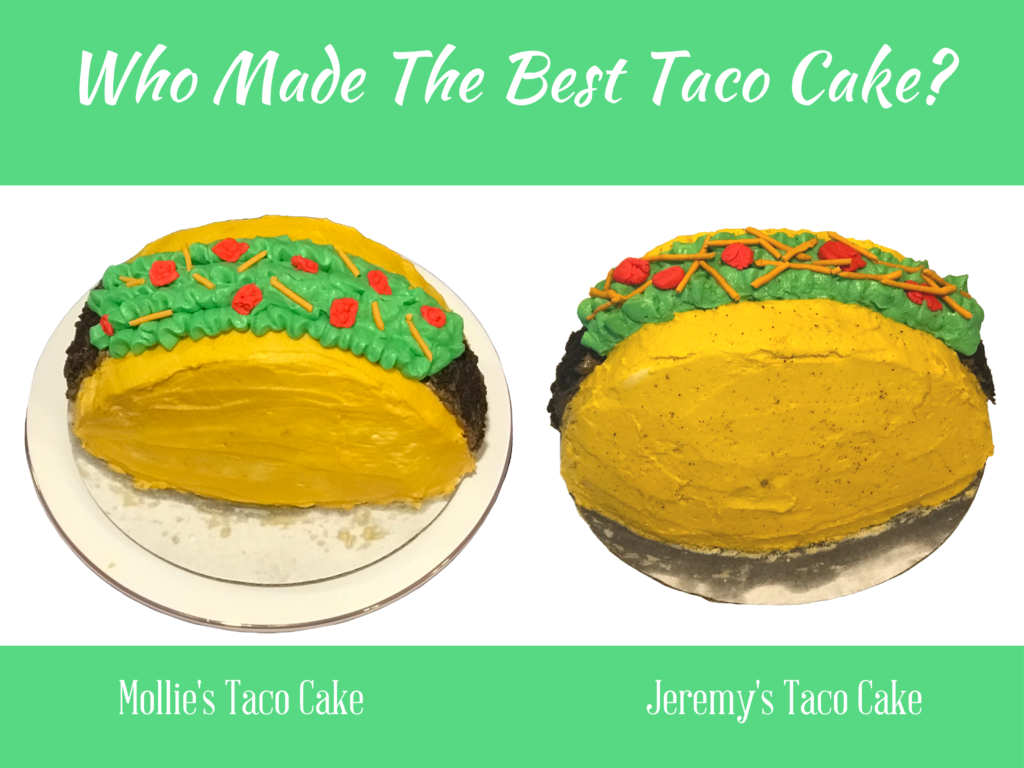
The cake batter I made was enough for two 8-inch round cakes so my husband decided to make one too so that we could have a little bake-off! It was so fun y’all. We took the taco cakes to our friend’s party and had everyone vote on the best looking taco cake. So I HAVE to ask y’all, which one is your favorite?
Side Note: See the terrible grease showing on the cardboard from the buttercream? I definitely learned my lesson. See my quick tip below Step 1 to see how to prevent this rookie mistake. Face palm for sure. SO embarrassing. Lesson learned.
Okay now that you have already made your mental vote, I will tell you that my hunky husband won the votes at our friend’s party. We both took one different creative liberty while decorating that made our cakes stand out. As I was mixing the yellow buttercream for my taco shell, I left some specs of white in the mix to make it look more like a corn taco shell. Jeremy decided to add some of the crushed Oreos to the frosting on his shell to make it look more realistic.
While I was so annoyed I didn’t win, it was honestly so fun and we had two cakes to enjoy! We even had a request to make another taco cake for another friend’s birthday the following week! And not that I’m bitter or anything, but my husband is a dentist so he is required to have steady hands while working with hand tools on a daily basis. Again, not bitter or anything! =P I’m honestly so proud.
Date Night!
For a fun date night, enjoy these super easy chicken tacos for dinner and have a taco cake decorating competition for a fun activity and dessert!
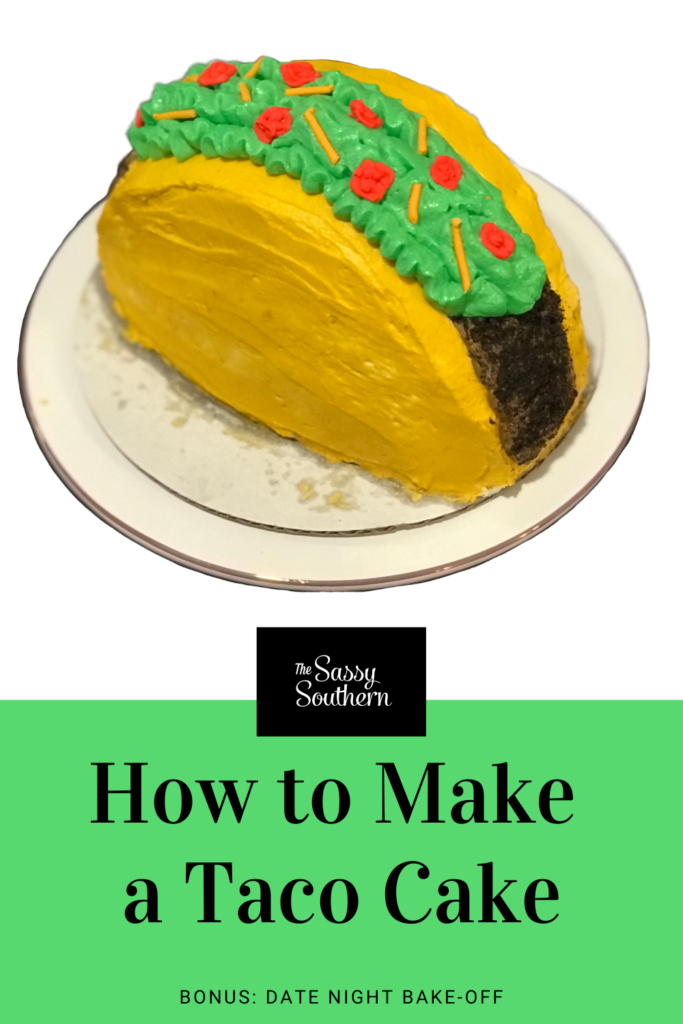
Are you ready to make your own taco cake? Gather all of your supplies and let’s get to decorating!
Taco Cake Supplies and Ingredients:
- 1 8-inch round baked cake
- 1 Batch of Buttercream (Check out one of my go to recipes from Paula Dean)
- I started with 1 batch of buttercream, but depending on your recipe, you may need to make half of a second batch to make sure you have enough.
- Red Food Coloring
- Green Food Coloring
- Yellow Food Coloring
- Brown Food Coloring
- Orange Food Coloring
- Crushed Oreos
- 3 Tbsp. Meringue Powder
- 4 Cups Powdered Sugar
- 5 – 7 Tablespoons Warm Water
Step 1:
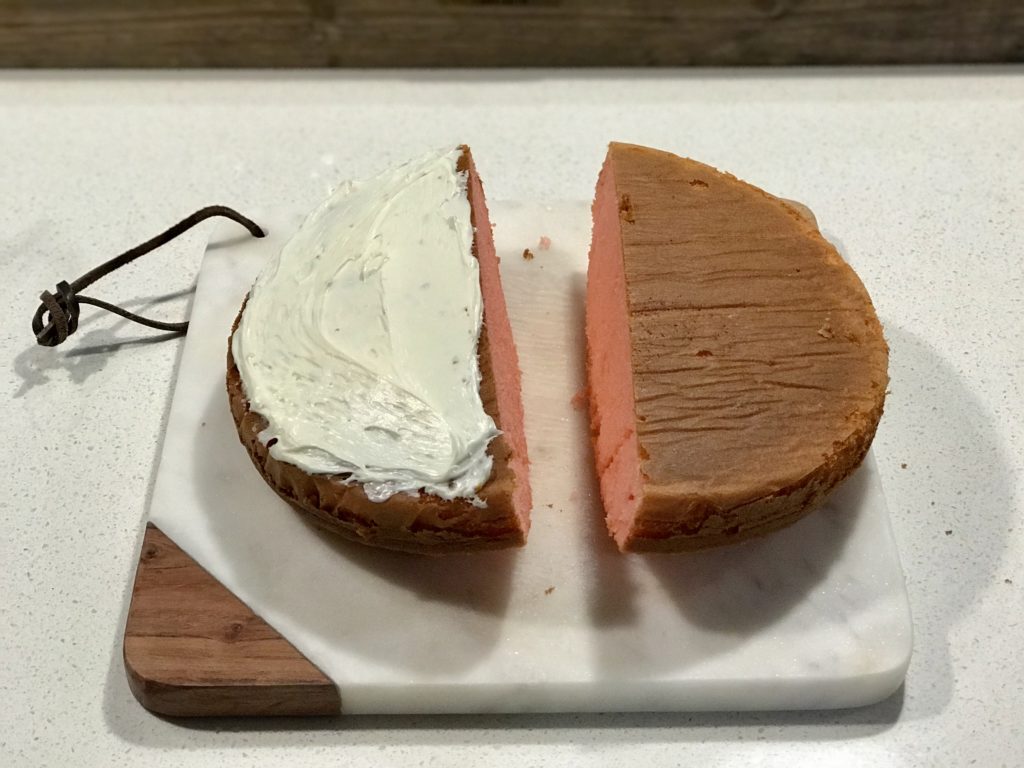
Cut your 8-Inch round cake in half. Spread buttercream on the bottom of each cake half and sandwich them together. This will act as your filling so be generous! Spread a little bit of buttercream on the flat edge of your sandwiched cake and place the flat edge on your cake stand. You should now have the shape of a taco on your cake stand.
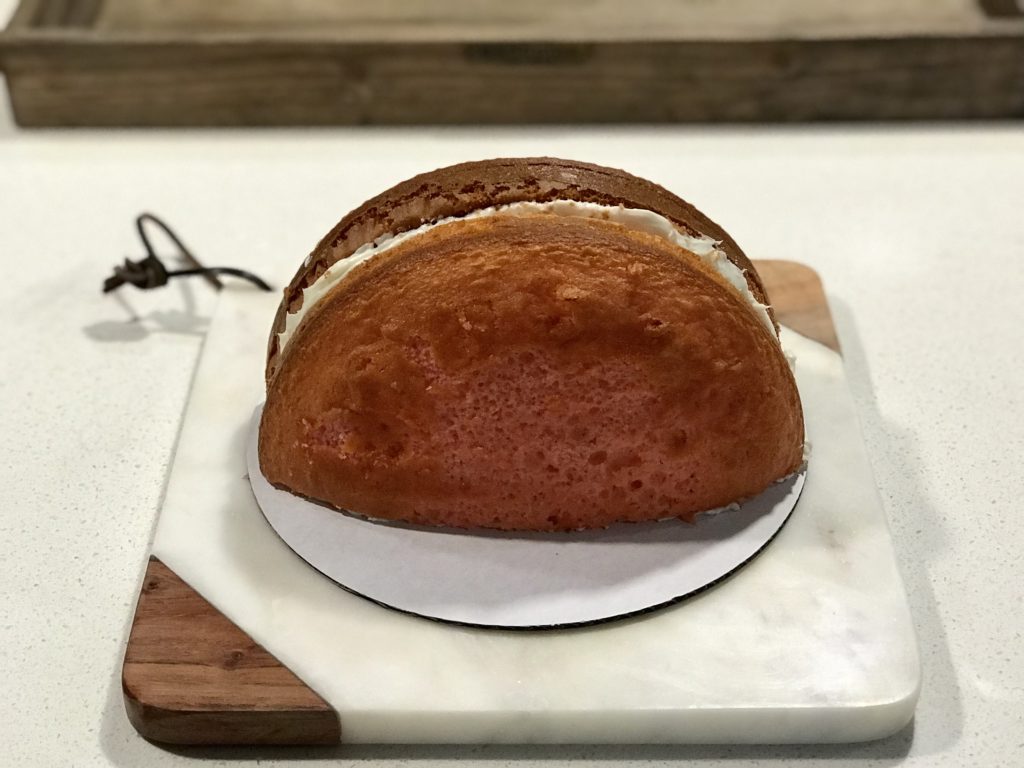
Quick Tip: As you can see, I made the rookie mistake of using a round cardboard cake board as my base to decorate. Since my cake is not round, you see SO much cardboard and it just looks terrible! And once you start decorating, there is no moving the cake without absolute disaster! This is why I recommend first placing it on the cake stand you plan to serve the cake on.
Another Quick Tip: The birthday boy requested a strawberry cake, so of course that is what he received. However, the strawberry cake did make it look like raw taco meat when we cut into the cake. Ha! SO if you don’t have a cake flavor preference, a chocolate cake would be the most appetizing visual in my opinion.
Step 2:
Cover the cake in a thin layer of the buttercream frosting and place it is the fridge for 30 minutes to chill. This is known as your crumb coat to prevent crumbs from getting into your final layer of buttercream.
Step 3:
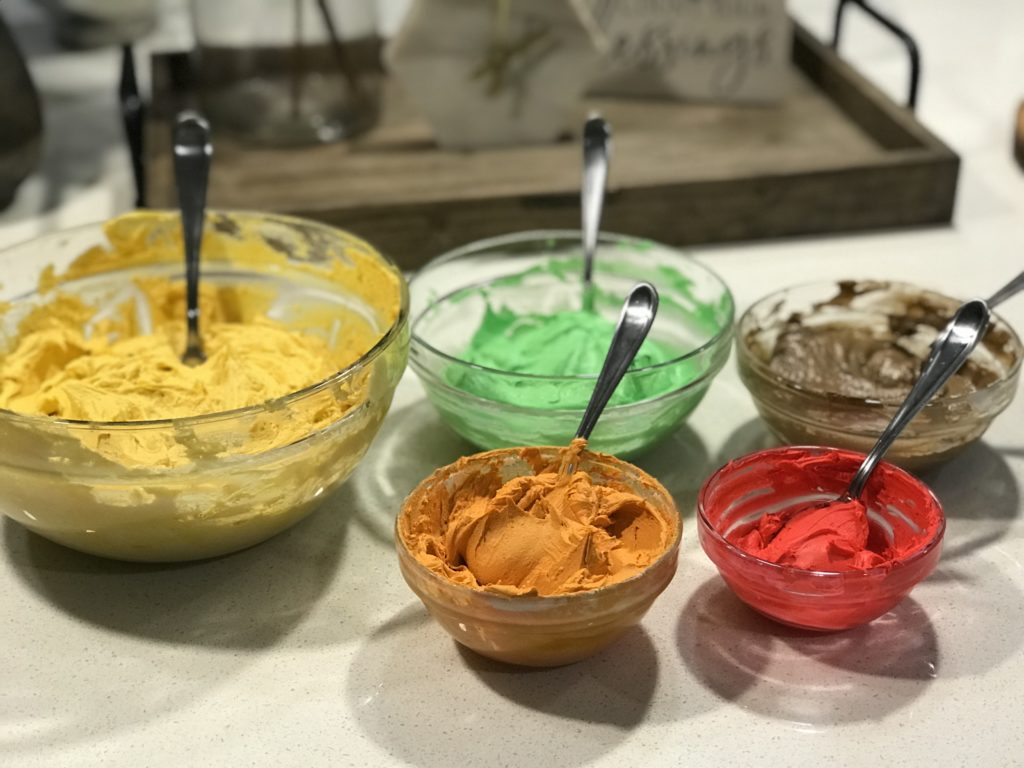
While the crumb coat chills, make your buttercream and icing paste colors.
Buttercream:
¼ cup brown buttercream.
¼ cup green buttercream
Color the remaining buttercream yellow
Icing Paste:
Mix the meringue powder with 5 tablespoons of water to form the icing paste for the cheese and tomato toppings. You want it to be thick, but thin enough for you to pipe. Just add a tablespoon at a time until you have the right consistency. I personally needed 6 tablespoons of warm water.
Step 4:
Remove the cake from the fridge and cover the cake in the yellow buttercream until the cake looks like a yellow taco shell!
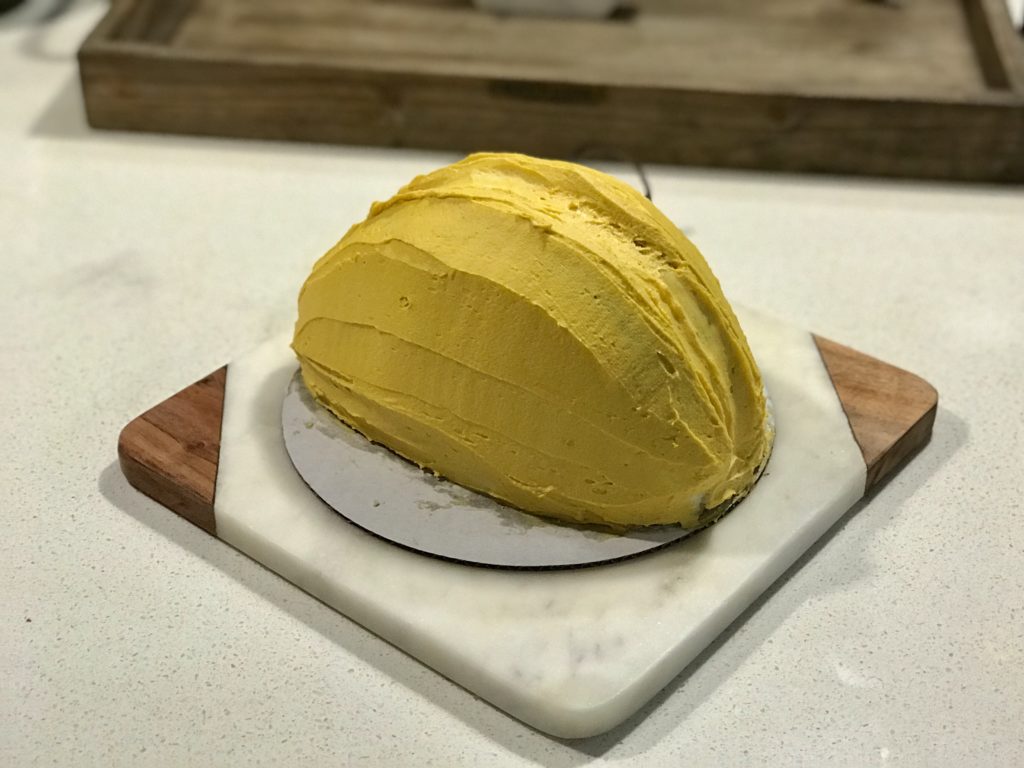
Quick Tip: Use a knife or frosting spatula to smooth the top of the taco and help create a groove for your toppings. See how the picture above doesn’t quite look like a taco? Keep working with your knife or spatula until you have more defined edges on top. I worked on this step until I was pleased with the top.
Step 5:
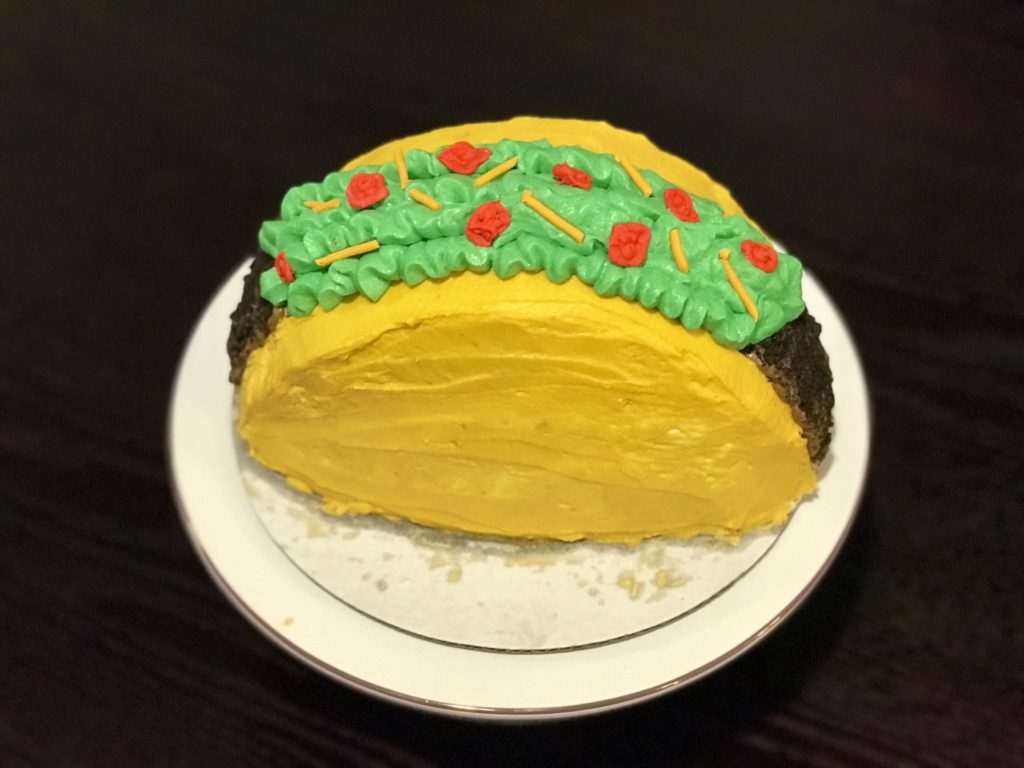
Place your brown buttercream in a piping bag and cut a small whole at the bottom of the bag. Fill each side of the taco with the brown frosting about ¼ of the way up each side of the taco. Carefully coat the brown frosting with the crushed oreo pieces to make the “ground beef” for the taco.
Place your green buttercream into a piping bag and use the Wilton 366 Leaf Tip to pipe the lettuce on the top of the cake. You will cover the remaining yellow top of the taco cake with the lettuce buttercream.
Quick Tip: Practice using the leaf tip on a paper towel before you pipe the buttercream lettuce on top of the cake.
Step 6:
Divide the icing paste into two bowls and color one red and one orange. Add each icing color to a piping bag with a round tip. Pipe small lines onto parchment paper to make the shredded cheese. For the tomatoes, pipe tiny squares to resemble diced tomatoes. Let the toppings sit until set enough to remove with a knife or small spatula. I waited about 10 minutes.
Place the shredded cheese and tomatoes on top of the cake to finalize your beautiful and delicious taco cake!
I would LOVE to see your finished taco cakes! Please leave me a link to your post below. If you want a little more inspiration, check out this Nailed It! themed emoji cake decoration competition I had one my friends last year!
Have you made an awesome cake? I would love to see your finished cakes! Happy decorating, friends!