This post may contain affiliate links, but all opinions are my own. Please read my disclosure policy for more information.
One of my favorite things to do when planning a baby shower is to incorporate décor that the mommy-to-be can use later. One of my go-to staples is the diaper cake! It looks fantastic as a centerpiece and it is so easy to incorporate into any theme. You can buy pre-made diaper cakes on sites like Etsy, but making it yourself will save you a lot of money and you can really customize it to the theme of the shower. Trust me, if I can make this, you can too!
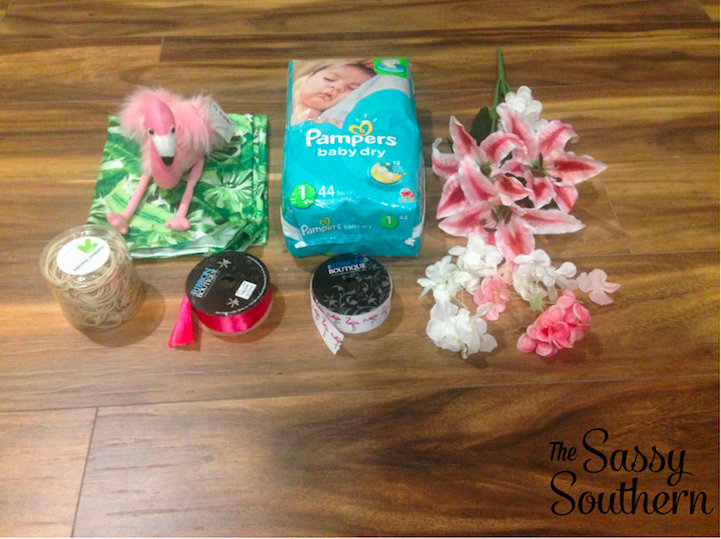
Here are the supplies you will need to get started:
Fabric. I found mine at Hobby Lobby, but Jo-Anne’s also has a lovely selection. Don’t forget to use your 40% off coupon for Hobby Lobby or any of Joann’s weekly coupons!
T-pins. I purchased mine from Target, but you can find these anywhere!
Diapers (I used 88 size 1 diapers). On top of getting 5% off of your purchase with your Red Card, Target will price match. So if you find a better deal on diapers, just let them know! You also never know what deal Cartwheel has, so make sure you check that!
Ribbon. I bought mine from Hobby Lobby because, well, I love it there.
Flowers. I bought my flowers from Hobby Lobby and Michaels. Hobby Lobby puts all floral 50% off every other week and Michaels is always having sales on different flowers. If you can catch them right before a new season, this is a great time for deals on flowers.
Stuffed Flamingo. The flamingo for this diaper cake came from Amazon.
Rubber Bands. I purchased an assorted pack from Target.
Hot Glue Gun. I bought mine from Hobby Lobby, but you can find one at any craft store. Or, if you would like it delivered to your door, Amazon is a fantastic choice.
Scissors.
Now that you have your supplies, let’s get started!
Step 1: Assembling the cake!
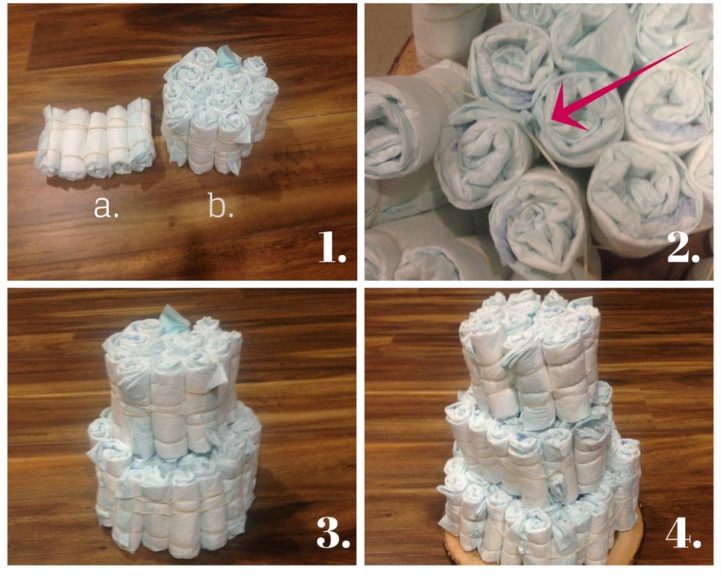
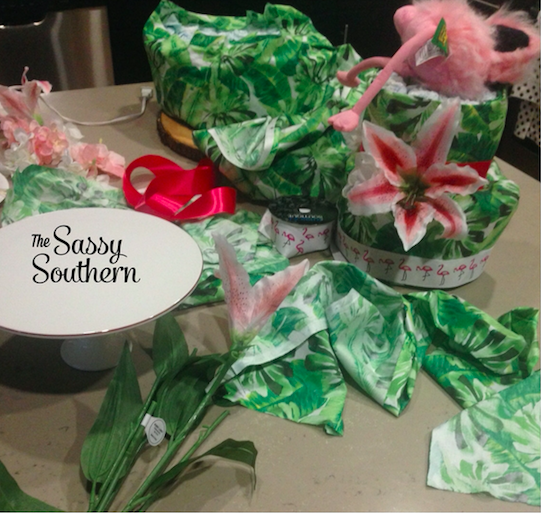
Roll each diaper like a fruit roll-up and wrap a small rubber band around the top and a small rubber band around the bottom. Take a medium sized rubber band and wrap it around 3-4 diapers. Repeat this step. Take the rubber band wrapped around one set of diapers and wrap it around one of the diapers in the first set. This will connect the two sets without stretching one rubber band too thin. I made this mistake during my first attempt and was popped in the hand while diapers fell to the ground. Good GRAVY!
See examples 1 and 2 above on how to connect the diapers. You will take the rubber band wrapped around example b and put it over one of the diapers in example a to connect the two. From here, it is very easy to move the diapers around to make the round shape for the diaper cake.
Continue this until the first layer of your cake is formed. I used a round cake stand to help me make sure the bottom layer was round, but an actual cake pan would help hold the diapers in until you have all of them wrapped with rubber bands. Once the bottom layer is formed, start making the middle and top layers. Or, top layer if you are sticking with only two tiers. For the example pictured, I used 48 diapers for the bottom layer, 25 for the middle layer, and 15 for the top layer.
Step 2: Frost Your Cake!
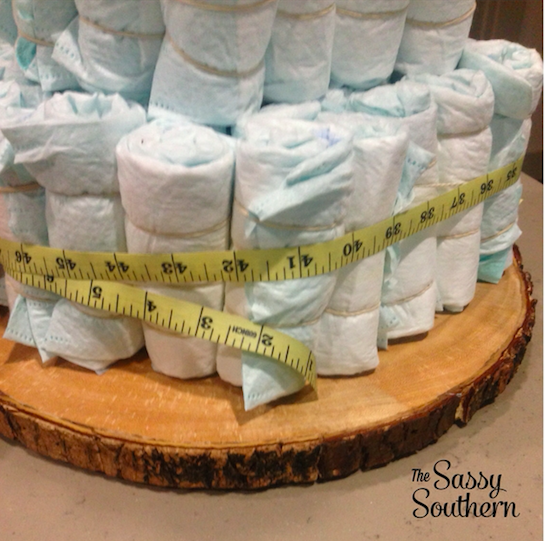
This part was the hardest part for me. I tried this two different ways. For the first try, I measured the length and circumference of each layer of cake. I cut the fabric a bit longer for the length to make sure it would go over the top of the cake and under the bottom to cover the full side of the cake. I used the t-pins to secure the fabric to the diapers. This worked pretty well, but I didn’t leave enough fabric to cover the full top of the layer, so it looked a little sloppy. I tried to cover it with flowers, but I didn’t like how that looked either. I also LOVED the flamingo ribbon, but I thought it made it look way too busy.
I just didn’t like the way that looked at all. So I started over.
It just looked unfished. So I tried a different approach. This time, I measured the layer from one side to the other to make sure the fabric would completely drape over the entire layer. For all of my bakers out there, this would be the same way you would cover a cake with fondant. This made the top of the cake look absolutely perfect! I used the t-pins to secure the fabric underneath the cake. However, the sides of the cake weren’t as smooth because the fabric was bunching more due to the roundness of the cake. In the end, I decided I liked this approach the best.
Step 3: Apply the Finishing Touches
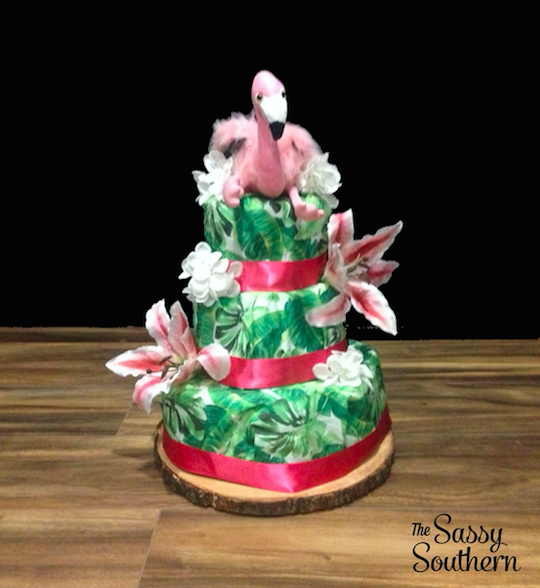
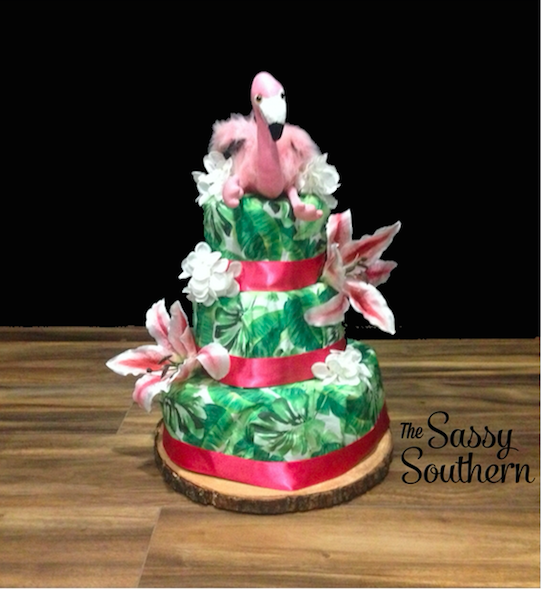
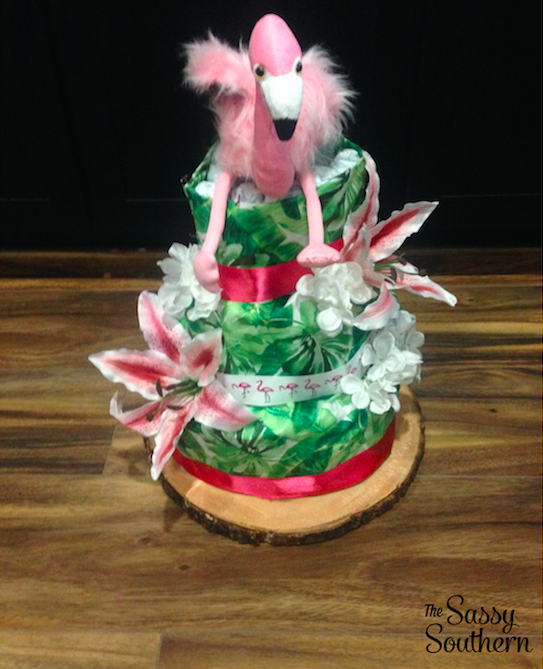
I started the décor process by adding ribbon to the bottom of each layer. I really love how the hot pink really pops on the lovely greens. I measured the circumference of each layer and cut the ribbon just a bit longer. I used the hot glue gun to secure the ribbon to the cake. You don’t need to glue the entire ribbon, just each end of the ribbon. For a cleaner look, fold each end of the ribbon so that the frayed ends don’t show. Once you add the ribbon, place the flowers on the cake. You can hot glue the flowers to the fabric or just stick them in the cake. Once your flowers are settled, top with your adorable flamingo!

It really was the perfect centerpiece for this tropical themed baby shower!


3 comments
Hello,I log on to your blog named “How To Make A Tropical Themed Diaper Cake | The Sassy Southern” regularly.Your humoristic style is awesome, keep it up! And you can look our website about Gamal Marwan.
Your website is fantastic, I just found your website at Yahoo, I am interested to learn more. Hope it works out for me. Thank You.
Thank you so much!